 Are you tired of hearing how "simple" it is to deploy apps with Docker Compose, because your experience is more one of frustration? Have you read countless blog posts and forum threads that promised to teach you how to deploy apps with Docker Compose, only for one or more essential steps to be missing, outdated, or broken?
I’ve been using and experimenting with container-based applications for years, but have mostly focused on a few specific services, those being Docker Hub and DigitalOcean’s Container Registry and Droplets. However, in recent months, I’ve started experimenting with other options, such as Docker Registry and AWS ECS (Elastic Container Service). So, in this tutorial I want to step you through one of the new tools I’ve been using, one that I feel has a good balance of functionality and simplicity: Google Cloud Run.
Prerequisites
To follow along with this tutorial, you’re going to need the following:
- A Google account with
- A Google project linked to a billing account
- The Artifact Registry service enabled for it
- Git
- Docker Engine
- Your favourite browser to test the application; mine’s Firefox
- Your favourite text editor or IDE; mine’s PhpStorm
- Some prior experience or familiarity with the following would be ideal, but is not required:
- The command line
- Docker commands and Dockerfiles
- Google Cloud, its Web Console, and its documentation
The demo application
To save time finding or writing an application to follow along with this tutorial, we’ll use one that I created. I created it as the test application for my book Deploy With Docker Compose.
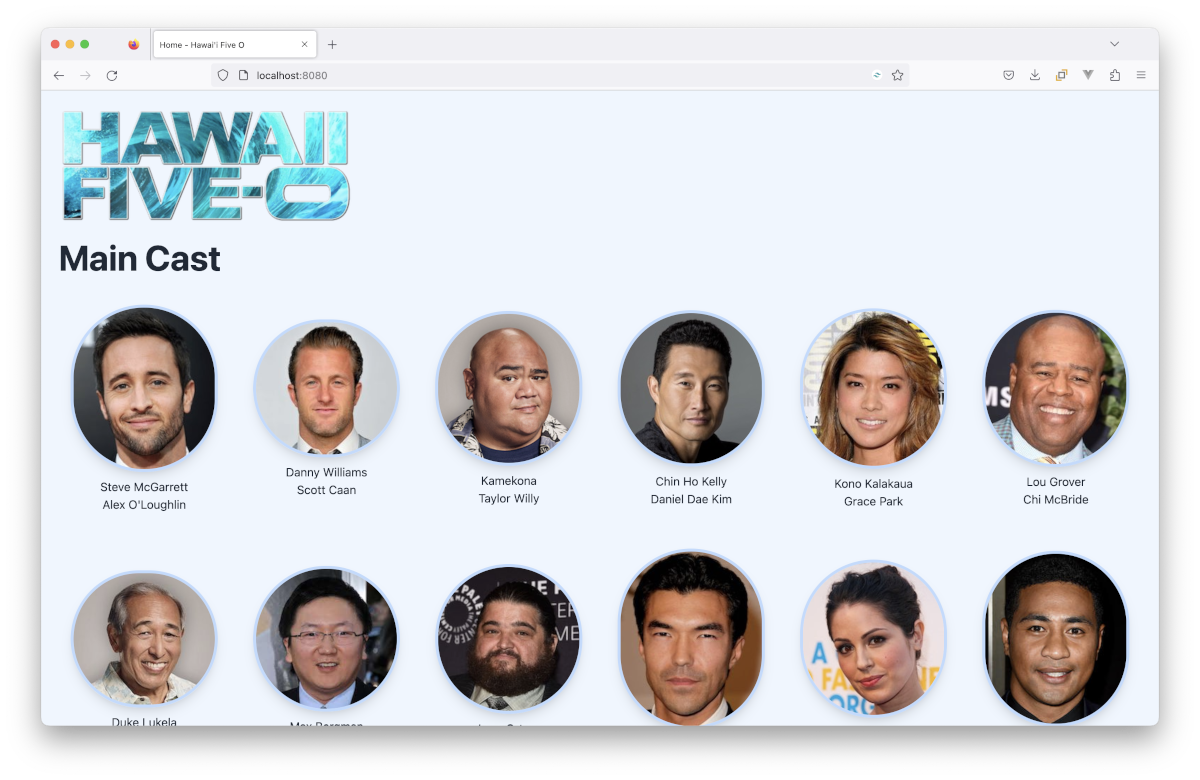
It's pretty small and requires a single container. The application retrieves a list of the main cast from the 2010 - 2020 reboot of Hawai'i Five-0 and renders the actor’s name, their character’s name, and a photo. Why Hawai'i Five-0? It’s one of my all-time favourite shows.
The screenshot below shows what to expect. It’s not much, but it’s enough to make a deployment somewhat involved.
Create an Artifact Registry Repository
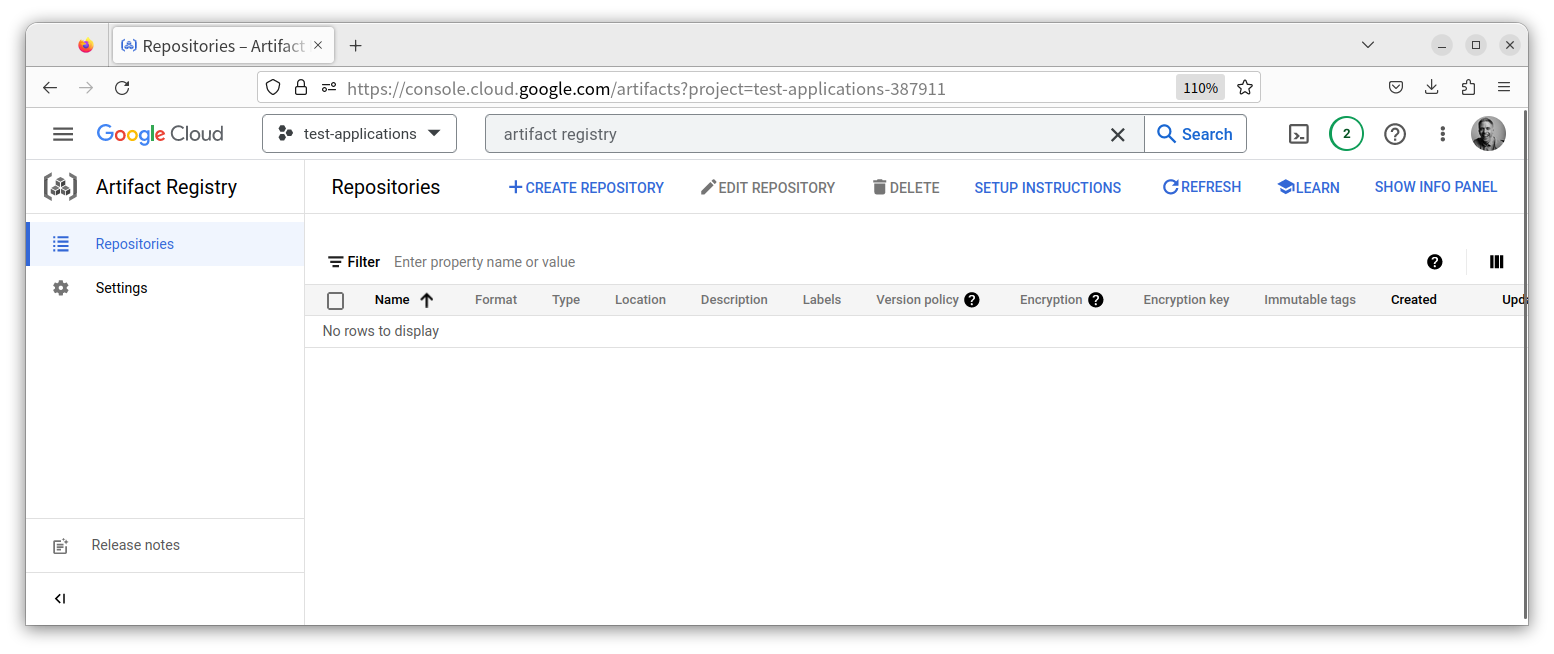
The first thing you need to do is to create a repository in your project’s Artifact Registry. To do that, open the navigation menu, in the top-left hand corner of the Console and navigate to Products and solutions > All products > CI/CD > Artifact Registry. Then, click CREATE REPOSITORY at the top of the page.
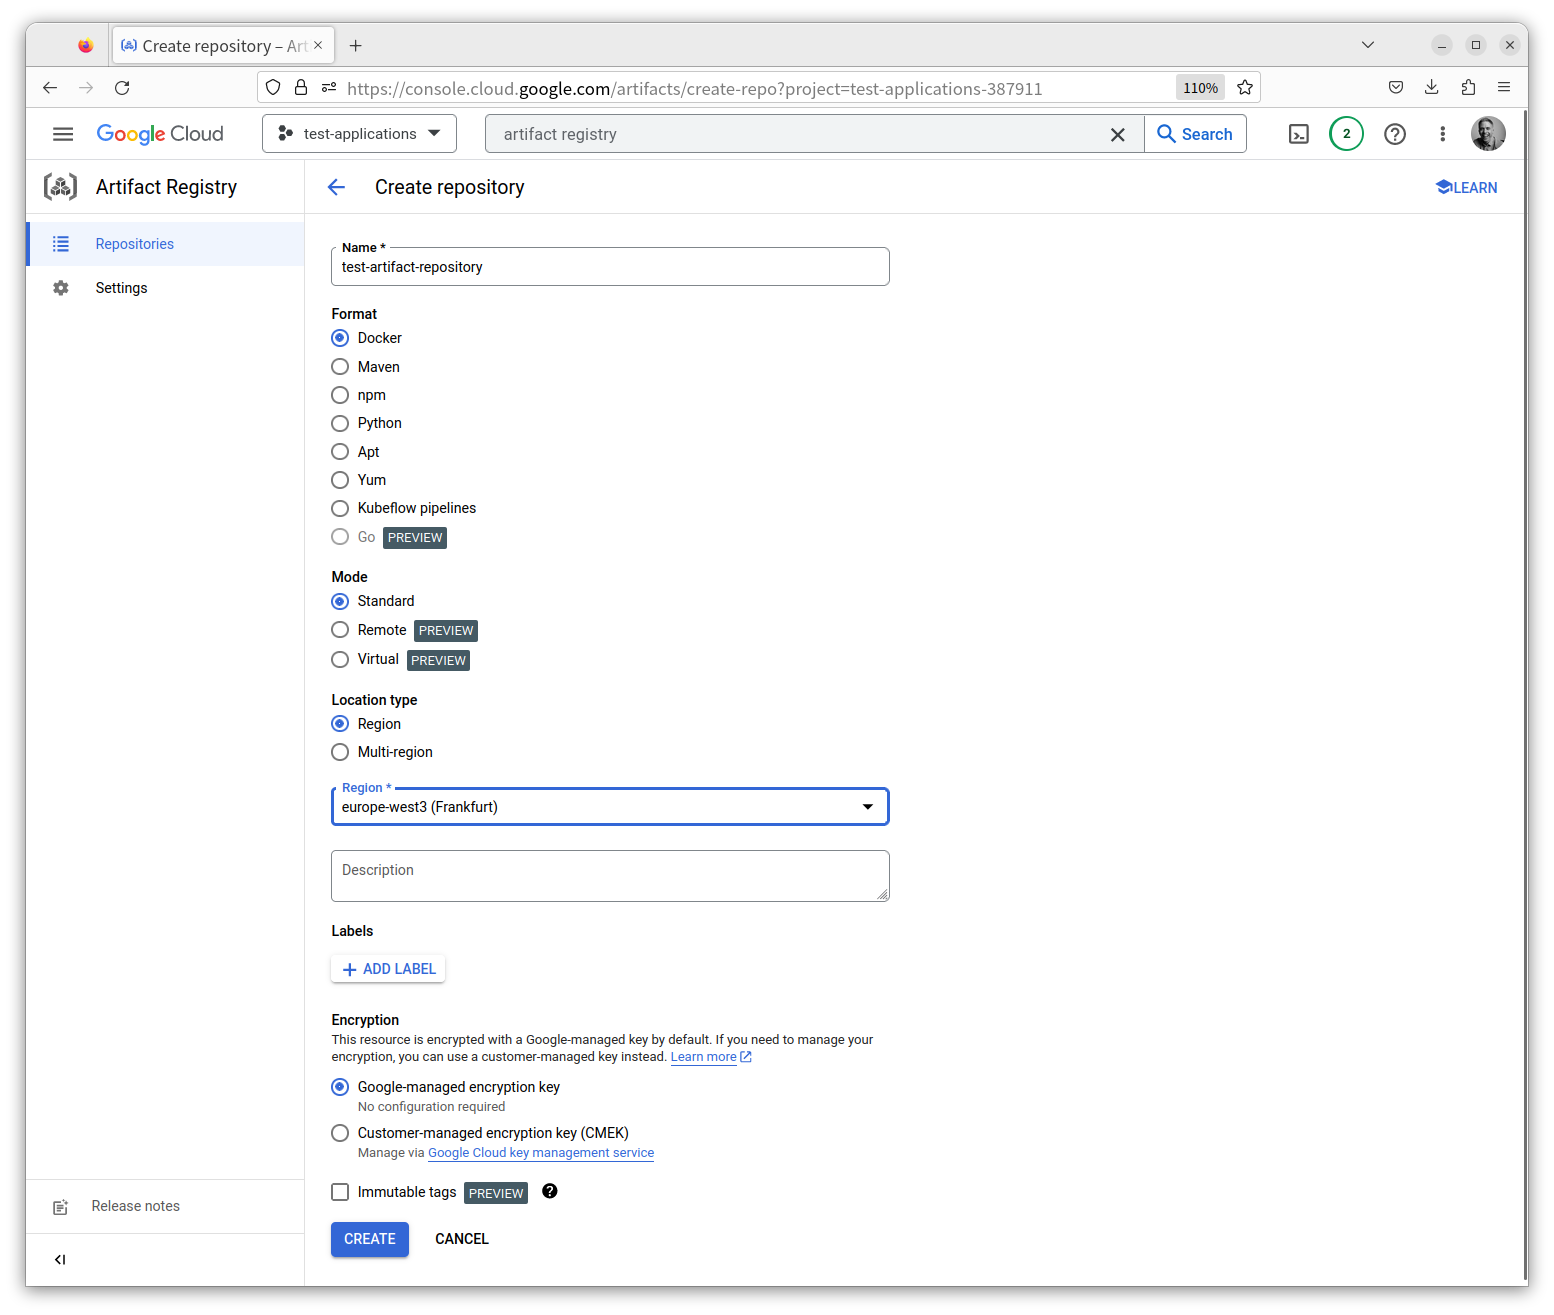
Next, add a name for the new repository, pick the closest region closes to yourself, and then click CREATE. The default values for the remaining settings are fine for this tutorial.
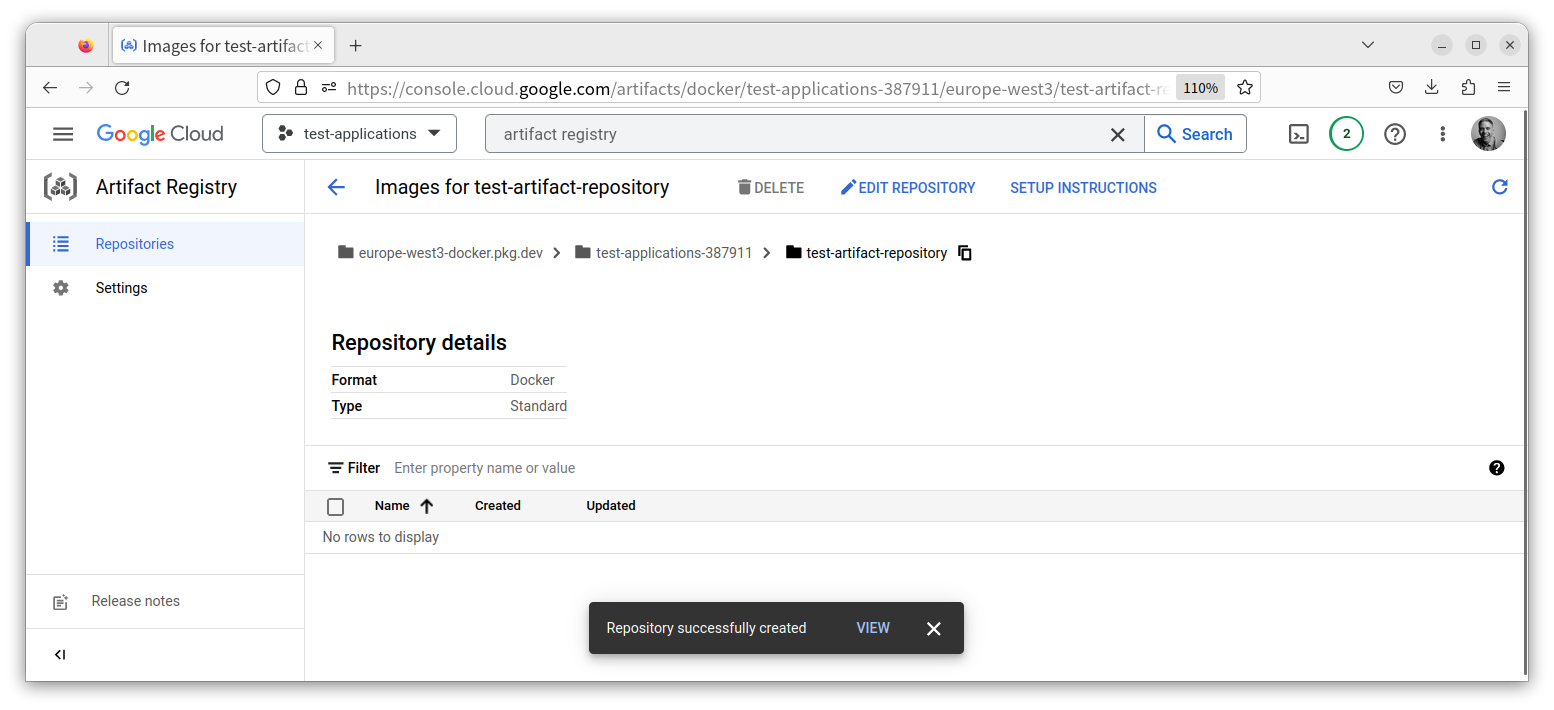
After a little while, the new repository will be created. With it created, copy the repository's path, by clicking the copy icon to its right. Keep it somewhere handy as you’ll need it to build, tag, and push the image, later in the tutorial.
The path is comprised of three parts:
- The service (
europe-west3-docker.pkg.dev) - The repository (
test-applications-387911) - The account (
test-artifact-repository)
Clone the demo application
The next thing to do is to clone the demo application from GitHub, by running the following command in the directory where you usually keep your software projects.
git clone git@github.com:settermjd/deploy-with-docker-compose-talk-app.git
cd deploy-with-docker-compose-talk-app
Build an image for the demo application
With the application cloned, the next thing to do is to change into the cloned project and build an image for it. You don’t need to write a Dockerfile, as the app’s source code contains one in the docker directory. Feel free to have a look at it if you’re curious about how it’s built.
Replace <YOUR ARTIFACT REPOSITORY'S PATH> in the following command with the repository path you copied earlier, and then run it to create the image.
docker build \
    --no-cache \
    --file ./docker/Dockerfile \
    --tag <YOUR ARTIFACT REPOSITORY'S PATH>/gcr-demo-app:1.0.0 \
    .
Breaking down the command, it:
- Builds the image from the instructions in docker/Dockerfile
- Sets the registry service
- Sets the repository
- Sets the account name
- Names the image
gcr-demo-app; and - Gives it a tag of
1.0.0
If there were any image layers in the local Docker cache, these would be skipped because the --no-cache option was used.
Push the image to the Artifact Registry
With the image built, it’s now ready to be pushed to your project’s Artifact Registry.
To do that, as before, replace <YOUR ARTIFACT REPOSITORY'S PATH> in the following command with the repository path you copied earlier, and then run the command below.
docker push \
    <YOUR ARTIFACT REPOSITORY'S PATH>/gcr-demo-app:1.0.0
Create a Google Cloud Run Service
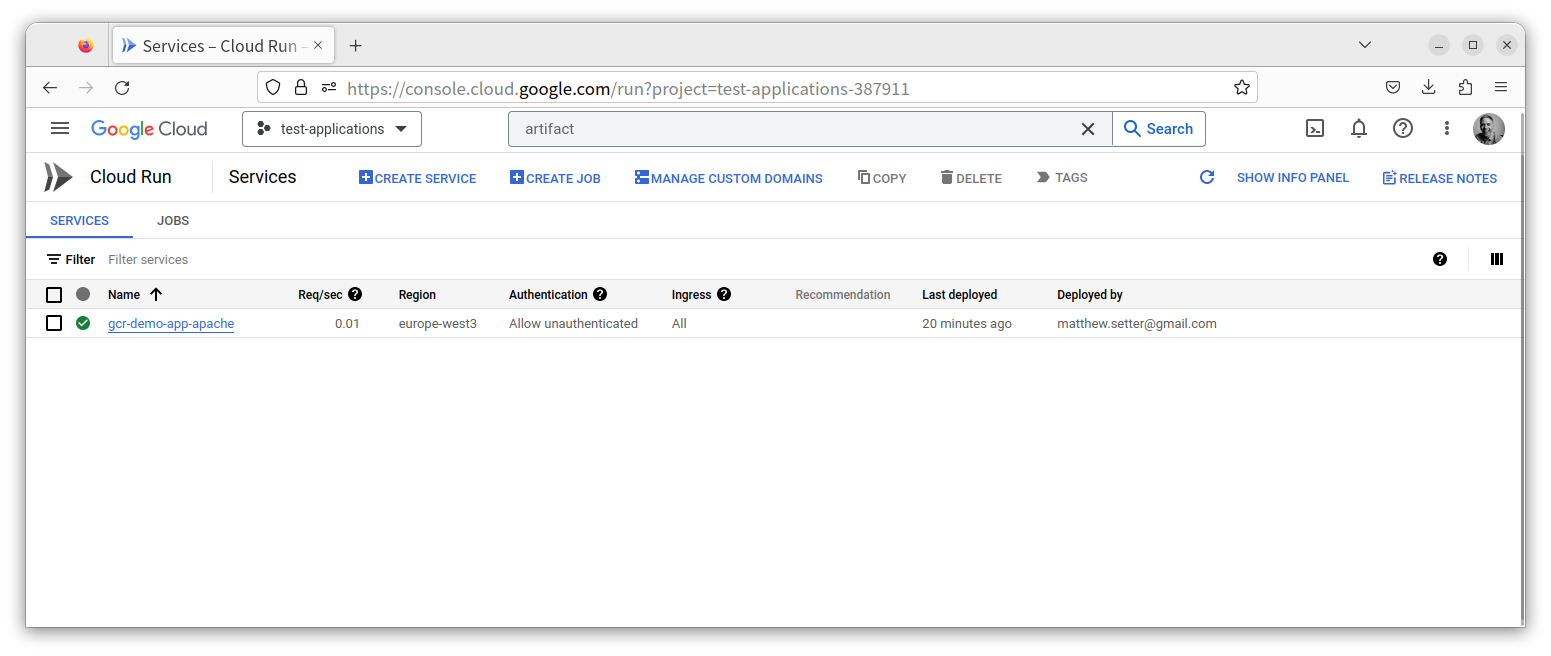
Now, it’s time to create a Cloud Run service, so that the image can be deployed. Start by logging in to the Google Cloud Console. Then, open the Cloud Run console. From there, click CREATE SERVICE buttons near the top of the page.

Now, make sure that Deploy one revision from an existing container image is enabled before clicking SELECT inside the Container image URL field.
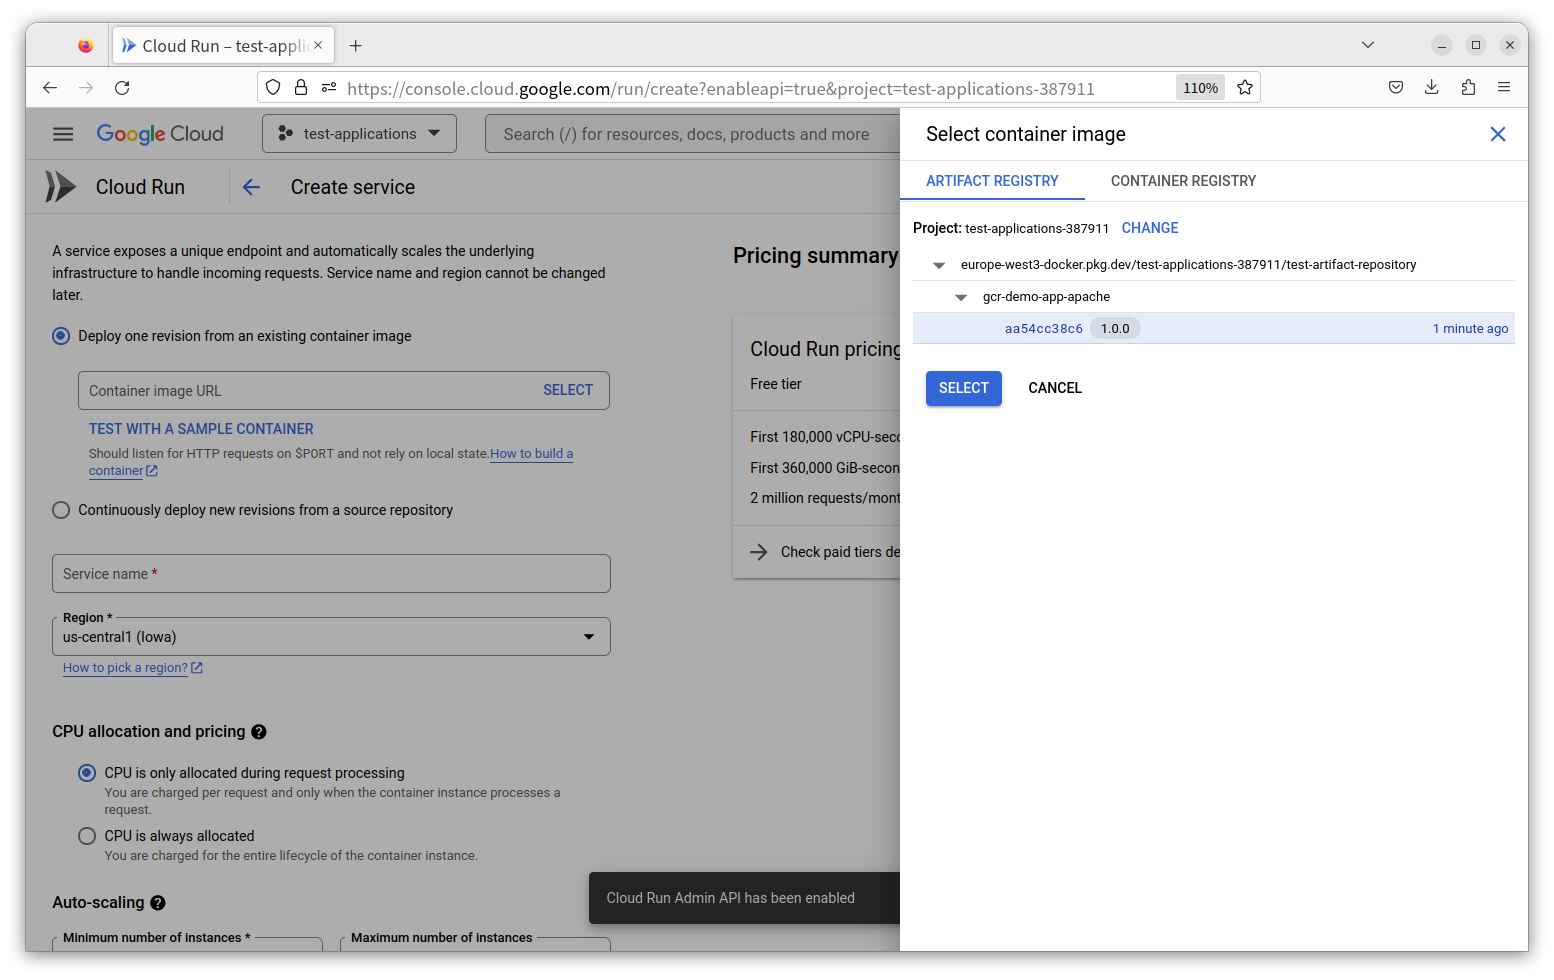
Then, under ARTIFACT REGISTRY expand the image drop-down and pick the version of the image that you uploaded earlier. Enter a name for the service in the Service name field, e.g., cloud-run-app.
After that, pick a region from the Region drop-down. For this deployment, the region doesn't matter. However, feel free to pick one closest to where you live. Alternatively, just use the default of us-central1 (Iowa).
Finally:
- Under Auto-scaling, set Minimum number of instances to
1 - Under Authentication, enable Allow unauthenticated invocations
- Expand Container, Networking, Security, and under CONTAINER > General set Container port to
80 - Click CREATE
The service will then be created and deployed. Please be a little patient, as it may take a minute or more until it’s ready to receive traffic.
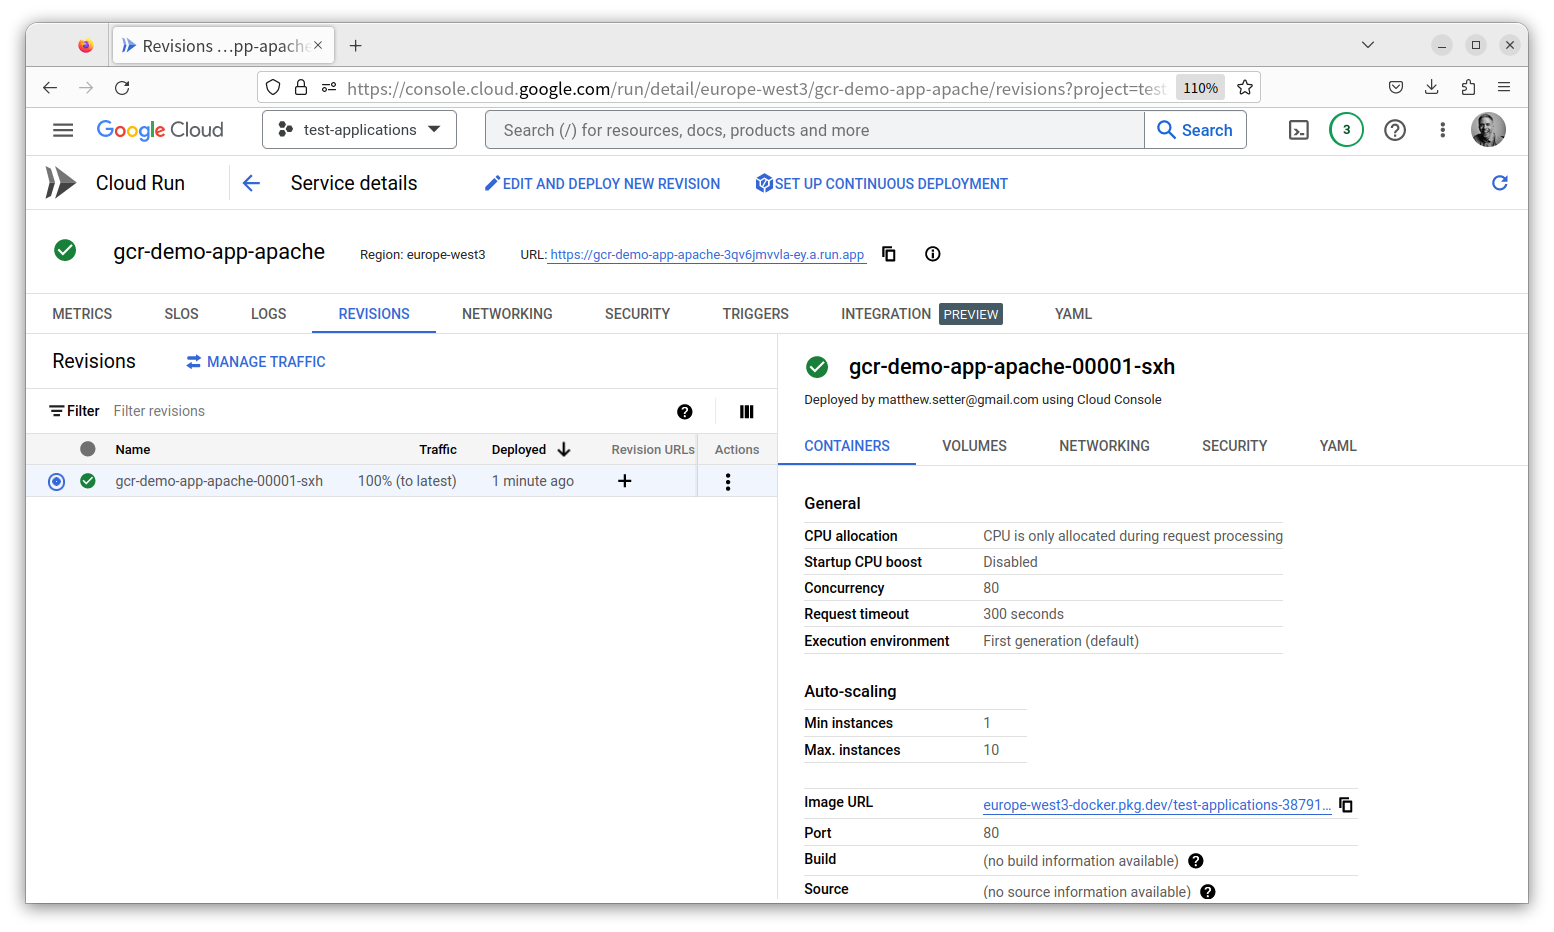
Test that the deployment works
Now that the deployment’s been provisioned, it’s time to check that it works. Click the application’s URL, which you can find in the middle of the page, to open it. It should look like the screenshot below.
That’s how to deploy an container-based application with Google’s Cloud Run
Yes, there were quite a few steps to work through, and it was pretty much required to have prior experience with Google Cloud to get through the process reasonably quickly. However, at least in comparison to other cloud providers, it didn’t take all that long to deploy your first container-based application.
Have a play with the configuration options, and a good look through the documentation. Personally, I’ve just scratched the surface of what’s possible and am enjoying diving deeper. I’d love to know what your tips and suggestions are. Please share them in the comments.