 Are you tired of hearing how "simple" it is to deploy apps with Docker Compose, because your experience is more one of frustration? Have you read countless blog posts and forum threads that promised to teach you how to deploy apps with Docker Compose, only for one or more essential steps to be missing, outdated, or broken?
{{< youtube 5fnUt9fYQlI >}}
And one of the tools that I've started using is an open source tool called Burp Suite. Before I took on the role, I'd only heard a little about the software, when Dale Meredith briefly mentioned it in the Ethical Hacking course, which I took recently.
If you're not familiar with Burp Suite, here's a brief overview, from Wikipedia:
Burp or Burp Suite is a graphical tool for testing Web application security. The tool is written in Java and developed by PortSwigger Security.
It is a proxy through which you can direct all requests, and receive all responses, so that you can inspect and interrogate them in a large variety of ways.
While not the best looking tool (at least from my personal perspective), it has an absolute plethora of functionality for testing web application security.
Here's a quick overview of what's on offer:
Automated crawling and scanning. You can scan for SQL injection and cross-site scripting (XSS) vulnerabilities, as well as for all vulnerabilities in the OWASP top 10.
Intercepts browser traffic using a man-in-the-middle proxy. You can intercept requests and responses, whether that's just to view, modify, or drop them. You can automatically modify responses by creating rules that operate on a range of criteria, including headers, and request parameters.
Advanced scanning. You can perform active scans, such as OS command injection and file path traversal. You can perform passive scans looking for information disclosure, and insecure use of SSL.
And this is just a fraction of what's on offer. I hope that you can see that just from this short list, it's a pretty powerful tool.
But It's a Bit Overwhelming
To be honest though, at first it wasn't a tool which I found particularly (visually) appealing. Additionally, I didn't find it that simple to get started with either — especially as a newcomer!
Yes, there are loads of tutorials and blog posts about it. But at least to this newbie, they seem to assume a lot of prior information and understanding.
Given that, I decided to write this short introductory Burp Suite guide for other newcomers like me. While I'm not intending, at least at this stage, to write a longer series, if there's enough interest, it just may end up that way.
That said, I'm intending this to only be a starting off point. Given that, the walk-through will be quite unsophisticated. It's going to be based around a basic, one-page, application which returns the string hello world as the page's body, along with a small collection of headers.
Getting Started With Burp Suite
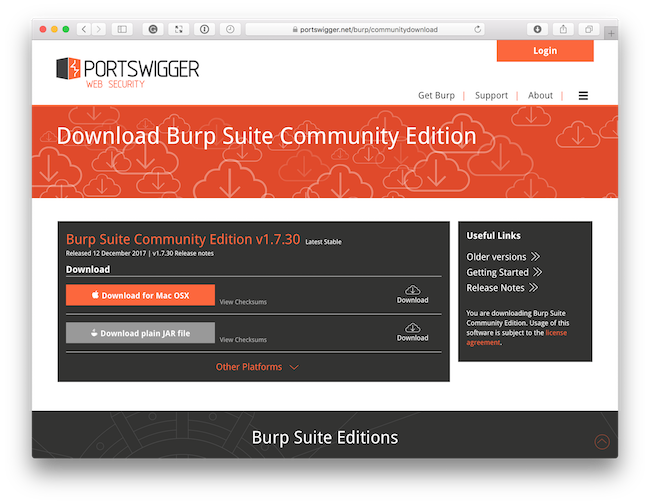
The first thing to do is to download a copy of the community edition, which is version 1.7.30 as I write this post.
The download page normally gives two options, one specific to your operating system and a plain JAR file. I've had mixed success with the operating system-specific file. So I suggest using the plain JAR file.
Once downloaded, run it with java -jar ~/Downloads/burpsuite_community_v1.7.30.jar.
You'll see the first screen, which you can see below.
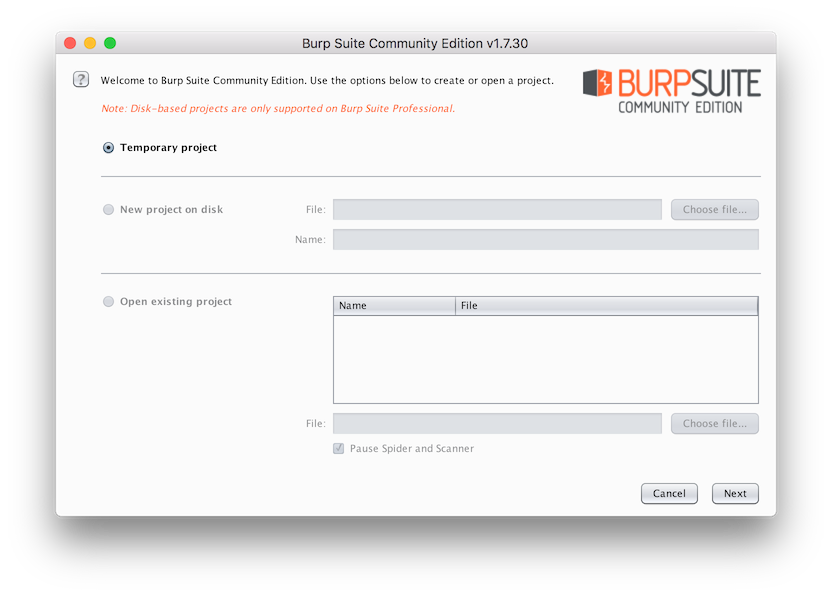
If you had the professional version you'd have three options. As we're using the community version, we only have one. So just click Next in the bottom right-hand corner.
You'll then see the configuration screen, where you can load a project's configuration from disc, or start with the defaults. As this is a simple walk-through, nothing needs to be changed. So click Start Burp, in the bottom right-hand corner.

From there, Burp is ready to run. We've loaded no external configuration, so it won't have any settings pre-configured. That way, there's nothing to cause any confusion.
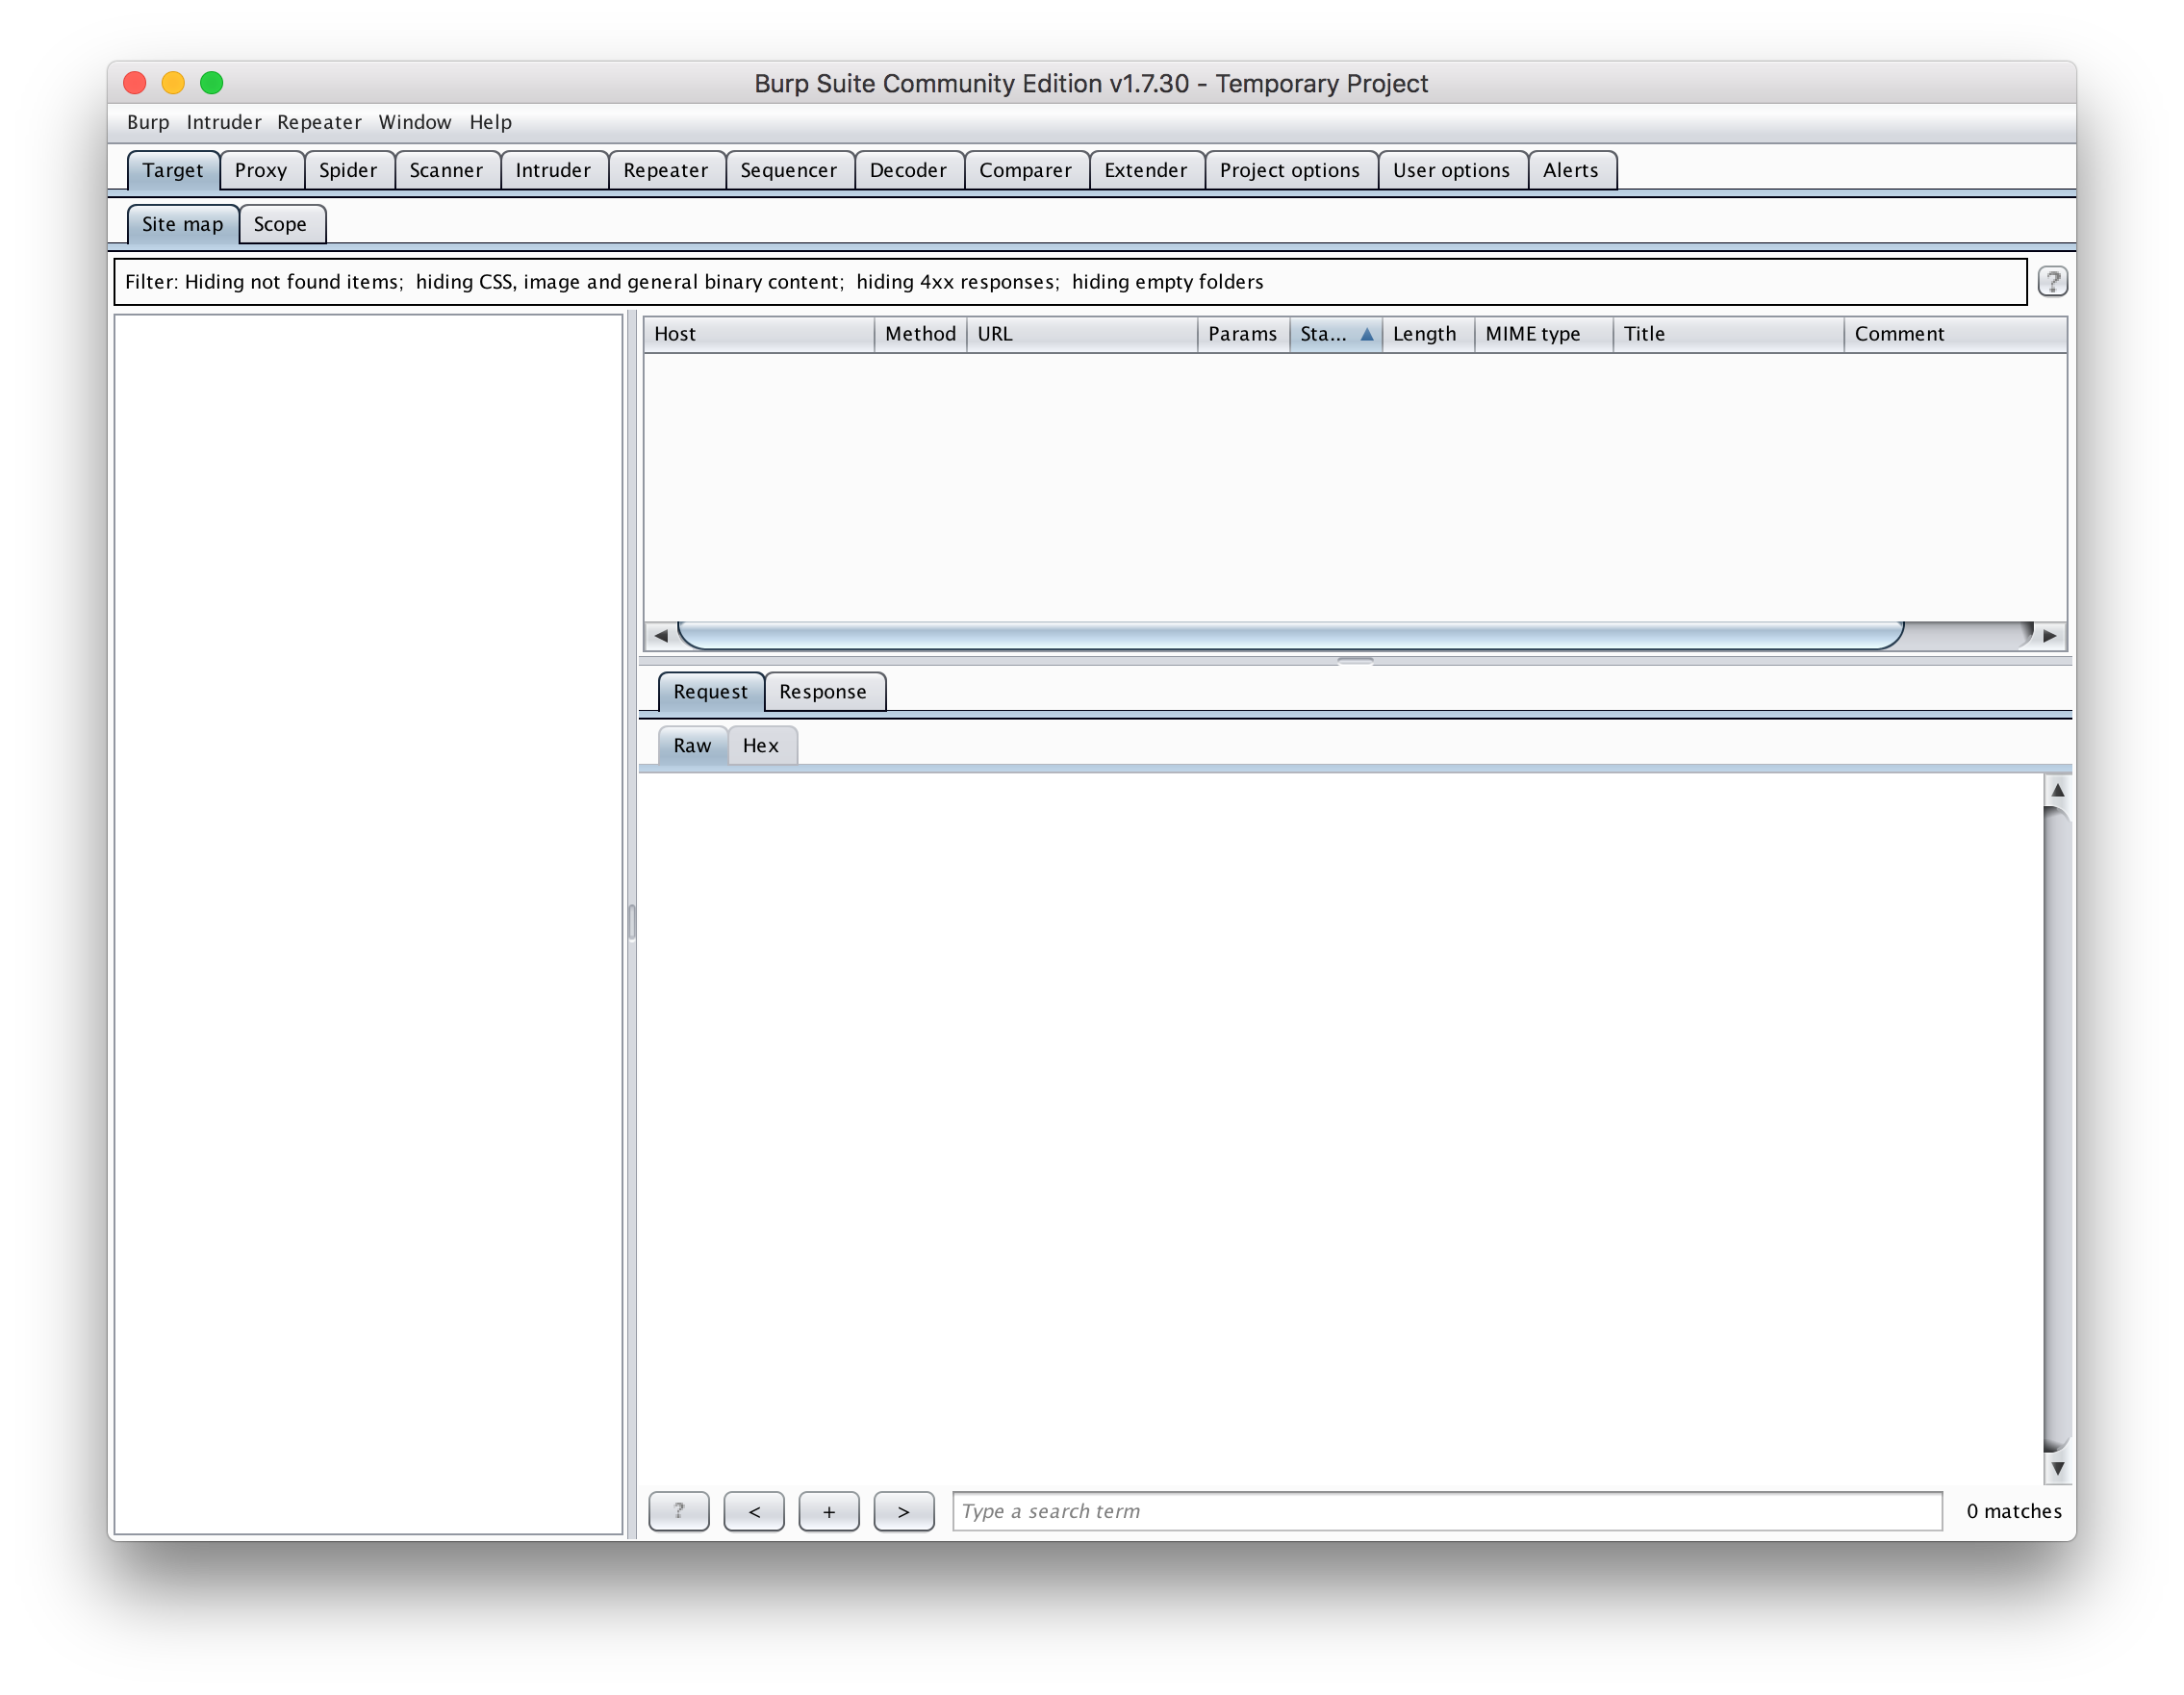
You can see two rows of tabs at the top of the application. The top row links to the thirteen core sections of functionality of the app.
It may seem overwhelming — especially when seeing it for the first time. But don't worry, we're only interested in the second tab, Proxy.
{{< partial "inline-book-promotion" >}}
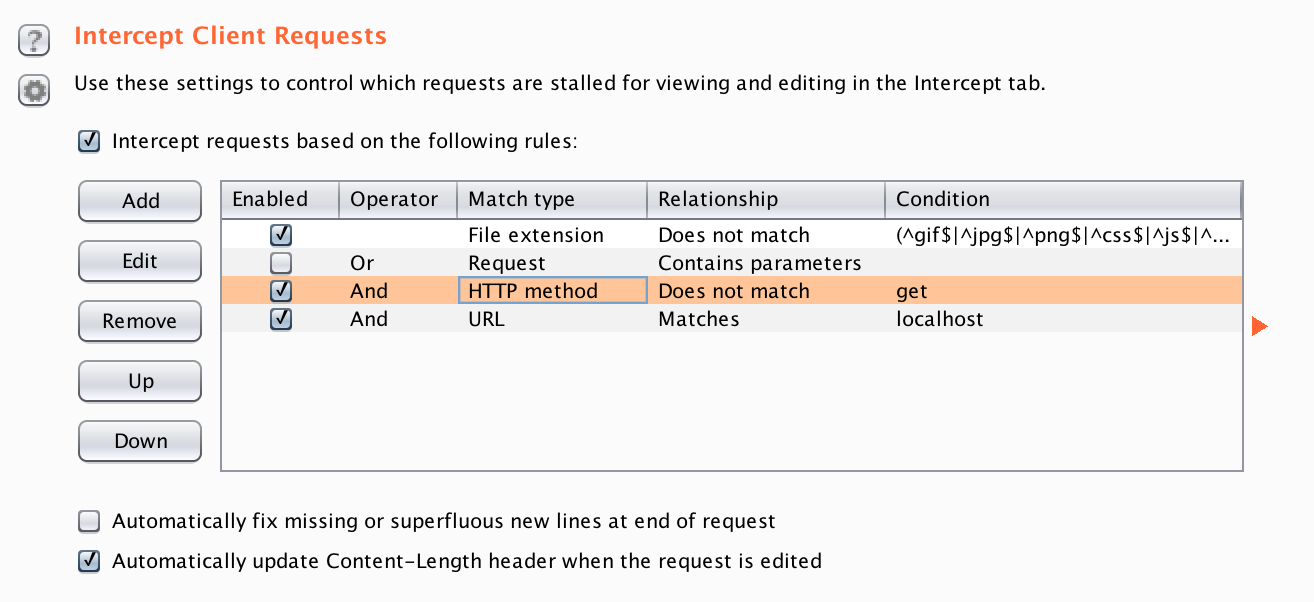
The second row of tabs are sub-sections, or sub-categories, of the active top-level tab. Click the Proxy tab, then click Options, the sub-option at the far right-hand side. You can see an example in the screen shot below.
In the top section of the Options tab, you can see that Burp's proxy is running, along with the hostname and port that it's running on. In the bottom section you can see the conditions which need to be met for requests to be intercepted by it.
The default conditions aren't going to do a lot. So let's make them more interesting.
The application is going to listen on localhost, on port 8090.
And as we're inspecting an ultra-basic one-page app, which contains no forms, links, or anything else, it only makes sense to make GET requests to it.
So we'll ensure that only GET requests are captured.
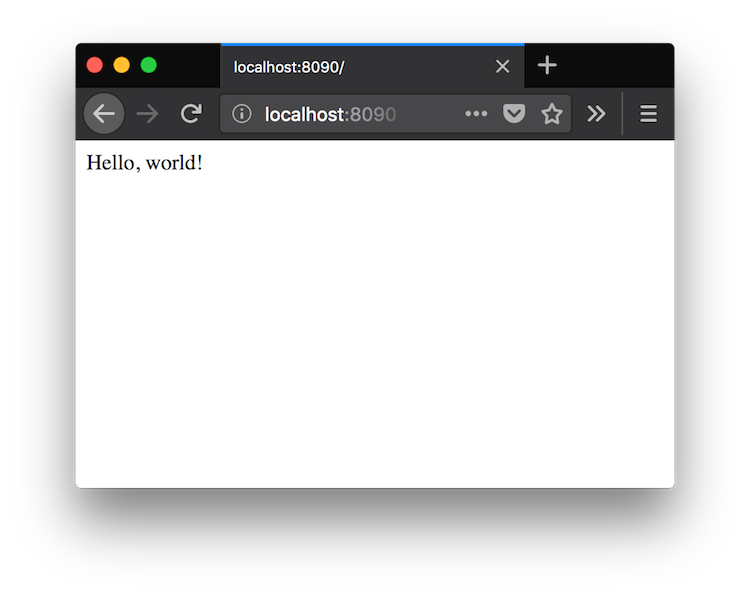
You can see what it looks like, in all its glory, below. It's nothing special, just a page that says: Hello, world!.
First, enable the third condition, which matches on HTTP method.
Then, click Edit.
You'll see the window below appear.
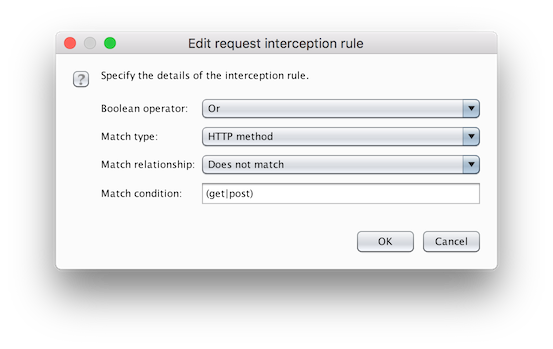
In Match condition change (get|post) to get, change the Boolean Operator to And, change Match relationship to Matches, and click OK.
Then, change the fourth option, setting Match relationship to Matches, set Match condition to localhost, and click OK.
When you're done, it should match the screenshot below, and the proxy will be ready to go. There's no need to restart the application or anything else.
Change Your Operating System or Browser's Proxy Settings
Now, you need to set either your operating system's proxy configuration to route HTTP traffic through Burp Suite’s proxy, or use Firefox and change the settings there.
If you're running the latest version of Firefox — which by the way is excellent — under Settings -> General, right at the bottom, you'll find Network Proxy.
There, click Edit, and then click Manual Proxy Configuration.
Set HTTP Proxy to localhost and Port to 8080 and click OK.
With that done, boot the application, with the following command php -S localhost:8090 -t public.
Then, open http://localhost:8090 in Firefox.
You'll notice that the request never completes.
This is to be expected.
Switch back to Burp Suite, where you'll see the main tab, Proxy, and its sub-tab Intercept highlighted in orange, as in the image below.
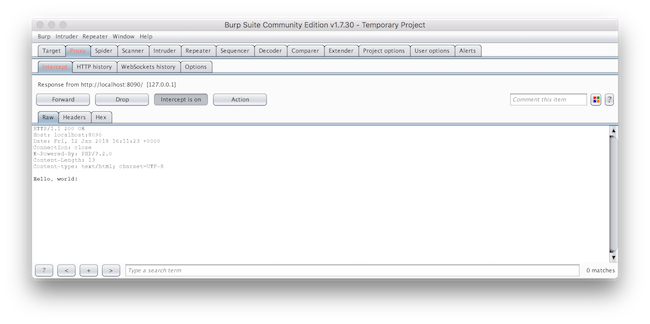
At this point, the request is paused, waiting for you to decide what to do with it. You have three options:
- Forward: Let the request complete, uninterrupted.
- Drop: Drop (or cancel) the request.
- Take action: One of a number of actions, including intercept.
What we're going to do is to change the response's body. To do that, click Action, which will open a long list of options.
Towards the bottom mouse over Do intercept and then click Response to this request and then click Forward. The request will complete and Burp will pause again when the response is received.
Click into the Raw text field, and change the body to whatever you feel like.
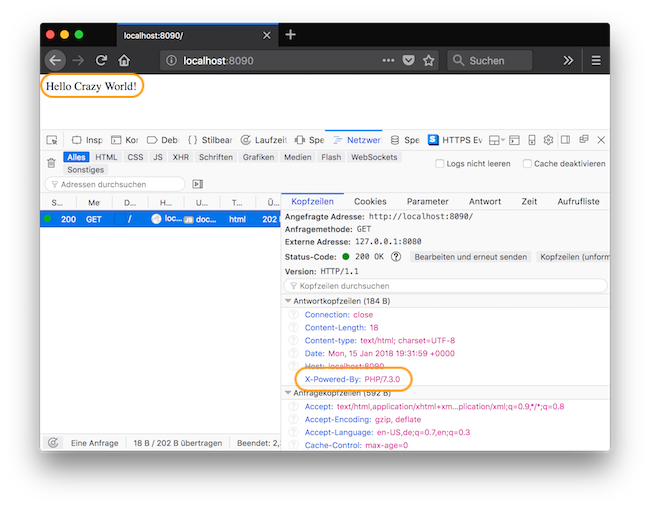
In the screenshot below, you can see I've changed both the body to Hello Crazy World! and changed one of the headers, X-Powered-By, to PHP/7.3.0.
With those two changes made, then click Forward, and the modified response will be sent to the browser. In the screenshot below, you can see that the response's body has been changed as well as the X-Powered-By header.
And That's It!
And that's the basics of using Burp Suite to intercept a request and modify its request. If you've been looking for an application that provides this level of sophistication for web application security testing, especially one that's got a free edition, then Burp is the one to get started with.
If you want to get started just that much simpler, then try out Kali Linux, which includes it as part of its toolset.
As I said at the top of the article, I'm not so impressed by the UI. But then fitting so much functionality into any application isn't easy to do. And I'm neither a UI or UX expert. So hats off to them for doing as good a job as they've done.
If you're already experienced with Burp Suite, I'd love to get your thoughts and experience.