 Are you tired of hearing how "simple" it is to deploy apps with Docker Compose, because your experience is more one of frustration? Have you read countless blog posts and forum threads that promised to teach you how to deploy apps with Docker Compose, only for one or more essential steps to be missing, outdated, or broken?
Let's go through five that make your websites and web-based applications more secure, for minimal effort.
Strict-Transport-Security (HSTS)
The first header you should use is Strict-Transport-Security (HSTS). This header tells the browser (or other clients) that requests to this domain should only be made using HTTPS — not HTTP! So, even if clients request a page in the domain over HTTP, the browser won't allow it to happen. Instead, requests will be automatically re-requested over HTTPS.
Naturally, you can only use this header, when you have an HTTPS version of your website available. And in the modern age, thanks to services such as Let's Encrypt and support for it from so many hosting providers worldwide (such as Automattic, SiteGround, Mozilla, and Akamai), there's no excuse (nor reason) for not using HTTPS.
Sure, once upon a time HTTPS was slower than HTTP, and SSL Certificates were expensive. But these days, unless you want an EV (Extended Validation) certificate, then those arguments are a thing of the past.
What's more, thanks to HTTP/2, there are so many reasons to switch to HTTPS. These include:
- Connections are fully multiplexed, instead of ordered and blocking
- Connections can use one connection for parallelism
- It uses header compression to reduce overhead
- It allows servers to "push" responses proactively into client caches
Now, back to the HSTS header. Here's what it looks like:
Strict-Transport-Security: max-age=31536000; includeSubDomains; preload
Here you can see the three parts of the header. The first specifies the time in seconds that the header is to be in force for (the default is one year). The second indicates whether to apply the directive to just this domain, or to any sub-domains.
The third indicates that you (or the site's owner) is OK with the domain being included in the HSTS preload list. The HSTS preload list is a list that future builds of most of the major browsers will include and use to determine if a site should only be requested over HTTPS. No matter what you do, no matter how hard you try, they won't accept requests to your site over HTTP.
Now that might sound pretty good. However, if you have assets that are only served over HTTP, or for some reason you want to revert to HTTP, then you'll effectively DoS your site. So be careful before you go adding your site to the preload list.
That said, the preload list is necessary because if the browser never receives the HSTS header, then it won't enforce loading requests over HTTPS. This can happen if a MitM (Man in the Middle) attack is able to stop the header being received by the client.
Getting back to the configuration above, it tells the client that for the next year, any requests to this domain, and any of its sub-domains, must only be requested using HTTPS. Once received, any subsequent requests, even if you specifically request them using HTTP, result in an internal redirect, and the browser making an HTTPS request.
X-XSS-Protection
The X-XSS-Protection header stops pages from being the victim of reflected cross-site scripting (XSS) attacks. These types of attacks, also known as non-persistent XSS attacks, occur when users click on maliciously crafted links in emails or websites.
It's highly likely that you've seen them before if you can't think of them from that description. Take the following example.
https://www.maliciouswebsite.evil/search.php?PHPSESSID=\">XSSHERE<script>alert(1)</script>
What do you think would happen if you clicked on it? Gladly, in this case, nothing very nasty would happen. All that you would see is a JavaScript alert popup, showing the string “1".
Here's an example of the header:
X-XSS-Protection: 1; mode=block; report=<reporting-uri>
If the first parameter is set to 0, then XSS filtering is disabled.
If it's set to 1, then it's enabled, and the browser will remove any parts of the page that are deemed to be unsafe.
If mode=block is set, then the browser will, as the parameter implies, block the entire page from being loaded.
If report is set, then a violation report will be sent to <reporting-uri>.
Only Chromium supports this last option.
X-Frame-Options
The X-Frame-Options header can be used to tell the browser (or other clients) whether or not it should be allowed to render another page in a <frame>, <iframe>, or <object>.
You can use this header to avoid click-jacking attacks because it stops your content being embedded in other sites.
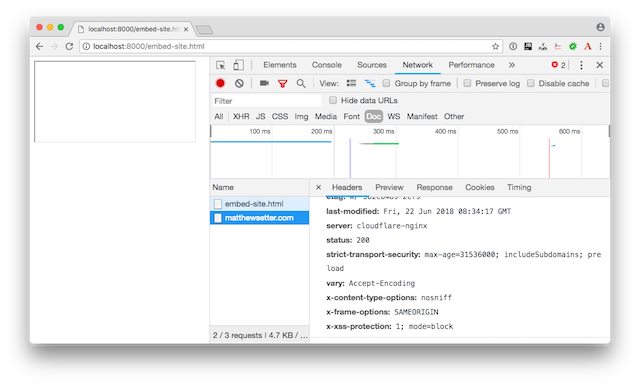
If you're not sure what I mean, have a look at the first example below. I've created a generic HTML page and attempted to embedded my site in it via an IFRAME.
In the developer tools, you can see that an attempt was made to load the site, but that the embedding of the content was refused because the X-Frame-Options header was sent in the response, and the browser respected it.
Now, look at the second example.
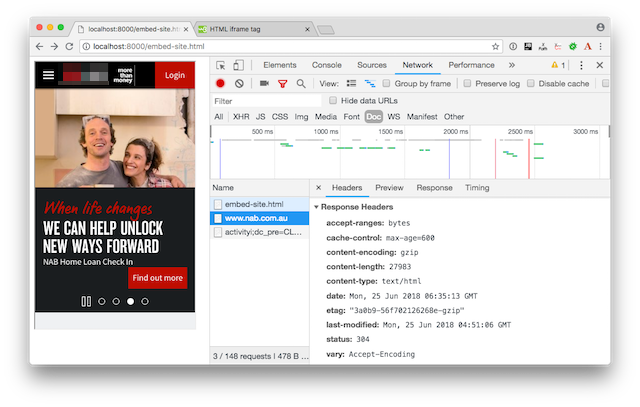
In that one, I've successfully embedded NAB.com.au (the NAB is one of Australia’s four big banks) in an IFRAME, because the site doesn’t send X-Frame-Options headers. Interesting...
X-Content-Type-Options
The X-Content-Type-Options header is used by the server to indicate that the MIME types specified in the Content-Type headers should be respected. Respecting the Content-Type headers is essential because it stops MIME type sniffing, which you can see a diagram of in the image below.

MIME type sniffing is where a web server doesn't provide a Content-Type header for an asset, such as an image, so the web browser (or other clients) attempts to detect the content type on its own.
This can be helpful, as the asset could be perfectly valid, but if the browser doesn't know how to handle it, then it might be discarded, breaking your carefully crafted website or web-based application.
However, while helpful, this can lead to XSS (Cross Site Scripting) attacks. For example, let's say that users can upload files to your website, say it's a mini Flickr or something similar. And let's say that one of your users doesn't have the most honorable of intentions and creates an HTML file with some slightly malicious JavaScript and saves it so that it appears as a JPEG file.
If the site wasn't adequately prepared, it's possible that, as a result of MIME type sniffing, when requested, the image will be read and loaded into the page, resulting in the JavaScript being executed.
So that's why the X-Content-Type-Option header is essential to use.
And as you can see in the image below, it's quite a simple one, supporting only one parameter.
X-Content-Type-Options: nosniff
If set, it will block a request if the requested type is:
- "style" and the MIME type is not "text/css", or
- "script" and the MIME type is not a JavaScript MIME type.
Content Security Policy
Content Security Policy (CSP) is a way of helping to prevent executing malicious content. By default, a browser will retrieve the HTML for a page and then set about retrieving and loading all of the assets required.
However, this leaves open the possibility for malicious actors to cause the site to load malicious content at a later stage, potentially resulting in XSS attacks.
By creating a CSP, you can tell browsers precisely what kind of content they can load when rendering your site. Rules can be quite limited, such as only loading assets from the same domain, such as in the following example.
Content-Security-Policy: default-src 'self'
Alternatively, they can be quite intricate, and specify where images, fonts, stylesheets, JavaScript, and so on can be loaded from, such as in this second example:
content-security-policy: default-src 'self' ; script-src 'self' https://matthewsetter.disqus.com https://www.reddit.com https://use.typekit.net https://cdnjs.cloudflare.com; style-src 'self' https://cdnjs.cloudflare.com https://fonts.googleapis.com; img-src 'self'; font-src 'self'; media-src 'self' ; object-src 'none' ; child-src 'self';
One thing to bear in mind about Content Security Policies, is that if you make a mistake and you deploy them, then you can break your site, likely resulting in some pretty unhappy visitors.
So to help you make the transition, you can also use the content-security-policy-report-only header instead.
This version of the CSP header won't enforce your CSP, instead, in your browser's Developer Tools, you'll be able to see what requests break the CSP.
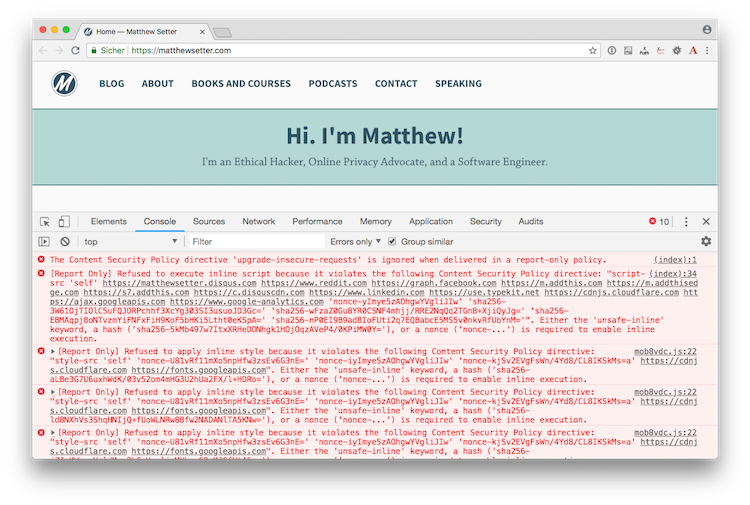
In the example above, you can see that there are several inline scripts that are refusing to load.
In addition to using your browser's Developer Tool's console, you can also specify (mandatory for this header) the report-uri parameter, such as in the example below.
Content-Security-Policy: default-src 'self'; report-uri <report-uri-endpoint>
This will send the report to that endpoint, so it has to be to something that can receive it, such as a PHP, Python, Perl, or Ruby script, or alternatively to a service such as Report URI.
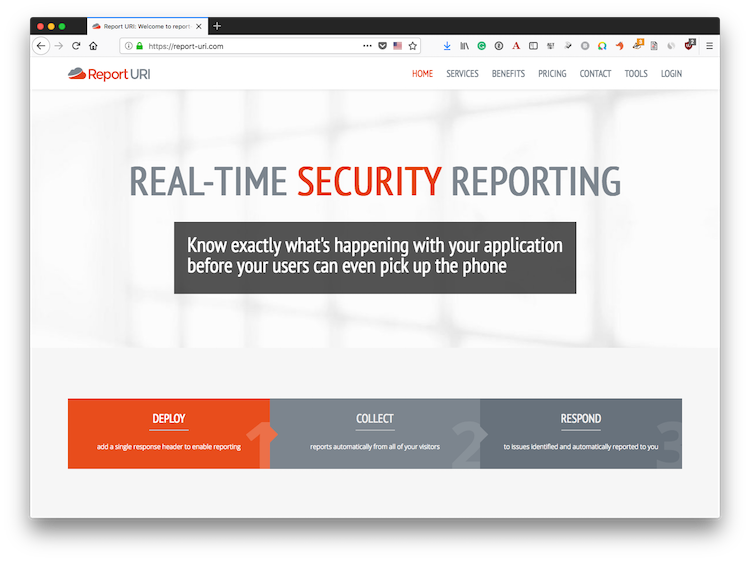
Report URI is an excellent service that lets you look through the CSP violation reports that your site has generated and find out where your CSP isn’t matching the content requested from your site.
For what it’s worth, I’m not an affiliate, just a happy user, who’s happy to recommend the service.
That's a Wrap
So those are five security-focused HTTP response headers that you can use to better protect your website or web-based application — no matter the technology stack that's powering it. If you're not using them, definitely spend the time learning about them, get your site's current implementation reviewed, and begin implementing them.
However, take care not to accidentally DoS yourself, with an overly-ambitious HSTS header. These are all excellent headers, but make sure that you think about what you're doing, and don't just use them because you can. Make sure that they're crafted to best serve your site or application.