 Are you tired of hearing how "simple" it is to deploy apps with Docker Compose, because your experience is more one of frustration? Have you read countless blog posts and forum threads that promised to teach you how to deploy apps with Docker Compose, only for one or more essential steps to be missing, outdated, or broken?
What is Composer?

Composer is the dependency manager for PHP. Since it’s first release on March 1, 2012 (oh, how time flies), it’s revolutionised PHP development, because it significantly reduced the time and effort required to use external packages, and for organising your code in a maintainable and coherent way.
Quoting the documentation:
It allows you to declare the libraries your project depends on and it will manage (install/update) them for you.
Prior to the advent of Composer – unless all of your code was in one huge file, you had to litter your code with require() and require_once() function calls to include the various functions and classes that you wanted to use. That got old fast!
Then, in PHP 5.1.0, you could create an autoload function with spl_autoload_register() that would automatically load classes and functions for you, if you had not already required them. But, this started to get tedious after a while as well.
Then, came Composer, and everything changed for the better. If you’re not familiar with Composer (which is still possible), you’re going to love this tutorial.
How are we going to learn the essentials of Composer?
As this isn’t a deep dive into Composer, rather an introduction, I’m going to center the tutorial around building a small application using the Slim framework that renders the current date. It will look like the following:
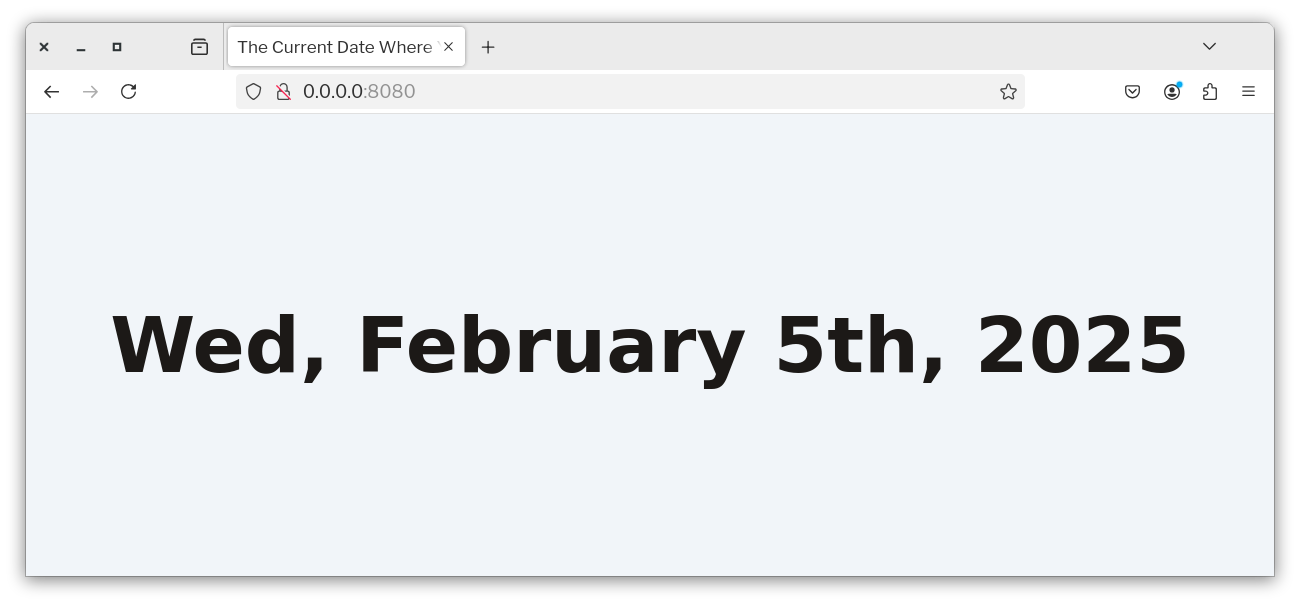
The application will have one route which prints out the current date. It’s not much, but it’s enough to get your proverbial feet wet with Composer, allowing you to rapidly learn more about it.
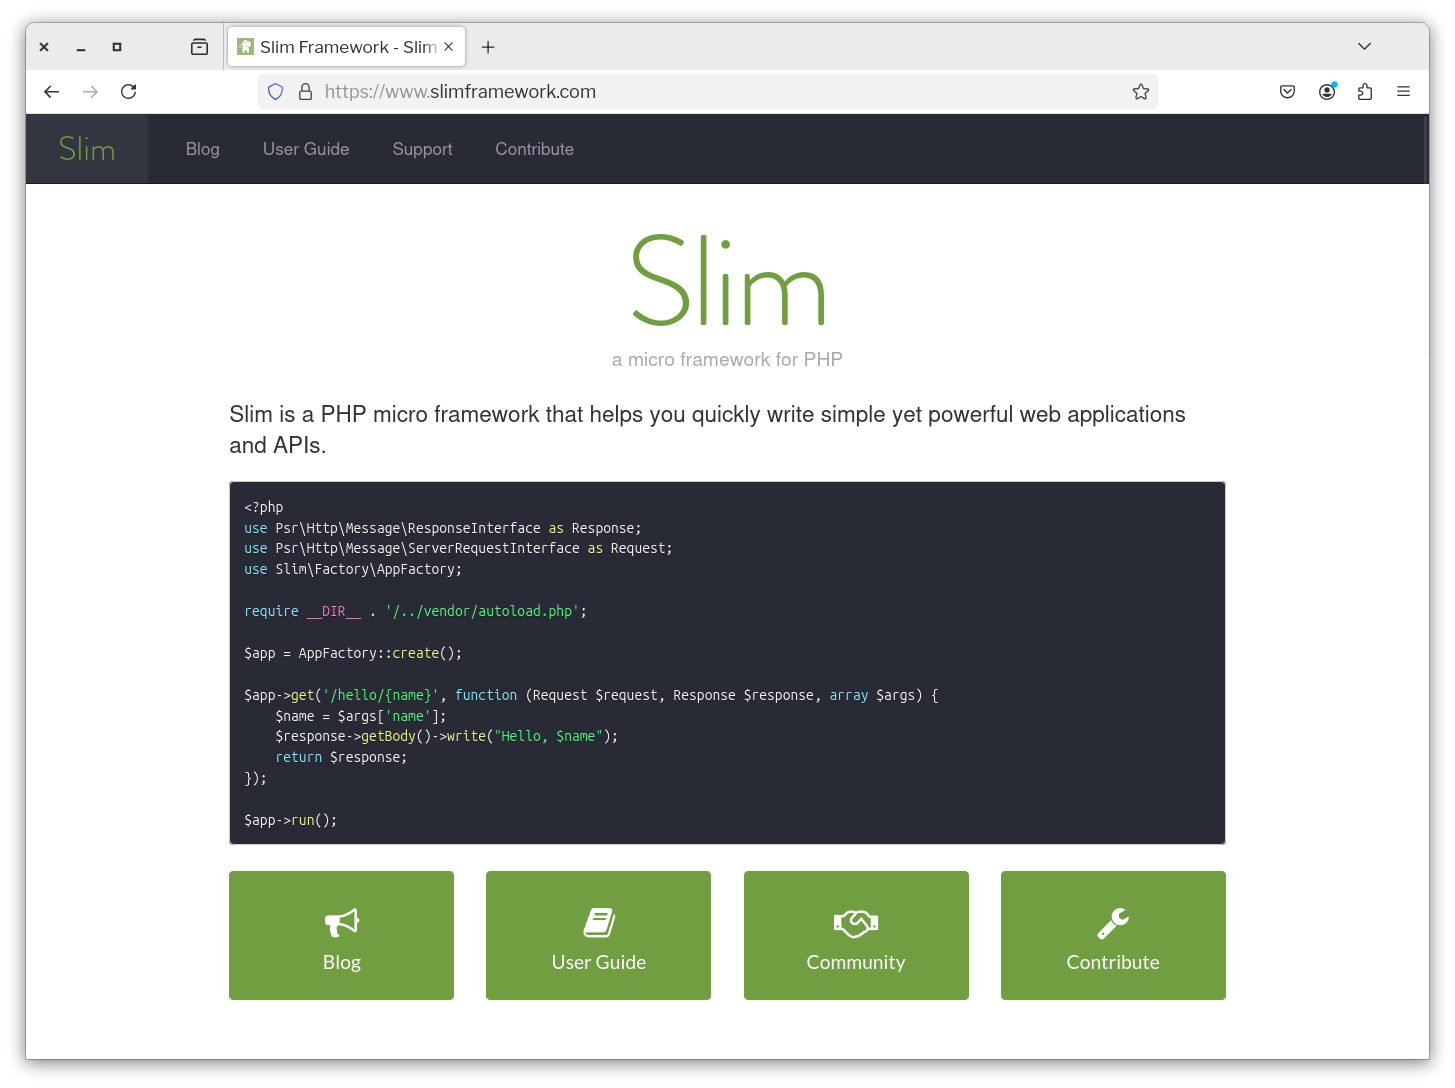
If you’re not familiar with Slim (my favourite framework for teaching PHP), it’s:
...a PHP micro framework that helps you quickly write simple yet powerful web applications and APIs.
Sure, there are more powerful and popular frameworks, such as Laravel and Symfony. But those two (and many of the others) are overkill for the purposes of this tutorial. Slim, however, is perfect as it provides just enough tooling and functionality to rapidly build a small (or not so small) web application – without requiring you to really know that much about the framework. You’ll see why before you’re finished.
Prerequisites
To follow along with this tutorial, you’ll need the following:
- Composer installed globally. If you haven’t already installed it, follow the instructions in the documentation for your operating system.
- PHP 8.3 (or, ideally 8.4)
- Git (as it’s required by Composer)
- Your preferred web browser and text editor or IDE (mine are Firefox and Visual Studio Code respectively)
I don’t think you’ll need anything else. But, I’ll add it to the above list if so.
Set up the project directory
The first thing you need to do is to create a project directory for the application and change into it. It doesn’t matter what you name the directory, but ideally use a meaningful name. Use the following commands if you’re short on time:
mkdir sample-slim-app
cd sample-slim-app
After that, in the project's top-level directory, create two new directories: src and test. As the names imply, src will hold the app’s source files, and test will hold the app’s test suite files. Now, create a directory named Handler inside both src and test.
The app will only have one class, which handles requests to the application’s default route. We could put it anywhere, but I believe in organising code as intuitively as possible, right from the get go. So we’re going to store the file in src/Handler and its test in test/Handler and make proper use of PHP namespaces and Composer’s auto-generated autoloader. More on that shortly!
Add Composer support to the project
The next thing we'll do is where a lot of the fun happens: adding Composer support to the new project by using Composer's init command. The command is an interactive way of generating a composer.json file for the project.
So, run the following command.
composer init
The command will ask you a series of questions, as you can see in the output below.
  Welcome to the Composer config generator

This command will guide you through creating your composer.json config.

Package name (<vendor>/<name>) [settermjd/sample-project]: settermjd/sample-slim-project
Description []: A small project to show how to use the basics of Composer
Author [Matthew Setter <matthew@matthewsetter.com>, n to skip]:
Minimum Stability []: stable
Package Type (e.g. library, project, metapackage, composer-plugin) []: project
License []: MIT

Define your dependencies.

Would you like to define your dependencies (require) interactively [yes]? no
Would you like to define your dev dependencies (require-dev) interactively [yes]? no
Add PSR-4 autoload mapping? Maps namespace "Settermjd\SampleSlimProject" to the entered relative path. [src/, n to skip]:

{
    "name": "settermjd/sample-slim-project",
    "description": "A small project to show how to use the basics of Composer",
    "type": "project",
    "license": "MIT",
    "autoload": {
        "psr-4": {
            "App\\": "src/"
        }
    },
    "authors": [
        {
            "name": "Matthew Setter",
            "email": "matthew@matthewsetter.com"
        }
    ],
    "minimum-stability": "stable",
    "require": {}
}

Do you confirm generation [yes]?
Answer the questions similar to how I have in the sample output above, allowing for your specific details, and enter "yes" (or press Enter) when prompted with "Do you confirm generation"
You’ll now have a composer.json file in the project’s top-level directory that looks similar to the following.
{
    "name": "settermjd/sample-slim-project",
    "description": "A small project to show how to use the basics of Composer",
    "type": "project",
    "license": "MIT",
    "autoload": {
        "psr-4": {
            "App\\": "src/"
        }
    },
    "authors": [
        {
            "name": "Matthew Setter",
            "email": "matthew@matthewsetter.com"
        }
    ],
    "minimum-stability": "stable",
    "require": {}
}
Most of the key/value pairs should be self-explanatory.
However, the two most important ones are autoload/psr-4 and require.
- autoload/psr-4:
- This defines a PSR-4-compliant mapping of namespaces to directory paths that will be used by Composer to generate its autoloader file.
So, based on the example above, if we imported
App\\Handler\\DefaultHandlerin one of our classes, it would be autoloaded from src/Handler/DefaultHandler.php. - require:
- This defines the list of packages that the project requires. Currently, we don’t have any defined, but we will soon.
If you want to save a bit of time, you can provide answers to one or more of these as options to the command. For example, if you wanted to provide the package’s name, description, and license, you could call the command as follows:
composer init \
    --name "settermjd/sample-slim-project" \
    --description "A small project to show how to use the basics of Composer" \
    --license "MIT"
composer.json is Composer’s central configuration file. It contains all of the information about your project's dependencies along with a range of project metadata, including the package’s name, description, author(s), type, home page, and autoload configuration.
Note: At a minimum, you should provide the package’s name, description, package type, and autoload information.
Configure autoloading of the test classes
The next thing to do is to configure autoloading of the application's test classes. To do this, add the following to composer.json:
"autoload-dev": {
    "psr-4": {
        "AppTest\\": "test/"
    }
},
As with autoload, autoload-dev will set up a PSR-4-compliant namespace (AppTest) to path mapping (test/) for test files.
Add the required packages
Let's now bring in the packages we’ll used to simplify building the application.
- php-di/slim-bridge: It will need to simplify integrating using PHP-DI as Slim’s DI (Dependency Injection) container
- The Slim Framework: As the app is built around the Slim framework, it’s going to need Slim
- Slim-Psr7: It's going to need this package for a strict PSR-7 implementation
- Twig-View: This is a Slim Framework view helper built on top of the Twig templating component. In short, it simplifies integrating Twig into Slim which in turn makes it pretty trivial to render templates as the body of responses.
To add them to the project, run the following command:
composer require \
    php-di/slim-bridge \
    slim/psr7 \
    slim/slim \
    slim/twig-view
All being well, and allowing for the speed of your internet connection, you’ll see output similar to the following in your terminal within a few seconds.
./composer.json has been updated
Running composer update slim/slim slim/psr7 php-di/slim-bridge
Loading composer repositories with package information
Updating dependencies
Lock file operations: 16 installs, 0 updates, 0 removals
  - Locking fig/http-message-util (1.1.5)
  - Locking laravel/serializable-closure (v1.3.7)
  - Locking nikic/fast-route (v1.3.0)
  - Locking php-di/invoker (2.3.6)
  - Locking php-di/php-di (7.0.7)
  - Locking php-di/slim-bridge (3.4.1)
  - Locking psr/container (2.0.2)
  - Locking psr/http-factory (1.1.0)
  - Locking psr/http-message (2.0)
  - Locking psr/http-server-handler (1.0.2)
  - Locking psr/http-server-middleware (1.0.2)
  - Locking psr/log (3.0.2)
  - Locking ralouphie/getallheaders (3.0.3)
  - Locking slim/psr7 (1.7.0)
  - Locking slim/slim (4.14.0)
  - Locking symfony/polyfill-php80 (v1.31.0)
Writing lock file
Installing dependencies from lock file (including require-dev)
Package operations: 16 installs, 0 updates, 0 removals
  - Downloading laravel/serializable-closure (v1.3.7)
  - Downloading php-di/invoker (2.3.6)
  - Downloading php-di/slim-bridge (3.4.1)
  - Installing laravel/serializable-closure (v1.3.7): Extracting archive
  - Installing psr/log (3.0.2): Extracting archive
  - Installing psr/http-message (2.0): Extracting archive
  - Installing psr/http-server-handler (1.0.2): Extracting archive
  - Installing psr/http-server-middleware (1.0.2): Extracting archive
  - Installing psr/http-factory (1.1.0): Extracting archive
  - Installing psr/container (2.0.2): Extracting archive
  - Installing nikic/fast-route (v1.3.0): Extracting archive
  - Installing slim/slim (4.14.0): Extracting archive
  - Installing php-di/invoker (2.3.6): Extracting archive
  - Installing php-di/php-di (7.0.7): Extracting archive
  - Installing php-di/slim-bridge (3.4.1): Extracting archive
  - Installing symfony/polyfill-php80 (v1.31.0): Extracting archive
  - Installing ralouphie/getallheaders (3.0.3): Extracting archive
  - Installing fig/http-message-util (1.1.5): Extracting archive
  - Installing slim/psr7 (1.7.0): Extracting archive
1 package suggestions were added by new dependencies, use `composer suggest` to see details.
Generating autoload files
4 packages you are using are looking for funding.
Use the `composer fund` command to find out more!
No security vulnerability advisories found.
Using version ^4.14 for slim/slim
Using version ^1.7 for slim/psr7
Using version ^3.4 for php-di/slim-bridge
What’s happened here is that Composer updated composer.json’s require element to be as follows (at the time of writing this tutorial):
"require": {
    "php-di/slim-bridge": "^3.4",
    "slim/psr7": "^1.7",
    "slim/slim": "^4.14",
    "slim/twig-view": "^3.4"
}
You can see the package’s name on the left, and each package’s minimum major and minor versions on the right.
You could add this configuration to composer.json yourself if you wanted to. However, Composer takes away the need to do so along with the likelihood of potentially mess up the file. If you ever do update composer.json, run composer validate to check that it’s still valid.
After adding the required packages, the command:
- Created a directory named vendor in the project’s top-level directory (which is where Composer, by default, stores all third-party packages)
- Downloaded the packages – along with all of the packages that these three packages depend on, to vendor; and
- Created a composer.lock file in the project’s top level directory. I won’t delve too deep into composer.lock. But, in short, it records the exact package versions that are installed. Using the lock file, you can then install the exact same versions later, on either the same computer or another one, and so can your coworkers, a contributor to your project, and your CI/CD tool.
Add development packages
Now, we’ll add the project’s development dependencies, with the following command.
Note the --dev option, which makes the distinction that these are development dependencies.
composer require --dev \
    laminas/laminas-coding-standard \
    phpunit/phpunit \
    squizlabs/php_codesniffer
The dependencies are:
- PHPUnit: This is the unit testing framework for PHP
- PHP_CodeSniffer: This both helps detect and correct coding standard violations
- The laminas project’s coding standard: This is the coding standard for Laminas components, which builds upon PSR-12
Add some Composer scripts to simplify development
The Composer configuration is coming along nicely now, but there is at least one more thing that we can do to make our lives easier during the life of our project, and that's adding some helpful scripts.
These let you hook into various parts of the installation process, as well as create custom scripts for any number of tasks that you may carry out on a regular basis.
We’re going to add scripts for running our QA checks on the code, as well as starting up PHP’s built-in web server. To do that, add the configuration below to composer.json.
"scripts": {
    "qa": [
        "@cs-check",
        "@test"
    ],
    "cs-check": "phpcs",
    "cs-fix": "phpcbf",
    "serve": "php -S 0.0.0.0:8080 -t ./public",
    "test": "phpunit --colors=always"
},
In the configuration above, we’ve added five scripts:
- cs-check: This runs phpcs which checks the code for coding standard violations
- cs-fix: This runs phpcbf which, where possible, fixes coding standard violations
- serve: This starts PHP’s built-in webserver listening on all IP addresses on the local machine on port 80, with the public directory as the web server’s directory root.
- test: This runs the PHPUnit-based test suite
- qa: This is a little different to the others. Instead of being a single command, it calls a series of commands as defined by the text after the @ symbol.
For running PHP_CodeSniffer and PHPUnit, to save time and effort you’re going to need two configuration files. Firstly, create a file named phpcs.xml.dist in the top-level directory of the project, which is PHP_CodeSniffer’s configuration file, and in the file paste the configuration below:
<?xml version="1.0"?>
<ruleset xmlns:xsi="http://www.w3.org/2001/XMLSchema-instance"
         xsi:noNamespaceSchemaLocation="vendor/squizlabs/php_codesniffer/phpcs.xsd">

    <arg name="basepath" value="."/>
    <arg name="cache" value=".phpcs-cache"/>
    <arg name="colors"/>
    <arg name="extensions" value="php"/>
    <arg name="parallel" value="80"/>

    <!-- Show progress -->
    <arg value="p"/>

    <!-- Paths to check -->
    <file>src</file>
    <file>test</file>

    <!-- Exclude test assets -->
    <exclude-pattern>test/ConfigInjector/TestAsset/</exclude-pattern>
    <exclude-pattern>test/CreateHandler/TestAsset/</exclude-pattern>
    <exclude-pattern>test/Factory/TestAsset/</exclude-pattern>
    <exclude-pattern>test/MigrateInteropMiddleware/TestAsset/</exclude-pattern>
    <exclude-pattern>test/MigrateMiddlewareToRequestHandler/TestAsset/</exclude-pattern>

    <!-- Include all rules from the Laminas Coding Standard -->
    <rule ref="LaminasCodingStandard"/>
    <rule ref="Generic.Files.LineLength.TooLong">
        <exclude-pattern>/src/Factory/FactoryClassGenerator.php</exclude-pattern>
        <exclude-pattern>/test/MigrateMiddlewareToRequestHandler/MigrateMiddlewareToRequestHandlerCommandTest.php</exclude-pattern>
        <exclude-pattern>/test/MigrateMiddlewareToRequestHandler/ProjectSetupTrait.php</exclude-pattern>
    </rule>
</ruleset>
Then, create a file named phpunit.xml.dist, which is PHPUnit’s configuration file, and in it paste the following configuration:
<?xml version="1.0" encoding="UTF-8"?>
<phpunit xmlns:xsi="http://www.w3.org/2001/XMLSchema-instance" xsi:noNamespaceSchemaLocation="vendor/phpunit/phpunit/phpunit.xsd" bootstrap="vendor/autoload.php" executionOrder="depends,defects" beStrictAboutOutputDuringTests="true" colors="true" cacheDirectory=".phpunit.cache" beStrictAboutCoverageMetadata="true">
  <testsuites>
    <testsuite name="mezzio-tooling">
      <directory>./test</directory>
    </testsuite>
  </testsuites>
  <source>
    <include>
      <directory suffix=".php">src</directory>
    </include>
  </source>
</phpunit>
Write a small web application
With the project ready from Composer’s perspective, it’s now time to write the PHP code. For what it’s worth, it might seem like a bit of work to avoid work, but we truly have avoided a lot of manual, tedious work.
Create a new directory named public and in that directory create a new PHP file named index.php. Then, in public/index.php, add the following code:
<?php

declare(strict_types=1);

use App\Handler\DefaultHandler;
use DI\Container;
use Slim\Factory\AppFactory;
use Psr\Http\Message\ResponseInterface;
use Psr\Http\Message\ServerRequestInterface;
use Slim\Views\Twig;
use Slim\Views\TwigMiddleware;

require __DIR__ . '/../vendor/autoload.php';

$environment = $_ENV['APP_ENV'] ?? "prod";
if ($environment === "dev") {
    $dotenv = Dotenv\Dotenv::createImmutable(
        __DIR__ . "/../"
    );
    $dotenv->load();
}

$container = new Container();
AppFactory::setContainer($container);
$app = AppFactory::create();

$twig = Twig::create(
    __DIR__ . '/../templates',
    ['cache' => false]
);
$app->add(TwigMiddleware::create($app, $twig));

$app->get('/', DefaultHandler::class);

$app->run();
The code sets up small Slim application with:
- A single service registered in the DI (Dependency Injection) Container, a
Twigobject, under the name "view" - A single route (/) which will be handled by
App\Handler\DefaultHandler
Now, in the src/Handler create a new PHP file named DefaultHandler.php and in that file add the following code:
<?php

declare(strict_types=1);

namespace App\Handler;

use DateTimeImmutable;
use Psr\Http\Message\ResponseInterface as Response;
use Psr\Http\Message\ServerRequestInterface as Request;
use Slim\Views\Twig;

final readonly class DefaultHandler
{
    public function __invoke(
        Request $request,
        Response $response,
        array $args
    ): Response {
        $view = Twig::fromRequest($request);
        $date = (new DateTimeImmutable())->format("D, F jS, Y");
        return $view->render(
            $response,
            'home.html.twig',
            [
                'date' => $date,
            ]
        );
    }
}
DefaultHandler's __invoke() method returns the rendered version of templates/home.html.twig as the response to requests to the default route, setting one template variable, date whose value is the current date and time.
Thirdly, create a directory named templates in the project’s top-level directory and in that new directory, create a new file named home.html.twig. In the new file, add the following code:
<!doctype html>
<html>

<head>
    <meta charset="UTF-8">
    <meta name="viewport"
          content="width=device-width, initial-scale=1.0">
    <link href="/css/styles.css" rel="stylesheet">
    <title>The Current Date Where You Are</title>
</head>

<body class="mx-auto flex items-center bg-slate-100 text-stone-900">
    <section
        class="h-screen font-semibold rounded-md text-7xl flex items-center justify-center w-screen">
        {{ date|escape }}
    </section>
</body>

</html>
The template doesn’t do much other than render the value in date, with just enough HTML and CSS to make it render in a somewhat professional manner.
Download the application's CSS file
There’s one last thing to do, and that’s to download the CSS file, instead of setting up Tailwind CSS and building it yourself. Download it from the project’s GitHub repository to a new directory, named css in the application’s public directory.
Start the application
Right, with everything done, start the application with the following command, which makes use of the script that you just added:
composer serve
This will start PHP’s built-in web server listening on port 8080 using the public directory as the directory root. If you open http://localhost:8080/ in your browser of choice it look similar to the following screenshot:
Add the tests
Now, let’s bring the creation of the application to a close by creating a new file in tests/Handler named DefaultHandlerTest.php, and pasting the code below into the new file:
<?php

declare(strict_types=1);

namespace AppTest\Handler;

use App\Handler\DefaultHandler;
use DateTimeImmutable;
use PHPUnit\Framework\TestCase;
use Psr\Http\Message\ResponseInterface;
use Psr\Http\Message\ServerRequestInterface;
use Slim\Psr7\Response;
use Slim\Views\Twig;

class DefaultHandlerTest extends TestCase
{
    public function testRenderCorrectInformation(): void
    {
        $handler  = new DefaultHandler();
        $response = new Response();
        $request  = $this->createMock(ServerRequestInterface::class);
        $twig     = Twig::create(
            __DIR__ . '/../../templates',
            ['cache' => false]
        );
        $request
            ->expects($this->once())
            ->method("getAttribute")
            ->with("view")
            ->willReturn($twig);

        $body = <<<EOF
<!doctype html>
<html>

<head>
    <meta charset="UTF-8">
    <meta name="viewport" content="width=device-width, initial-scale=1.0">
    <link href="/css/styles.css" rel="stylesheet">
    <title>The Current Date Where You Are</title>
</head>

<body class="mx-auto flex items-center bg-slate-100 text-stone-900">
    <section class="h-screen font-semibold rounded-md text-7xl flex items-center justify-center w-screen">%s</section>
</body>

</html>
EOF;

        $result = $handler($request, $response, []);
        $this->assertSame(
            sprintf($body, (new DateTimeImmutable())->format("D, F jS, Y")),
            (string) $result->getBody()
        );
        $this->assertSame(200, $result->getStatusCode());
    }
}
This isn't a particularly complicated test.
And for the purposes of this tutorial, it doesn't need to be.
It just tests that DefaultHandler renders the correct output, and returns an HTTP status code of 200 OK.
If you'd like to learn more about writing tests in PHP, check out the official PHPUnit documentation.
Now, to run the tests and all of the other QA checks, run the following command.
composer qa
You should see output similar to the following printed to the terminal
> phpcs
.. 2 / 2 (100%)


Time: 66ms; Memory: 10MB

> phpunit --colors=always
PHPUnit 11.5.6 by Sebastian Bergmann and contributors.

Runtime:       PHP 8.3.11
Configuration: /opt/PHP/sample-slim-project/phpunit.xml.dist

.                                                                   1 / 1 (100%)

Time: 00:00.011, Memory: 8.00 MB

OK (1 test, 2 assertions)
That’s how to get started with Composer
This has not been the most comprehensive introduction to Composer, rather a practical, hands-on one that steps you through the key commands that you need to know through the lens of building a small PHP application.
If you’ve already worked through the documentation, what commands or other information would you add?
Otherwise, if you’d like to go deeper, check out the Composer documentation, as well as the other posts that I’ve written on Composer, here on the blog.