 Are you tired of hearing how "simple" it is to deploy apps with Docker Compose, because your experience is more one of frustration? Have you read countless blog posts and forum threads that promised to teach you how to deploy apps with Docker Compose, only for one or more essential steps to be missing, outdated, or broken?
{{< youtube 7YnYz_SjVbI >}}
Back on November 3rd, last year, I wrote a tutorial showing how to set up PHP debugging with PhpStorm, Xdebug, and PHPUnit. In this article, I'm taking that tutorial further by showing how to run tests in PhpStorm.
Now, you might wonder why you'd run tests in PhpStorm instead of from the command-line, that is if you're a command-line junkie like myself. Well, while running them from the command-line is likely the best way — especially from an automation perspective — there are some time-saving features of running your PHP tests in PhpStorm.
To provide a little more context, while I was working on a small side-project recently, I came to appreciate the simplicity that PhpStorm offers, because I didn't have to remember the command-line syntax for running either an individual test or all the tests in one class. Using PhpStorm can be an excellent way to "just get going", quickly, simply, and efficiently.
Anyway, let's get into each option. To run tests in you:
- Pick the level at which you want to run tests (project, suite, directory, class, and test)
- Choose one of "Run", "Debug", or "Run with Coverage".
Now, let's step through each of these.
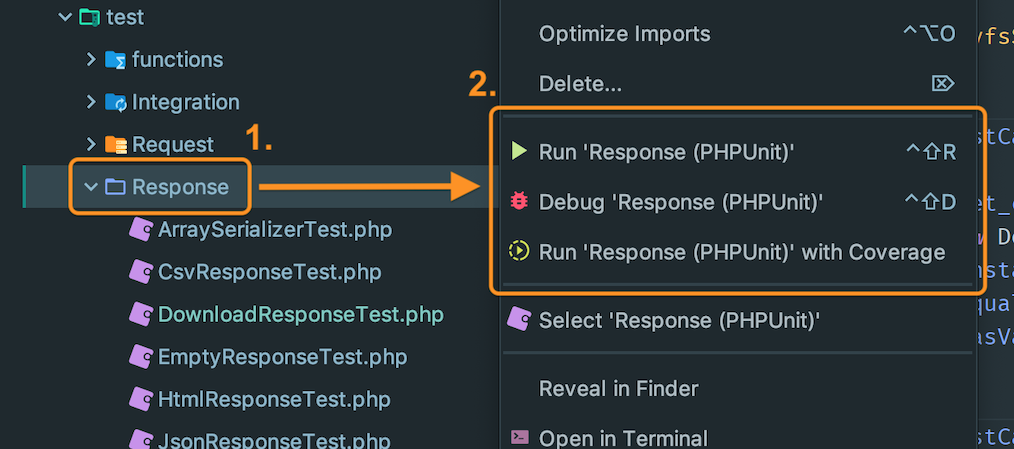
For example, you can see in the image above, that I've right-clicked (or context-tapped) on a directory (Response) and have scrolled down to the test options. Depending on the option that I choose, it will run or debug all of the tests in that directory.
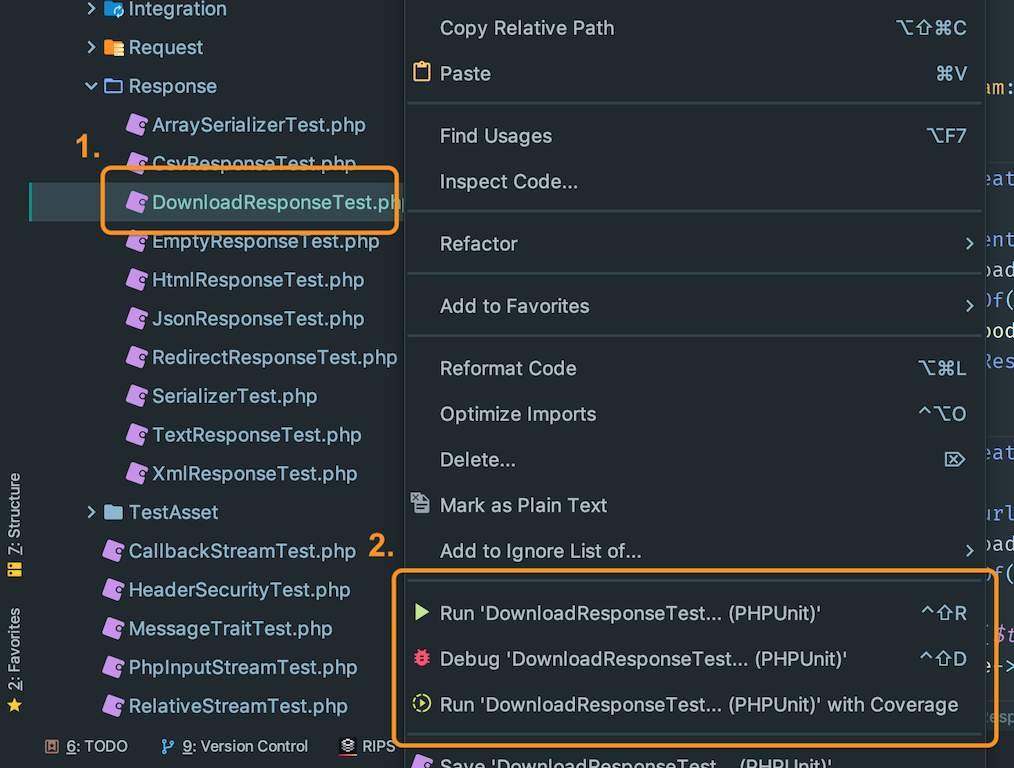
If I wanted to run all tests in a single class, I could either right-click on the class file in the project view (as in the image above) or right-click on the tab of an open file, and then choose the desired test option from the context menu that appears.
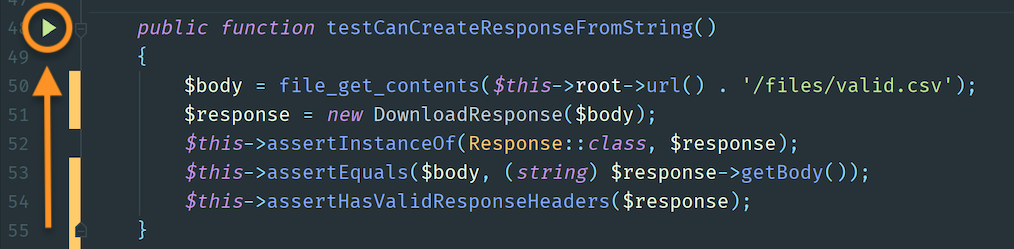
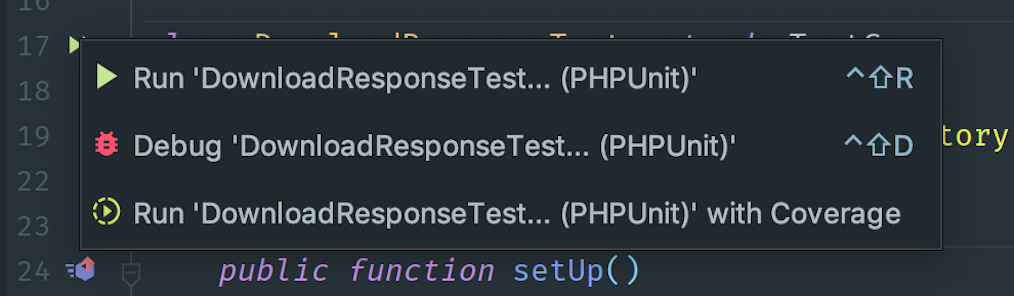
Running individual tests is a little different, however. In the image above, you can see a right-facing, green arrow next to the test's signature. Clicking on this opens a context menu specifically for testing, as in the image below. As with the previous approaches, you then choose the option which best suits your needs.
Viewing Test Output
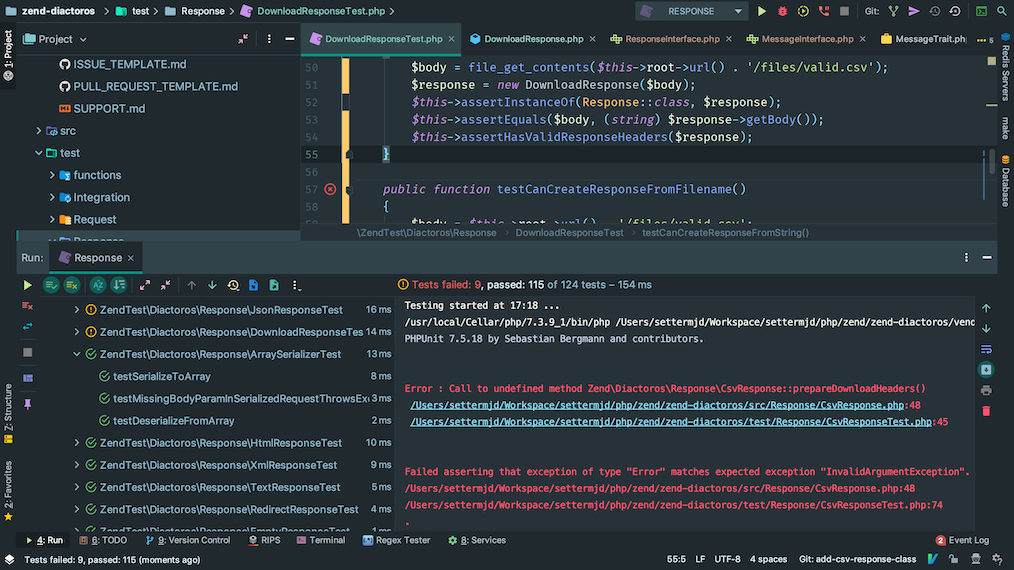
Regardless of the option that you choose, however, when the tests are run, the Run panel opens (by default at the bottom of your PhpStorm window).
It is split into two panels. The panel on the left lists all of the tests that were run categorised based on how the tests were initiated. The panel on the right shows the test output.
In the image above, you can see some of the reasons why some of the tests failed. The image isn't big enough to show all of the failed test output, but like most windows, you can scroll through the listed output. One advantage of PhpStorm's Run panel is how it can compact output, making it easier to read and work with.
For example, if you have a test that asserts if two items were the same, such as two strings, it will hide the output, but let it be displayed in a popup window, as in the screenshot below.

Now here's where it starts to get even more interesting — not to mention time-saving. Once you've run some tests for the first time, likely the majority will pass, but some will fail.
In the upper left-hand side of the Run panel, you can choose to re-run just the failed tests. That saves you from having to look through a large set of output if you have an extensive test suite.

Besides, you can (these are the buttons, from left to right, in the image above):
- Show ignored tests
- Sort the tests in alphabetical order (sometimes handy, sometimes not)
- Sort tests by duration
- Expand or collapse the test list
- Step forward or back through the tests
- View (and step through) the test history
- Import tests from a file
- Export test results
An especially handy option is to toggle auto-testing. This option automatically triggers tests to run when they're updated. I don't know of a way to do that on the command-line. I suspect it might be especially handy if I did know how to do it.
In Conclusion
And that’s an overview of how to run tests from within PhpStorm. PhpStorm offers more functionality, but what I’ve covered here will get you off to a great start.
I strongly encourage you to experiment and play around with the functionality on offer and find a workflow that works best for you. If you’ve been running tests in PhpStorm for a long time, what are your tips and suggestions? I’d love to know more about them in the comments.