If you want to create a great quality podcast, you need to have great audio. And to have great audio, you need to remove all the things that distract your listener, and make your audio sound less than professional; such as breaths and lip smacking. One of the easiest ways to do this is to use Audacity’s Noise Gate functionality. Come learn what it is and how to use it.
Over the last year and a bit as I’ve been creating podcasts and online courses, I’ve been rapidly learning about the ins and outs of creating great quality audio.
This isn’t to say that I have the best quality audio in the world, but I have been learning about how to continually improve it on a regular basis, using the excellent, open source, Audacity.
Now there are a whole range of aspects that create great quality, from high fidelity, to having the right noise level.
But one thing that I’ve found counts most of all, is removing the little things that distract the listener, and which contribute to a general unprofessional sound.
To be more specific, what I’m talking about are the things that all of us do, such as drawing breaths, licking lips, and so on.
Let’s be honest, we all need to breath, and not all of us are trained at reticular breathing.
And while we may know to not eat any sugary food before sitting down (or standing) to record a podcast, we may not always follow that advice religiously.
So if you’re like me, and aren’t a trained voice over expert or a professional singer or radio announcer, I want to share with you how to use Audacity’s Noise Gate plugin to minimise and remove these imperfections.
What is a Noise Gate?
If you’re not familiar with a noise gate, here is how Wikipedia describes it:
A noise gate is an electronic device or software that is used to control the volume of an audio signal. Comparable to a compressor, which attenuates (lessens or reduces) signals above a threshold, such as loud attacks from the start of musical notes, noise gates attenuate signals that register below the threshold. However, noise gates attenuate signals by a fixed amount, known as the range. In its simplest form, a noise gate allows a main signal to pass through only when it is above a set threshold: the gate is “open”. If the signal falls below the threshold, no signal is allowed to pass (or the signal is substantially attenuated): the gate is “closed”. A noise gate is used when the level of the “signal” is above the level of the unwanted “noise”. The threshold is set above the level of the “noise”, and so when there is no main “signal”, the gate is closed.
So, in short, noise gates reduce the intensity of sounds up to a specified threshold.
The trick to using a noise gate is determining the level below which to apply it.
Gladly, Audacity makes it relatively straight-forward.
Install Audacity’s Noise Gate Plugin
First off, check if your installation of Audacity has the Noise Gate plugin available.
To do that, check if the plugin is listed under the “Effects” menu.
If it’s not, open Audacity’s plugins manager, by clicking “Effects -> Add / Remove Plugins…”.
Then, when the window appears, show all plugins, and short by name, as in the screenshot below.
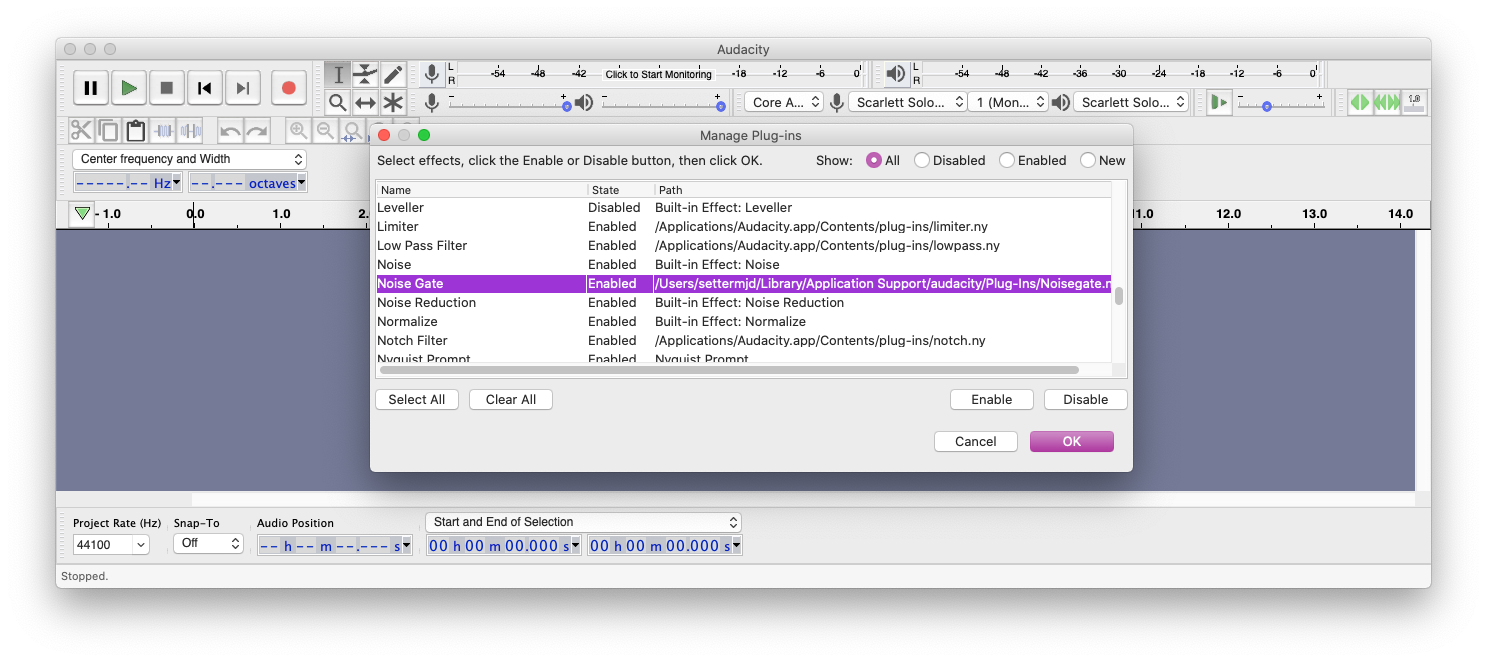
With that done, scroll down the list and see if it contains “Noise Gate”, near the bottom.
If it’s there, but disabled, enable it by clicking “Enable” in the lower right-hand corner of the window, and then click “OK”.
If it’s not in the list, download it from the Audacity plugins page, and follow the plugin installation instructions for your operating system.
After it’s installed, enable the plugin by following the steps listed above.
Want to Learn More About Mezzio?
Mezzio Essentials teaches you the fundamentals of PHP's Mezzio framework. It's a practical, hands-on approach, which shows you just enough of about the underlying
principles and concepts before stepping you through the process of creating an application.

How to Use Audacity’s Noise Gate
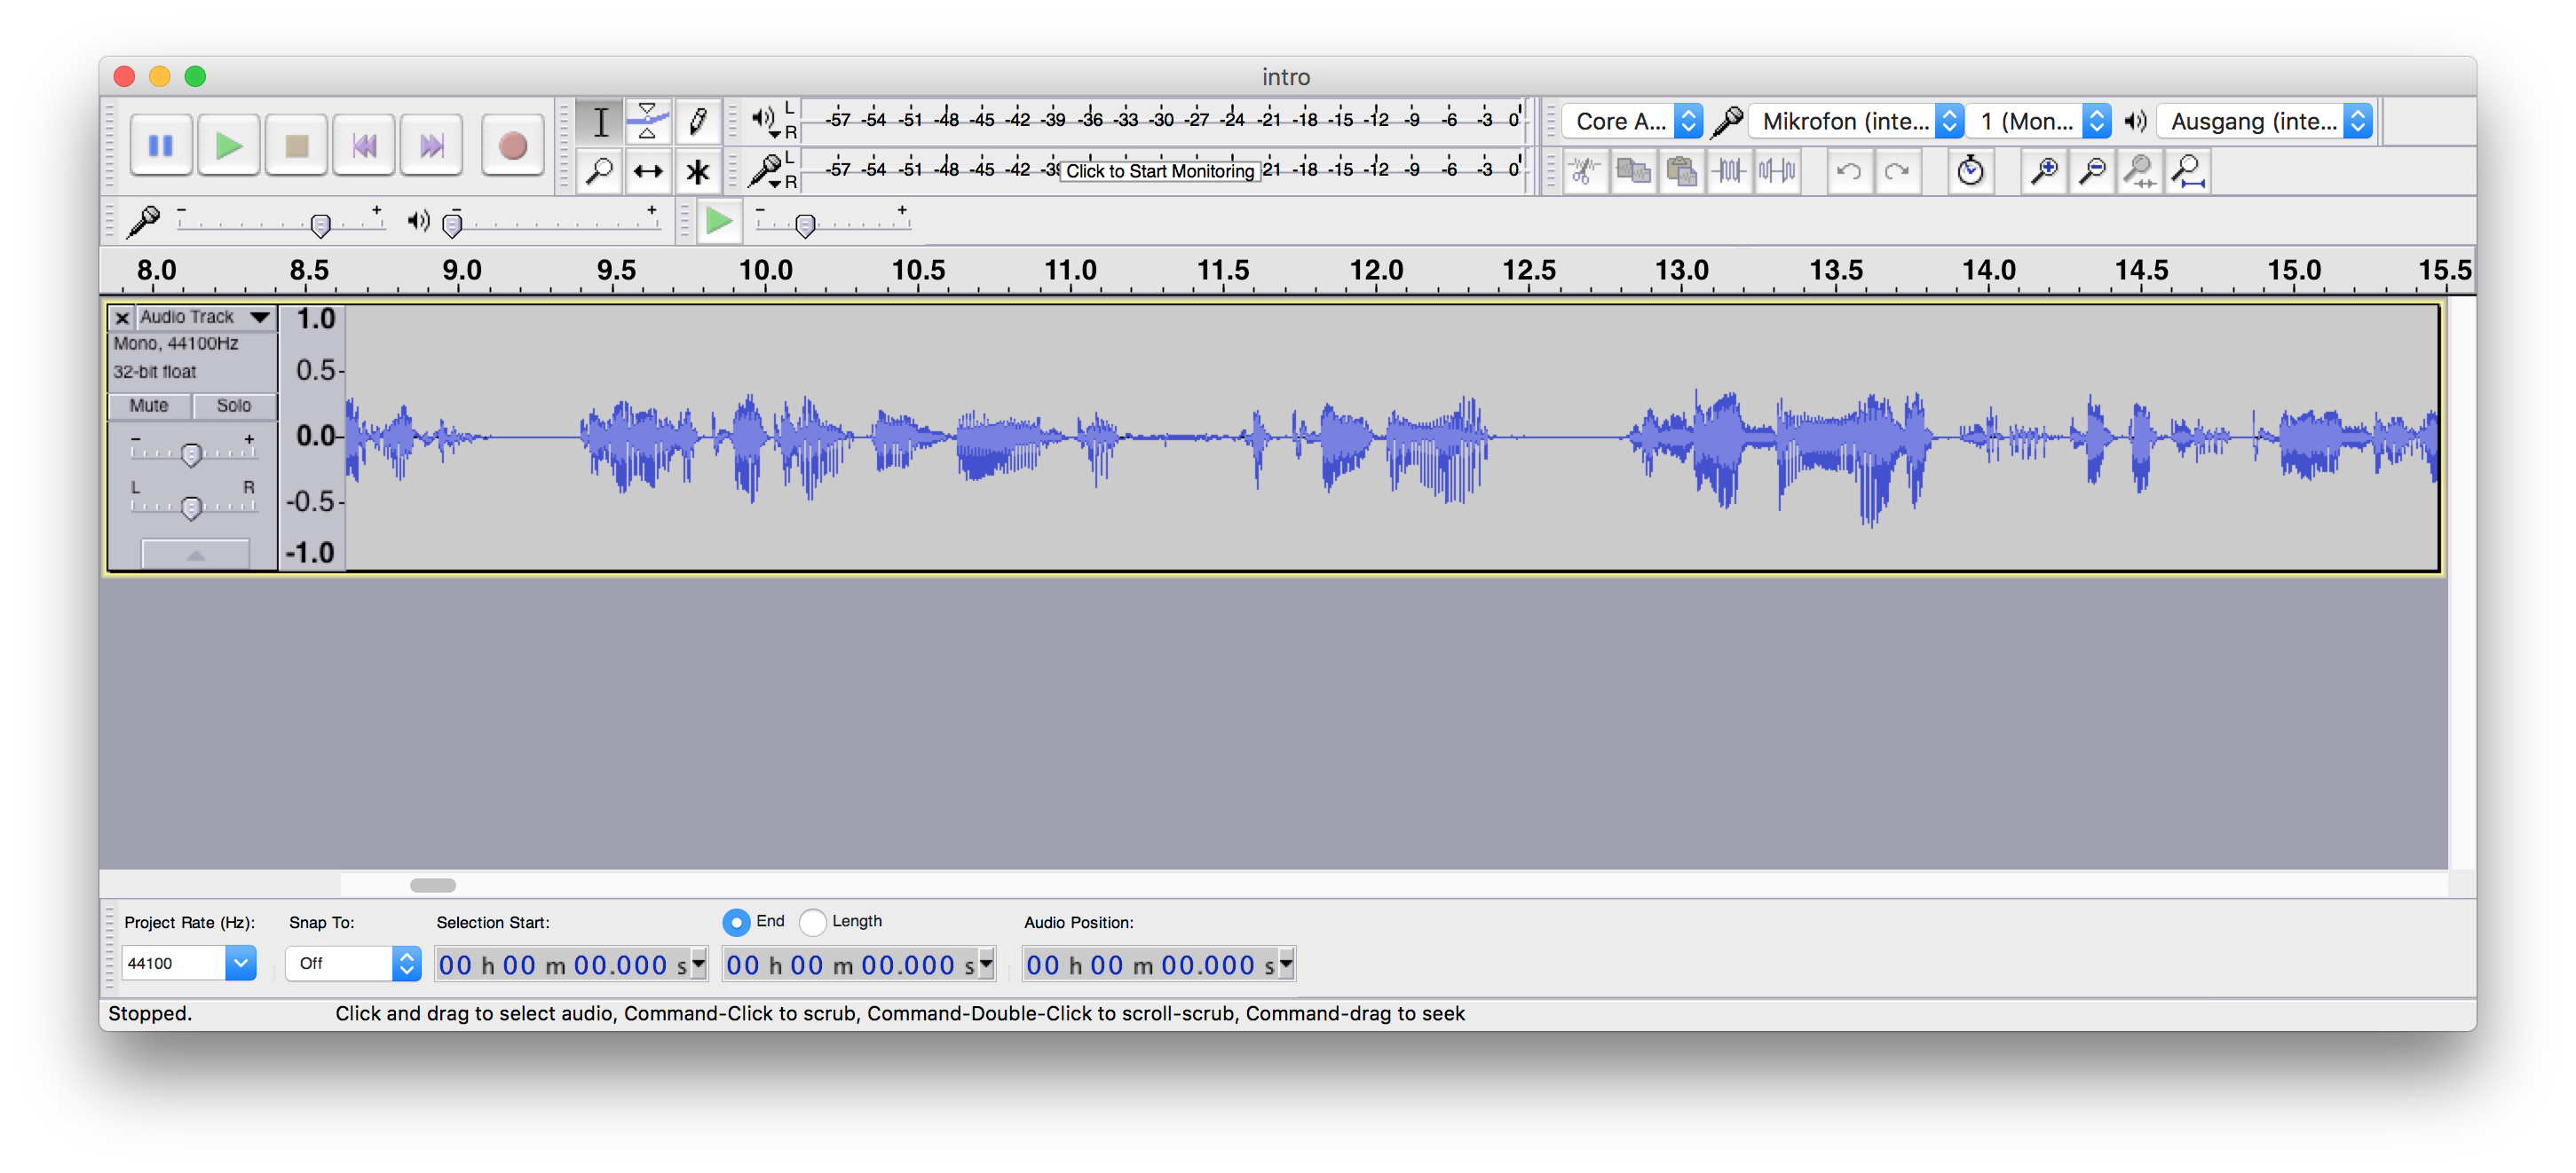
Open the recording in Audacity (if you’ve already recorded it) or make a new recording.
Then, on the far left-hand side of the recorded track (labeled “Audio Track” by default), click the down arrow.
About a third of the way down, click the “Waveform (dB)” menu item, where you’ll see the audio’s waveform become much larger and more fine-grained.
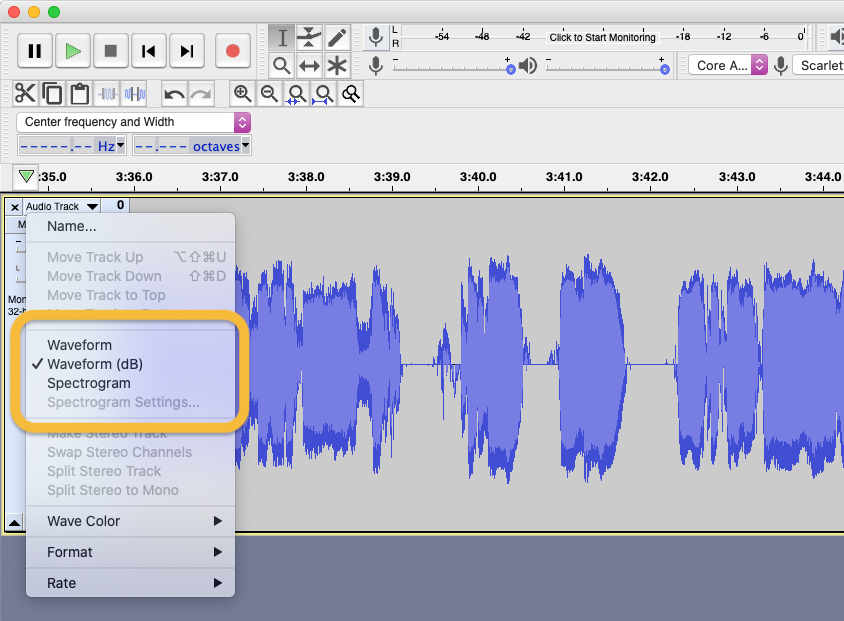
After that, you need to enlarge the track’s size, by moving your mouse over bottom edge of the track, where you’ll see it become a double-headed arrow, allowing you to click and drag the track’s size, enlarging it.
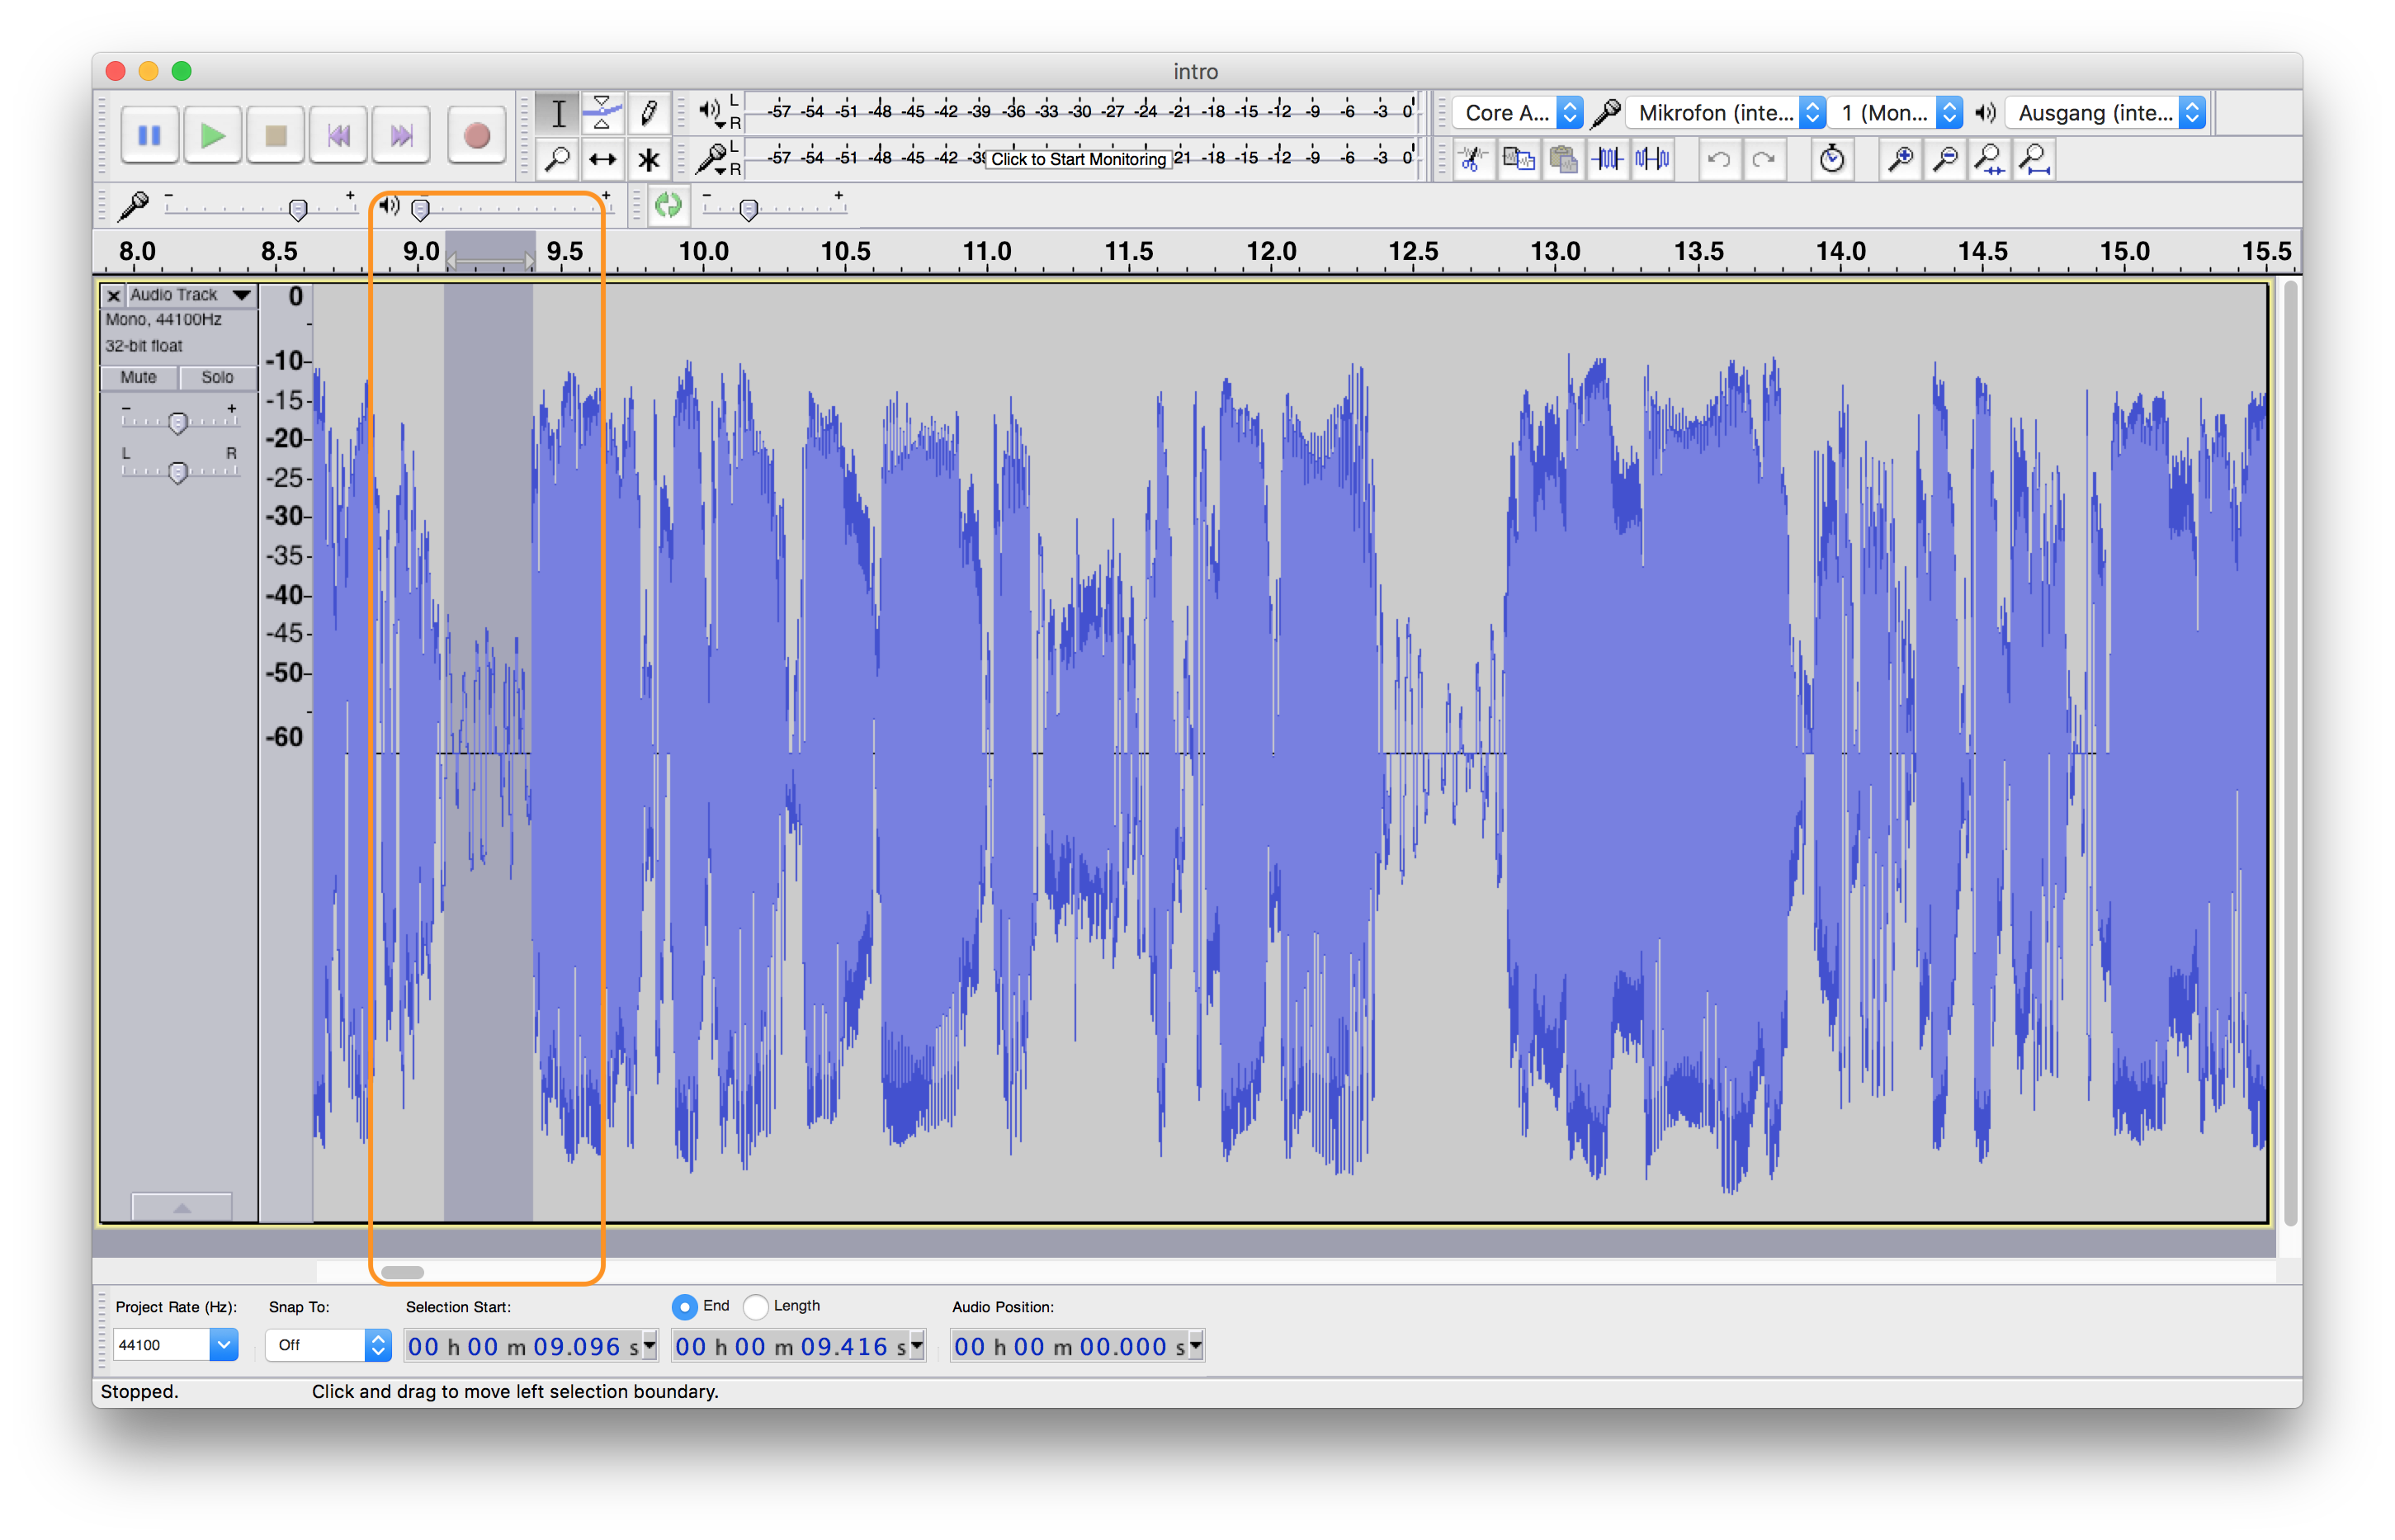
With that done, play the recording up until you hear yourself taking a breath.
When you hear it, make a note of, approximately, the noise level where it begins.
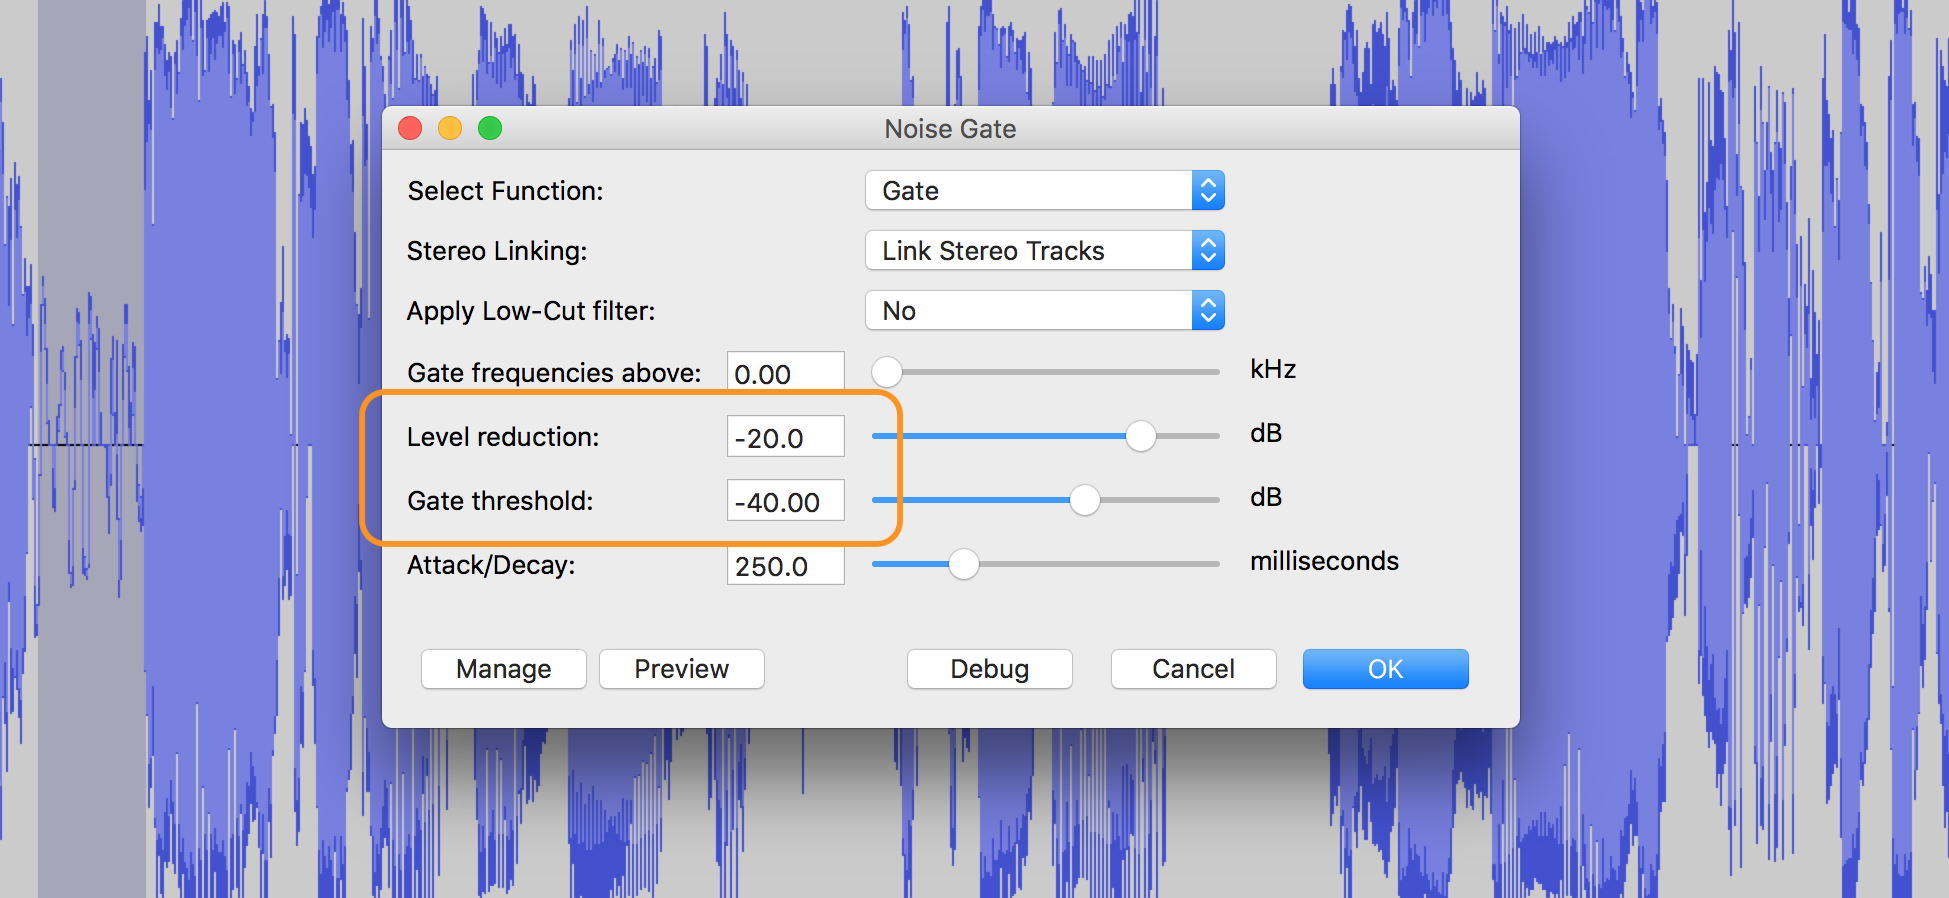
In the screenshot below, you can see that its loudest level is -45 dB.
With that in hand, click the “Effects” menu, and then click “Noise Gate”, which opens the noise gate window.
In that window, you’ll see a number of options and drop-down lists, but the two you need to focus on are “Level reduction” and “Gate threshold”.
- Gate threshold is the threshold above which the noise (or sound) should be removed.
- Level reduction controls the amount of signal reduction.
In that field, enter the value which you found when you analysed the sound of your breath.
Then click OK.
Depending on the size of your recording, this could take a few seconds and be barely noticeable, or it could take several minutes.
Regardless, when it’s finished, have a listen to your recording again and you should be pleasantly surprised at how much better, how much more professional it sounds.
Now, it’s not going to be perfect.
If you want perfection, you’d best pay a professional sound/audio engineer.
But if you’re simply wanting to improve the quality of your recording, then you’ve just come a long way.
And That’s It
And now you’ve learned how to use a Noise Gate in Audacity to clean up your podcast vocals.
By using this functionality, you can improve the quality of your audio, removing the minor – but noticeable – imperfections that detract from the quality of your recording.
It won’t turn it into a perfect recording, but it will help to notably improve its quality.
Remember though, this is just the first step.
So why not learn how to improve the quality of your audio – even further?


Join the discussion
comments powered by Disqus