Antora is the premier technical documentation platform. However, that doesn’t mean that it’s a breeze to use right from the get-go. If you have just begun using it or want to get the most out of it, this post will step you through the three key concepts that you need to know about.
When you fully appreciate these concepts and how they interact you’re going to be much more effective and efficient working with it, whether you’re a technical writer or a software developer.
And what are these three concepts?
They’re:
- The Playbook
- The Component
- The UI theme
Let’s begin with the most important — the Playbook.
One: The Playbook
The Playbook, stored in a YAML, JSON, or CSON file in the root directory of an Antora project, is what brings everything together.
It contains such essential details as:
- The information that globally applies to the site, such as its title and base URL.
- The content sources (components) to use.
These sources are git repositories (multiple branches and tags are supported).
- The theme to use.
- Where the site will be dateed (on the local filesystem, remotely, such as on Netlify or Amazon S3).
- Caching;
- and much more
Here’s an example Playbook (in YAML format) from the ownCloud documentation repository.
site:
  title: ownCloud Documentation

content:
  sources:
  - url: .
    branches: HEAD
  - url: https://github.com/owncloud/android.git
    branches:
    - master-antora
    start_path: docs/
  - url: https://github.com/owncloud/ios.git
    branches:
    - master-antora
    start_path: docs/
  - url: https://github.com/owncloud/client.git
    branches:
    - master-antora
    start_path: docs/

output:
  clean: true
  dir: public
You can read more about the Playbook in the official documentation, but here’s a quick rundown.
The site’s titled: “ownCloud documentation”.
It draws its content from four git repositories.
One is the local directory of the project and three others are remote GitHub repositories.
Antora will clone (and cache) a copy of each remote repository’s master-antora branch.
If we wanted to build from multiple branches, we could do so, by using a YAML array, such as [master, master-antora, development, 1.0, 2.0].
Finally, the configuration specifies where the generated content will be created, specified by the output.dir setting.
This directory, called public, is relative to the project’s root directory.
Two: The Component
Antora stores the source files and static assets that it uses to generate its content in what it refers to as components.
What’s particularly interesting about them, is that they’re composed of one or more modules, where each module is a logical (as much as possible) grouping of content.
Each module stores a combination of AsciiDoc source files, static asset files (JavaScript and CSS files), and other supporting content, such as code examples.
What’s more, Antora’s fairly opinionated about how a component and its modules are organised.
In the example file and directory listing below, you can see the absolute essentials required of a component.
├── antora.yml
├── modules/
    └── ROOT/
        ├── assets/
        │   ├── attachments/
        │   └── images/
        ├── examples/
        ├── _attributes.adoc
        ├── nav.adoc
        └── pages/
            ├── _partials/
            ├── _attributes.adoc
            └── index.adoc
A component needs three things at the absolute minimum:
- A component descriptor (antora.yml).
- A directory called
modules, that stores all of a component’s modules.
- At least one module named
ROOT.
This, as the name implies, is the base or first module.
Any other module is supplementary to this one, in Antora’s eyes.
As you saw in the example Playbook above, components are made available to Antora in two primary ways:
- They can be stored inside directories inside the
modules directory, off the root directory of the project.
- In external git repositories (located somewhere on the local filesystem or in a remote repository)
Now to the modules themselves.
What’s In a Module
Each module:
- Has a component (configuration) descriptor file called
antora.yml.
- Has a name
- Contains three core directories:
- assets: contains the static asset files
- examples: contains example files, such as code examples, that can be included in other files
- pages: this includes the source AsciiDoc files.
The pages directory also contains a
_partials directory.
This directory stores partials page that, like code examples, can be included in other files.
This is an excellent time saver when multiple pages need to include the same content, such as a warning or set of configuration options.
- Contains several key files:
- /_attributes.adoc: The contains one or more attributes specific to the module.
If you’re not familiar with attributes, you can think of them as shortcodes, that can be expanded.
- /nav.adoc: This stores the Playbook’s table of contents, or navigation tree.
Currently, this has to be manually created.
- /pages/index.adoc: This is the module’s default page and is what will be rendered when the module is viewed in the browser.
An alternate page name can be configured, especially important if you’re migrating an existing content structure from another platform, such as Hugo, Jekyll, or Sculpin.
The Component Descriptor File (Quick Overview)
Here is a small example of a component file:
name: my_antora_component
title: My Antora Component
version: '1.0'
nav:
- modules/ROOT/nav.adoc
The key things to keep in mind are the title and nav options.
These set the string that you see, when you view the content, and how the navigation tree is built.
I’ll go into these more in an upcoming post.
Currently, there’s no command-line tooling support to generate either a component or a module.
However, if you want to start quickly, clone my Antora content-template repository.
Three: The UI Theme
Antora Playbooks don’t directly integrate the documentation’s theme, instead choosing to use a separate UI theme.
This can be stored locally or remotely and manages the look and feel of the generated documentation.
Just like how HTML and CSS keep semantics and style separate, this approach makes it easier to reuse a theme across multiple playbooks, as well as to work on the theme itself.
Following the HTML/CSS metaphor, it makes the separation of duties far easier.
Perhaps this is just speculation on my part, but I’ve found it to be the case.
However, as a result, you have to get used to the workflow that this mandates.
Gladly, some necessary tooling has already been put in place with Antora.
Here’s an overview.
First clone the default Antora UI theme locally, and open it with your tools of choice.
Once you’ve familiarised yourself with the file layout and are ready to begin work you need to do two things:
- Install the required tooling and dependencies (by running
npm i in the root directory of the UI theme)
- Run
gulp preview.
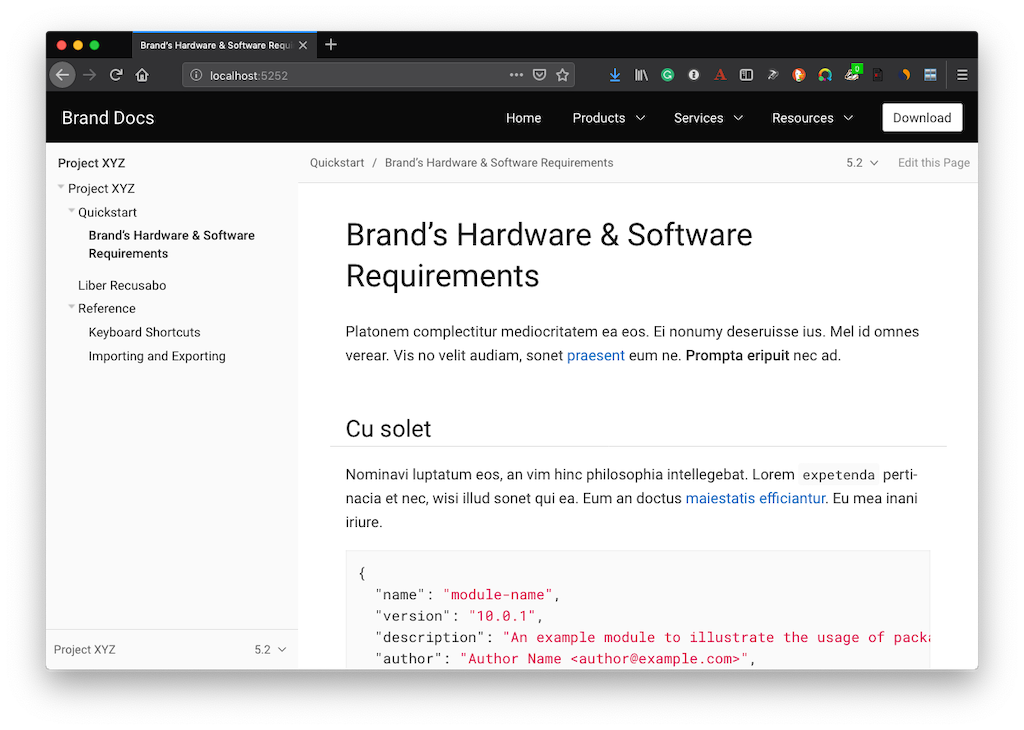
Running gulp preview generates a dummy site that uses the UI in its current state; which you can see an example of below.
Then, as you make changes, the site will automatically rebuild to reflect those changes.
When you’re happy with the changes that you’ve made, and have committed them,:
- Stop the live preview by pressing
ctrl + c.
- Run
gulp pack to generate a new, distributable, archive (which will be named ui-bundle.zip).
This can be distributed manually or stored remotely for ease of access across all the Playbooks that will use it.
Why Is This Structure So Beneficial?
If you’re seeing it for the first time or if you’re coming to Antora from another technical writing platform, they may take a little bit of time to sink in.
After a bit of usage, they can become second nature to you.
However, if you’re finding this approach a bit odd or strange, here are four reasons why I believe it’s ultimately the right way to go.
Assets and Examples Are Separate From Source Files
You might be thinking that you could intermix asset files, such as images, in alongside your source files, which is what other platforms, such as Sphinx-Doc, allow.
That doesn’t work in Antora.
Why?
Because to include an image file, you have to use the image directive.
So by default, the image directive uses the module’s images directory as the base path to the image.
image:enterprise/firewall/firewall-1.png[Figure 1: Empty File Firewall configuration]
If the path to the image isn’t relative to that directory, then it will not be found.
Now, this path can be overridden, but by default, that’s the path that you have to use.
In doing so, it implicitly — and strongly — encourages the separation of content from static assets.
The File Structure Is Easier To Learn
However, my existing tool mixes both; I hear you saying.
I was in just such a position some months back and felt the pain of having to find and relocate all the asset files, out from among the content files.
I can’t say how much if a pain in the backside that was.
So, I’m not coming at this from a purely academic point of view.
However, by having to go through that pain, the file structure is now infinitely cleaner — and therefore more manageable — than it was before.
Having the files structured in this way may have come down to lack of knowledge on the part of previous contributors or a lack of clarity in the previous platform’s documentation.
Regardless, when Antora doesn’t let you do it in the first place it’s all that much harder to get yourself into trouble in the first place.
That said, even with the best systems you can still choose poor file and directory naming conventions and wind up with a massive mess of files.
I’m not sure of anything — other than diligence — that’s going to help out there.
However, at least Antora pushes you in the right direction.
Note: In a future post, I’ll cover a migration strategy that you can use to make migration as rapid and painless as practically possible.
It Encourages Content Reuse Not Duplication
By providing a _partials directory as part of the core design, Antora strongly encourages you to reuse content — not to duplicate it.
This concept will be intrinsically familiar to software developers who follow this paradigm when writing code.
And it makes sense.
For example, say you are documenting an API, and each section references a standard set of configuration options, such as scheme, hostname, port, username, and password, and you’ve dutifully organised that content in a table, such as the one below.
|===
|Option
|Setting

|scheme
|`https`

|hostname
|`localhost`

|port
|`8080`

|username
|`admin`

|password
|`password`
|===
It’s incredibly wasteful and costly to copy and paste that table into every page that needs it.
It’s far more efficient to extract that content out into a partial, and include it where it’s needed.
To do so, you’d use Antora’s include directive, as below.
include::{partialsdir}/log-definition.adoc[]
You can see that it’s referencing a file called log-definition.adoc, which will be in the root of the module’s _partials directory, because it’s prefixed with {partialsdir}.
No need to include the full path, as it’s handled for you.
Easy to create small, reusable, snippets of content.
You Are Strongly Encouraged To Organise Content Into Related Modules
Perhaps “strongly encourages” is a bit much, but the documentation encourages you to use modules to store logically related content.
Take the breakdown below for the ownCloud documentation:
modules
├── ROOT
├── administration_manual
├── developer_manual
└── user_manual
You can see that, in addition to the ROOT module (which is used as an umbrella for introductory content) there are three modules: administration, developer, and user.
By breaking down the content in this way, it’s easier to maintain, as you push to keep items together that belong together.
The principal reason for doing this is the simplicity of long-term maintenance.
That might not make sense at first, but by breaking content down into logical groupings, it’s easier to maintain over the course of time, because the content isn’t all stuffed into one, giant, monolithic module.
When you want to find something or to add in something new, when you’ve taken the time to build a logical structure, it’s easier to intuit where that item will be or should be added.
Taking that further, if you break it down from one large module, into a series of smaller modules, then that same intuition requires less time and effort to complete.
In Conclusion
While there’s far — far — more to Antora than I’ve covered in this post, these are the three core concepts that you need to familiarise yourself with, if you want to use Antora effectively and efficiently.
I strongly encourage you to read through the linked documentation and experiment with what you learn, whether in a test project or on a live project.
Antora is an excellent tool that I’m growing to love more every day.
If you give it a chance, I’m convinced you’ll see just how feature rich and well designed it is.
Now for the fun part.
If you’re already an Antora user, what do you think about it?
If you’ve experimented with it, after using other platforms for years, what were your first experiences with it?
Did you want to continue, or were you frustrated by it?
I’d love to get your input.
Related Articles


Join the discussion
comments powered by Disqus