Last week, my most recent Pluralsight course launched! In this post, as well as shamelessly promoting it, I step through what it took to create it, including my online course creation process.
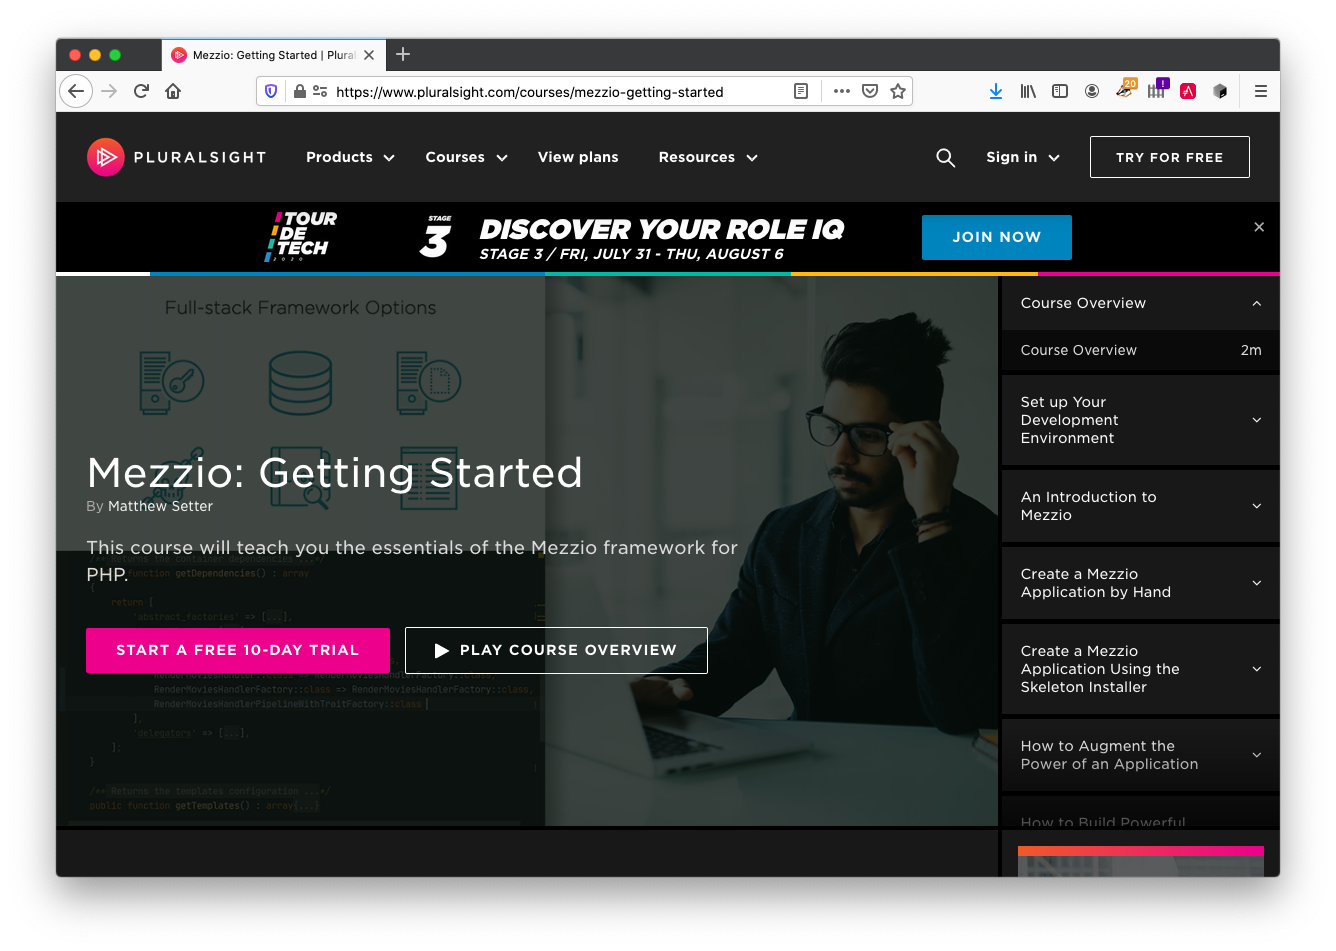
It’s been in development for some time now, but on Tuesday last week, my most recent Pluralsight course, Mezzio: Getting Started, launched!
Given that, it’s time to reflect on the process of creating it, and see what I can learn from the process, so that I can improve and make a better course next time.
Disclosure: I recommend some products in this post, some of which contain affiliate links.
This means that I may receive a commission if you click a link and purchase something that I’ve recommended.
Hey, you have to pay for website hosting somehow.
Right?
Please check out my disclosure policy for more details.
This is going to be quite cathartic, I’ll be honest.
However, I’m sharing it so that, if you’re interested in creating an online course, regardless of how you publish it, you’ll know just what it can take to create one.
If you’re still with me, this is a long, no-holds-barred, “the good, the bad, and the ugly” type of post.
So, if you’re sticking with me, then grab yourself a cup of your favourite beverage, and perhaps a snack, as you’re in for a long read, but a LOT of know-how.
If you haven’t seen the course yet, here’s the course’s description:
Getting up and running with the Mezzio framework doesn’t need to be a daunting task. In this course, Mezzio: Getting Started, you’ll learn how to build applications using the Mezzio framework for PHP.
First, you’ll get set up and ready to go with the tools that you need. Next, you’ll get an overview of the framework’s core concepts and components. Finally, you’ll learn how to build an increasingly sophisticated application using the framework.
When you’re finished with this course, you’ll have the skills and knowledge of the Mezzio framework needed to build powerful and robust web-based applications.
The intent of the course is to give you all the knowledge that you need about Mezzio, so that you can start building a real, working, get-paid-for-it application as quickly as possible.
Yes, you do have to learn some theory and concepts, but you won’t get bogged down in doing so.
You get as much theory as you need, so that how to build an application with Mezzio makes sense.
Mezzio is the fourth iteration of what was originally known as Zend Framework.
I say fourth iteration, because Zend Framework had two initial versions, after which it was rebranded as Zend Expressive.
So Mezzio, effectively, is the fourth iteration of the framework.
Here’s a Short Summary of the Course
It starts off by getting your development environment ready; on Linux, macOS, and Windows.
It then gets in to some of the essential concepts and theory, such as what is PSR-7, PSR-15, and Middleware; some of the key concepts which the framework is built upon.
After that, you learn how to build an application by hand, without any tooling or automation support.
The intent here is so that you learn about all of the moving parts that are required to have a working application.
Then, you learn how to use the Skeleton Installer project to rapidly bootstrap the application which was just built by hand.
Then, to close out the course, you learn about extending the power of the application, by adding database functionality, and how to build powerful middleware pipelines.
How I Came to Create the Course
Some months ago, my wonderful Pluralsight ASM (Author Success Manager), Kim, and I started discussing the possibility of creating more courses for Pluralsight.
This happened after I, as I so often do, got all super-enthusiastic about creating online courses for Pluralsight again.
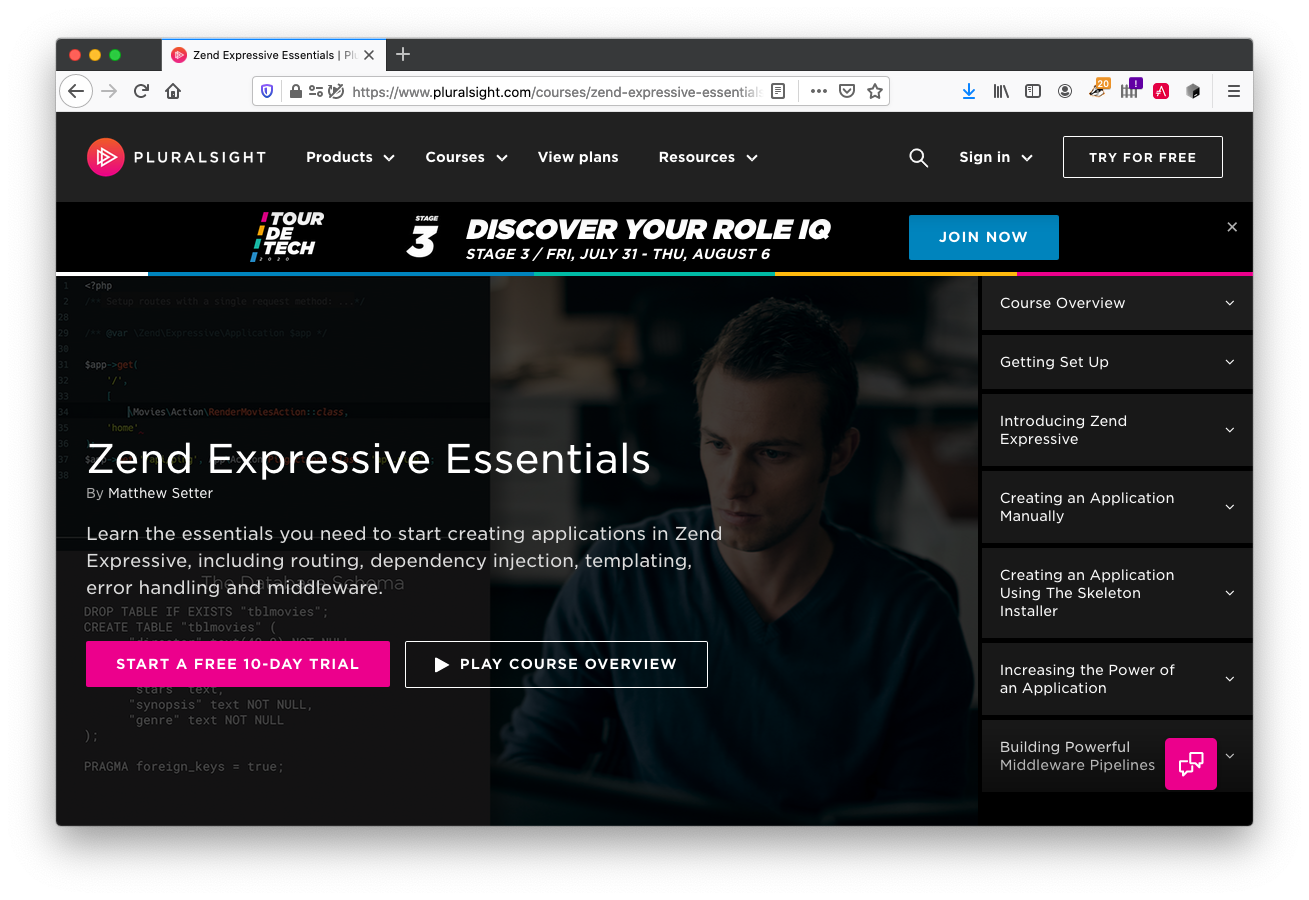
I say “again”, as it had been some time since I released my last one, Zend Expressive Essentials, with them.
I’d been looking at the available course list ideas which Pluralsight had on offer and had put my name in the proverbial hat to see if they’d commission me to create one or more of them.
Sadly, some of the course ideas were deprecated shortly afterward, and others were assigned to other authors.
No hard feelings (genuinely) and I wish them well with creating the respective courses.
This, as you can well assume, wasn’t the end of the story for me.
My ASM and I started discussing the possibility of me refreshing one or more of my two existing courses.
Of the two, refreshing Zend Expressive Essentials made the most sense to me; primarily because of a recent rebranding of the framework.
If you’re unfamiliar with the rebranding, it all started when Zend, the company which originally sponsored Zend Framework and Zend Expressive, was bought out by Roguewave Software, which was then bought by Perforce.
To cut a long story short, Perforce wasn’t interested in the framework, but the main contributors were committed to continuing to support and develop it.
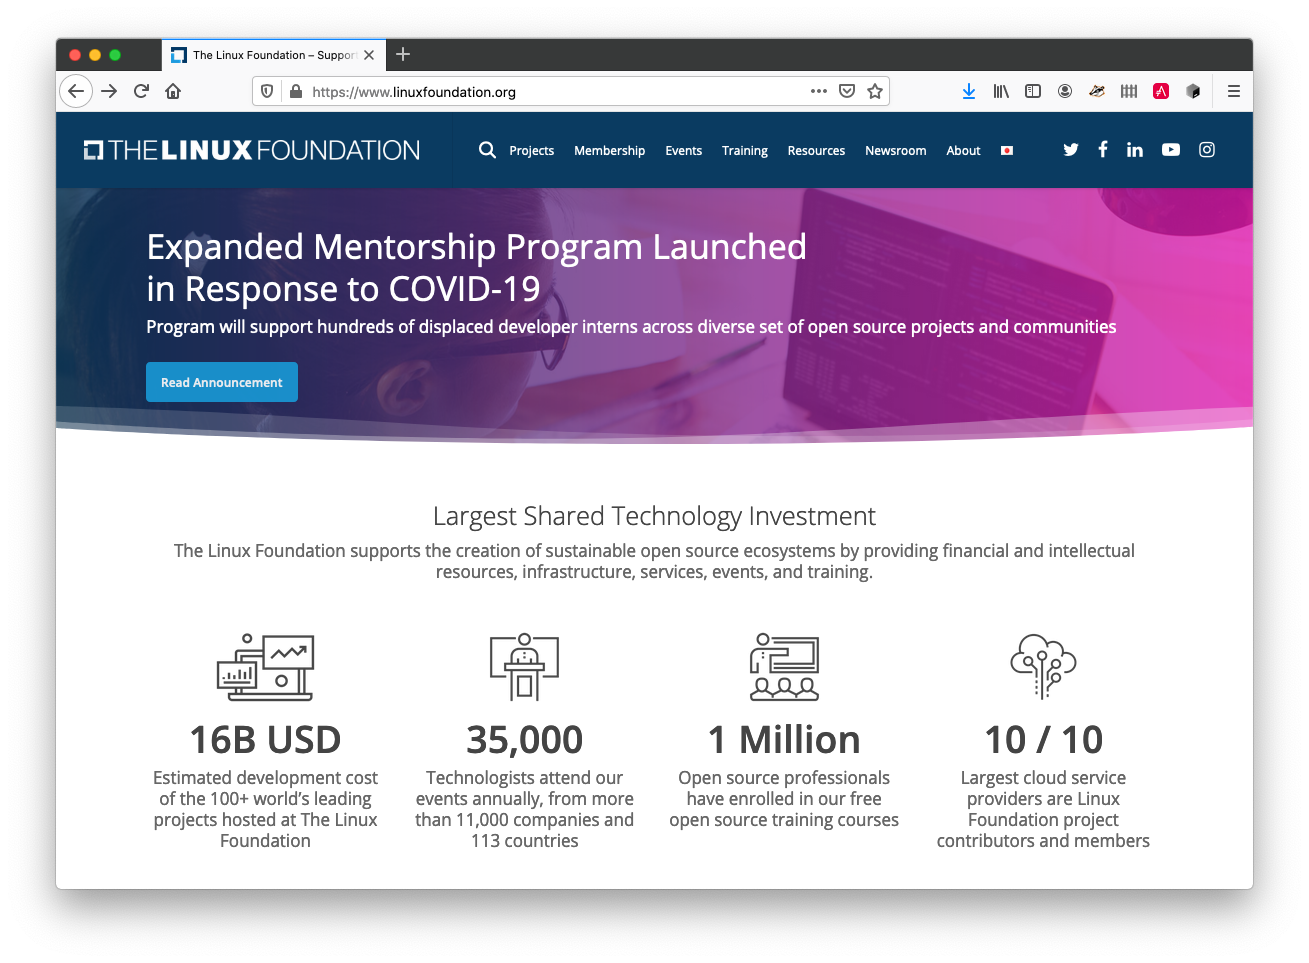
So, after much discussion, the decision was made to re-home the framework at The Linux Foundation.
Because of that, it needed to be rebranded.
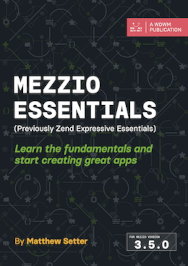
After some discussion, Zend Expressive was rebranded as Mezzio, and the Zend Framework libraries (which Zend Expressive is built upon) were rebranded as Laminas; e.g., zend-mvc was renamed laminas-mvc, and zend-servicemanager was renamed as laminas-servicemanager, etc.
You can read the full story of what happened on the Laminas Blog.
Anyway, back to the course.
In addition to the framework’s rebranding, it had been some time since my Zend Expressive course had been released (April 27, 2018), and, as you’d expect, a bit had changed in the underlying framework and referenced libraries.
Code had been added.
Code had been deprecated.
And a few other aspects had changed in various ways - as is always the case with software.
Want to Learn More About Mezzio?
Mezzio Essentials teaches you the fundamentals of PHP's Mezzio framework. It's a practical, hands-on approach, which shows you just enough of about the underlying
principles and concepts before stepping you through the process of creating an application.
The Early Stages of the Course Creation Process
So, for all of these reasons, my ASM and I decided to create a new course, which is effectively a refresh of the existing course.
We discussed it in some really funny and silly sessions, often late into the evening here (Berlin time), to flesh out what the course structure would be, what my key aims for course attendees were, etc.
After we’d gotten all that information together, I put together and submitted a course outline for Pluralsight to review.
After that, there was a bit of time where I could put my feet up (read: do more client work and be a loving father and husband) while I waited to hear if the course outline had been approved, or if I had to make any further changes to it.
Gladly, the course outline was rapidly approved.
Winning!
The next step was signing the contract.
Like any worthwhile business endeavour, contracts are involved.
No, there is no sarcasm or negativity here.
I often have great respect for organisations where I have to sign contracts.
This is because contracts clearly spell out what the responsibilities of both sides are, but most importantly for me, what I have to live up to, when I have to have the work completed.
Based on that, I can clearly track my progress, through to completion.
If you know me, then you’ll know that I’m a pretty relaxed type of person.
Perhaps it’s my upbringing in Queensland, Australia.
Perhaps it’s because I come from a sun culture.
Regardless, at times I need a bit of a push to ensure that I get things done.
I find contracts are an excellent source of this.
With the contract signed off, by myself and Pluralsight, the clock was now ticking.
I had to get the course created!
Can I do it?
Yes We I can!
Sorry, too much Bob the Builder with my kids lately.
Where to Begin Creating the Course?
As this was a course refresh, there was, in some ways, less work for me to do.
Well, at the start, that’s what I thought.
As the framework hadn’t, markedly, changed from the previous version, my approach to creating the course was this:
- Use a lot of my original course material; then
- Review and update said course material to:
- Reflect the new branding and code changes since the previous course was published
- Integrate new teaching ideas, styles, and techniques that I’d learned since creating that course — especially from creating content for my YouTube channel and more recent client work.
- Add a general touch of flair and “Matt-ness” to the content
After that, I then set about creating the course in the following way:
- Create the initial module’s directory structure
- Create the script for the first module
- Refine the script
- Create, refine, and record the first video’s slide deck
- Record the slide deck
- Record the live demo videos and related content
- Record the Live Demo Audio Narration
- Compile the video in Screenflow
- Do audio post-production
- Export to Pluralsight’s video and audio requirements
- Upload the video to my account
Create the Initial Module’s Directory Structure
While I’m a pretty relaxed, even casual, type of person, I’ve found that when it comes to work, I need to have a clear and well-thought-out sense of structure.
If I don’t, I’m like one of those stereotypical old professor types who, when you walk in to their office, they have papers all over the desk, who seem hopelessly lost when it comes to finding anything.
When I do have a clear approach and structure, I’m able to be far more creative while spending far less time and energy doing what I need to do.
The net result is that I have much greater success and satisfaction doing the things that I love doing.
So to help me do that when I’m creating online courses, I’ve worked out a reasonably trivial, yet helpful course file and directory structure.
Here’s a partial sample of the one that I created for the Mezzio course:
Mezzio - Getting Started/
└── module-1/
    ├── audio/
    ├── exported/
    ├── images/
    ├── slides/
    ├── videos/
    └── script.adoc
I’m a command-line junkie, so created it using the following bash one-liner:
mkdir -p "Mezzio - Getting Started"/module-1/{audio,exported,images,slides,videos} && \
   touch  "Mezzio - Getting Started"/module-1/script.adoc
You can see that the root folder is named after the course, and under there is another directory, named module-1.
Under module-1, there are five directories (audio, exported, images, slides, and videos) and a file, script.adoc.
Each of these five directories is named after the content which it will contain.
Within the audio, exported, and videos directories, I’ll have at least one file that matches a video within the module.
Taking the first video of module 1 as an example, it would eventually contain the following files:
audio\1. Introduction.{aiff,wav}exported\1. Introduction.mp4videos\1. Introduction.screenflow
I won’t claim to having a clean naming structure for that content within those directories, though.
But, at least if I’m looking for a file for that module, then I have a clear starting point to find it.
I follow this pattern for each module in the course.
2. Create the Script for the First Module
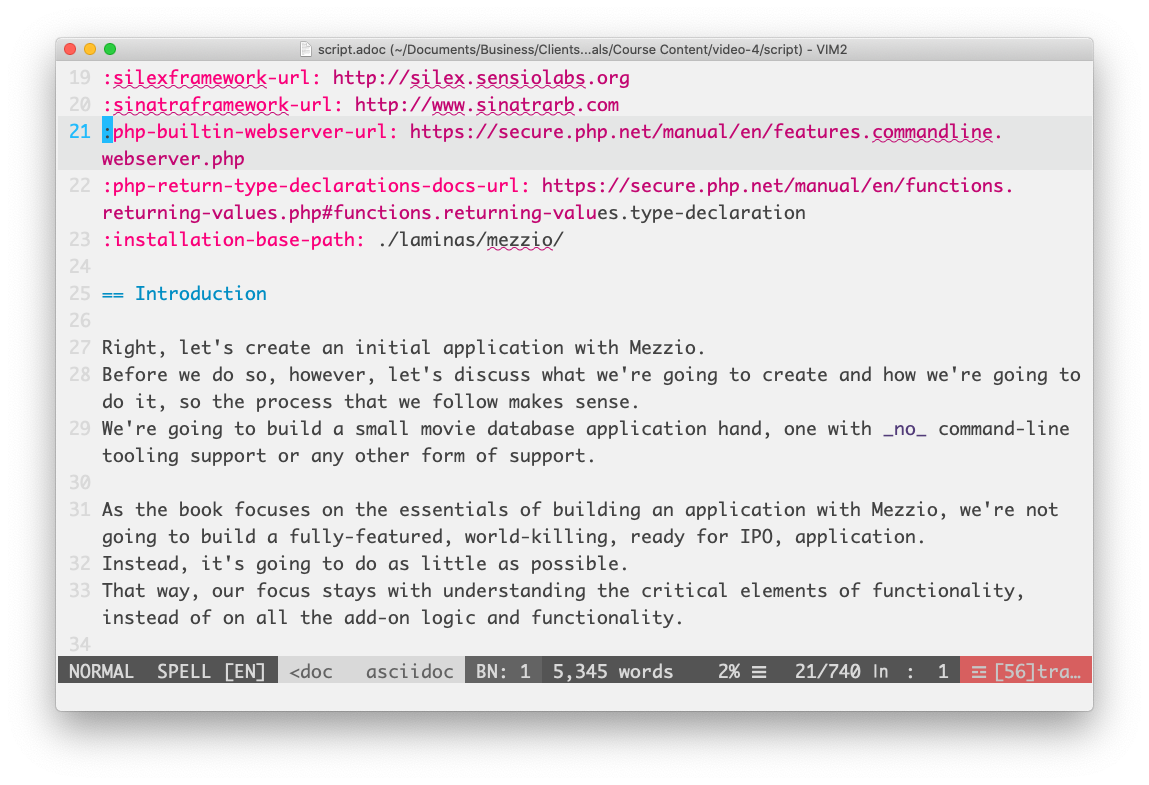
Once the initial module’s directory structure’s been created, I’ll then create the script for the module as a whole, using my all-time favourite editor of choice, VIM.
The script contains what I’m going to say at each point throughout the module.
The reason for this approach, as I said earlier, is that, except for the slides, I record audio and video separately.
Now, this might, potentially, put you off taking one of my courses, as you might feel that it would sound like I’m reading from a script and therefore be a pretty boring experience.
However, nothing could be further from the truth.
By reading from a script, I know that my courses are clear, concise, well-thought-out, structured, and, above all, accurate.
Sure, the course does have a more formal quality to it, but then, that’s what you expect when you take a Pluralsight course.
If you want something that’s less structured and more informal, then come check out the videos on my YouTube channel.
They’re where I free-wheel it and have more of an informal, one-on-one style chat about a particular topic or technology.
When you’re creating a course as in-depth as the ones for Pluralsight, at least for me, you have to have a very clear sense of structure, so that you can create all of the content that you need to create — as efficiently as possible.
I’d be lost if I tried to free-wheel a course like this.
For what it’s worth, I often do multiple takes of the audio as I’m recording it in Audacity, and while I’m doing it, I’m waving my arms, gesturing, and generally throwing all I can in physically to make sure I’m as enthusiastic as I can be.
Huge thanks to my mate Joe. P. Ferguson who inspired me to do this to liven up the sound of the recorded audio.
I may miss the mark from time to time, but it’s not for a lack of trying.
3. Refine the Script
After the script is written, I then go over it several times to ensure that it’s accurate, that the content flows in a logical order, and that the words used are both natural and prounouncable.
If you were one of my neighbours, you’d see me in my top-floor home office reading out the scripts and then correcting them as I flubbed the pronunciation of a word or phrase.
Reading the script aloud is a critical step for ensuring that I narrate the scripts as close to how I normally speak as possible.
If I don’t do that, the words that I use will likely sound too stuffy or formal, or I’ll have to record sections numerous times as the phrasing is too difficult to speak in a natural way.
If you just read the script, these problems will always remain hidden.
Thanks to Wistia for this tip.
Sure, this is a professional course, but I’m aiming for it to feel as though it’s just you and me in a room, and I’m mentoring you in how to develop with Mezzio.
With the script created, I then break it down in to logical parts, one for each video in the module.
After this, I then add an introduction, conclusion, for each video, and a “what’s coming up next” for all but the last one.
This helps me ensure that I follow a simple structure in each video:
- Say what you’re going to say
- Say it
- Say what you just said
- Say what’s coming up next
This helps the course attendee know what to expect, know if I delivered on that expectation, and know what to expect next.
With that done, I then script an introduction video to be the first video in the module, and a conclusion to be the last video in the module.
At a module level, this helps set and manage expectations of what will be taught.
4. Create, Refine, and Record the First Video’s Slide Deck
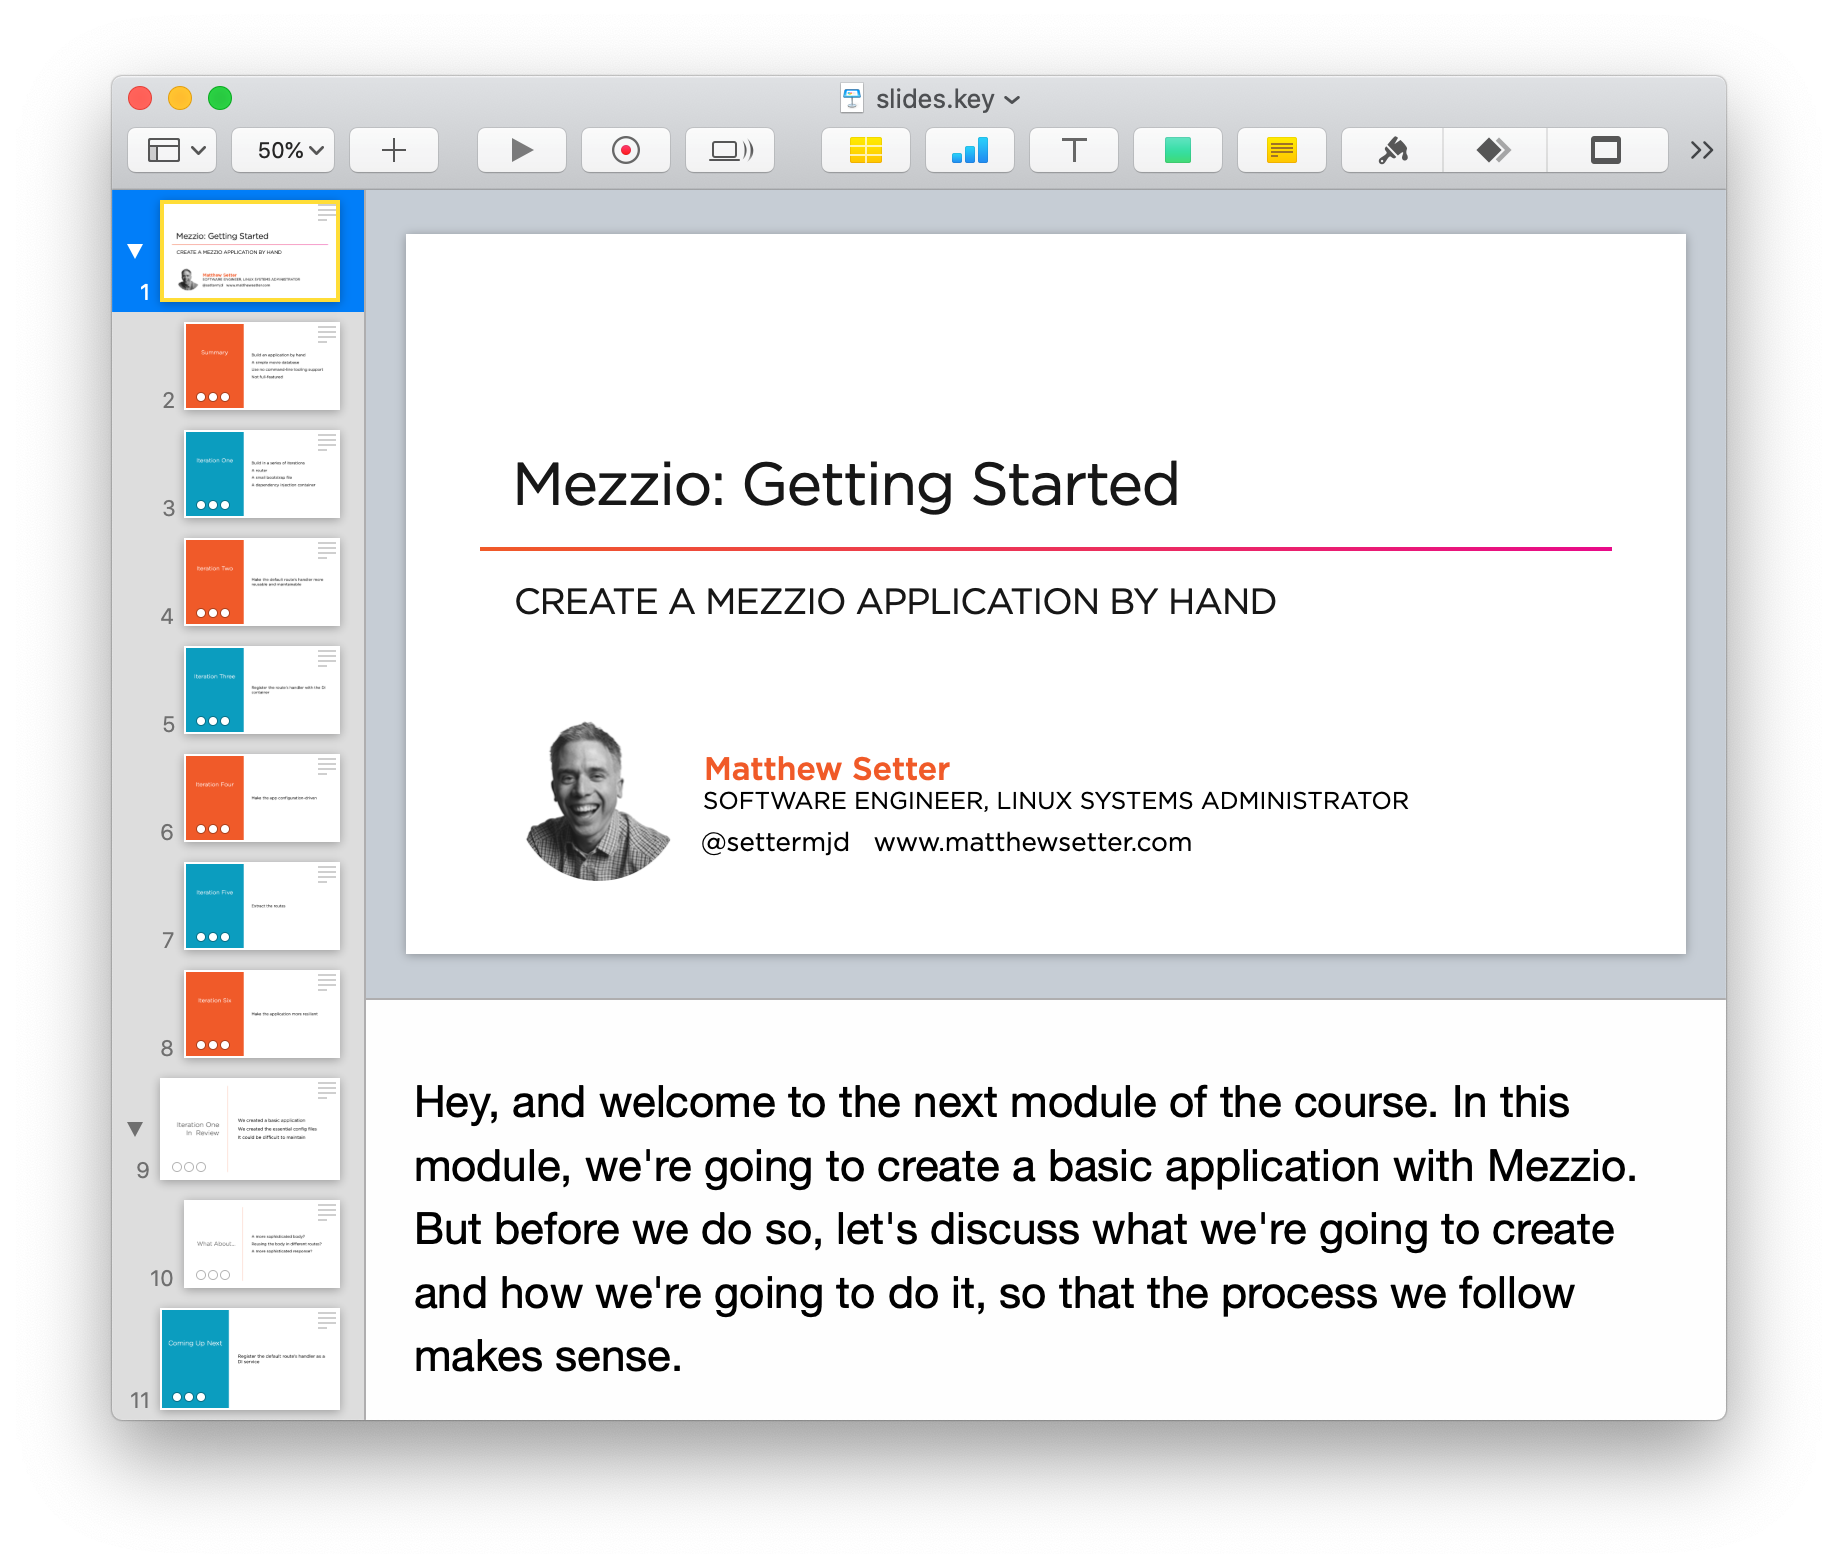
Now that the script’s been created and refined, it’s time to create the slide deck for each video.
For creating slide decks, my preference is Apple Keynote, though I could also use LibreOffice Impress or PowerPoint.
However, after having used Keynote for the last 5+ years, I’ve found that its combination of features, combined with its excellent UI/UX lets me create slide decks extremely quickly.
That said, Pluralsight supplies authors with a Keynote and PowerPoint template, along with a massive set of ready-to-use icons, so there’s not near as much work to do to create a slide deck.
With the script ready, I then, a video at a time, create a new Keynote presentation, working through that video’s script, and building the presentation around it.
I copy the relevant section of the script in to the presenter notes, and then build the slide from the notes.
After the slide deck is finished, I then run through the slides several times to make sure that they have the flow that I’m looking for.
5. Record the Slide Deck
Now that all of the slide decks for the module are ready, I record the slide deck for each one, using Keynote’s built-in recording functionality.
It doesn’t always go well.
However, usually, with practice beforehand and my trusty MXL-990 condenser microphone, the mistakes are kept to a minimum.
Keynote makes this a breeze, as the functionality’s embedded in in the app.

I think PowerPoint offers the same functionality as Keynote.
However, sadly, LibreOffice doesn’t 😢.
That said, if I really wanted to use LibreOffice, I could just present the slides and record the presentation using either Screenflow or OBS (Open Broadcast Software).
I think I’ll set myself the challenge to use LibreOffice for my next Pluralsight course.
With the slide deck’s recorded, I then export the recorded slides to an MP4 video, saving them with the applicable video’s name in the video directory for that module.
6. Record the Live Demo Videos and Related Content
With the slide decks recorded and exported, it’s time to record the live demo content for the first video.
Unlike how I create the slide decks all at once, the remainder of the steps in the process are all done one video at a time.
I tried to batch each component in the process, but found that my productivity dropped like a stone as I had to keep remembering where I was up to in each respective video, each time I came back to work on it.
The mental context switch took forever and left me really drained and deflated.
Now here’s something I did differently for this course.
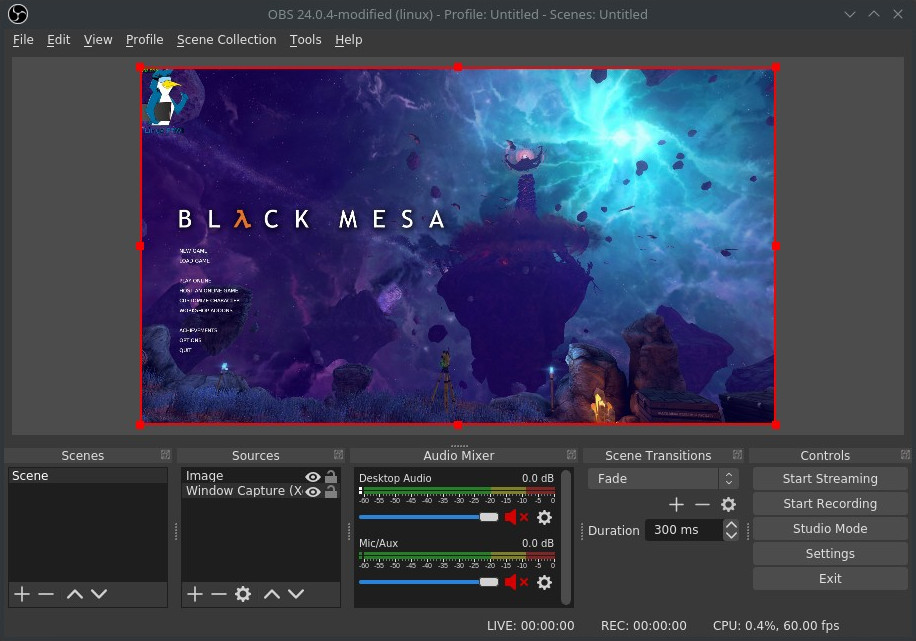
While I recorded all of the live demo content using Screenflow for my first two courses, I’ve recorded a large portion of the content on Linux, using OBS, in this course.
To be honest, I had a pretty miserable experience recording on Linux at first.
I would record some great live demos, but when I attempted to edit them under macOS, there’d be no sound.
Additionally, the video and audio didn’t always sync, the end of the video would be missing, and there would be some nasty screen tearing.
I think this was from some form of corruption or misconfiguration in my original Linux Mint installation.
After buying a new graphics card, the Geforce GT 1030 and installing Ubuntu 20.04, everything changed!
All of a sudden, the quality of the recordings shot up, and the effort dropped right off.
To be fair, I’d never used OBS before, so I didn’t fully understand the functionality it had to offer, how the UI was laid out, the approach that it takes to recording content, or the mindset that you have to use to get the most out of it.
After some a lot of experimentation, chatting to friends who are experienced with using it (thanks Jared Morgan), I’ve come to appreciate just how powerful OBS is, and it’s rapidly becoming my screen recording tool of choice.
In addition, I have dedicated user account setup just for recording video content.
It has:
- Keyboard shortcuts for starting and stopping an OBS recording
- The desktop resolution set to 1280 x 720
- A Pluralsight desktop background; and
- Custom presets in the standard apps I use to record live demos. The core of these are Gnome Terminal, Firefox, and PhpStorm.
Given that, all I need to do to record a live demo is to login as the content user, get the windows ready that I’m going to record, and start recording.
To speed up the recording process, I make a list of the steps that I need to take in the order I need to take them from the script.
After I stop recording, OBS creates an MKV (Matroska) file of the recording in the user’s Videos directory.
Note to self: I need to look in to whether it will also export to MP4, as that’s the format I need for editing in Screenflow on macOS.
As it exports to MKV, I need to use ffmpeg to convert the MKV file to MP4, so that I can edit it in Screenflow on macOS.
For what it’s worth, I have tried editing video on Linux, using Kdenlive and OpenShot.
However, based on my experience to date — or perhaps lack of it in the open source tools — editing in Screenflow is blissfully easier and more efficient.
The other thing about this process, is that OBS names the files with a timestamp of when they were created.
So, after recording each one, I need to then rename the file so that, when I’m editing the file, I know what the file is for.
It’s something little, but needs to be done.
With the video exported and renamed, I then back it up to my NAS and copy it to my Macbook Pro.
7. Record the Live Demo Audio Narration
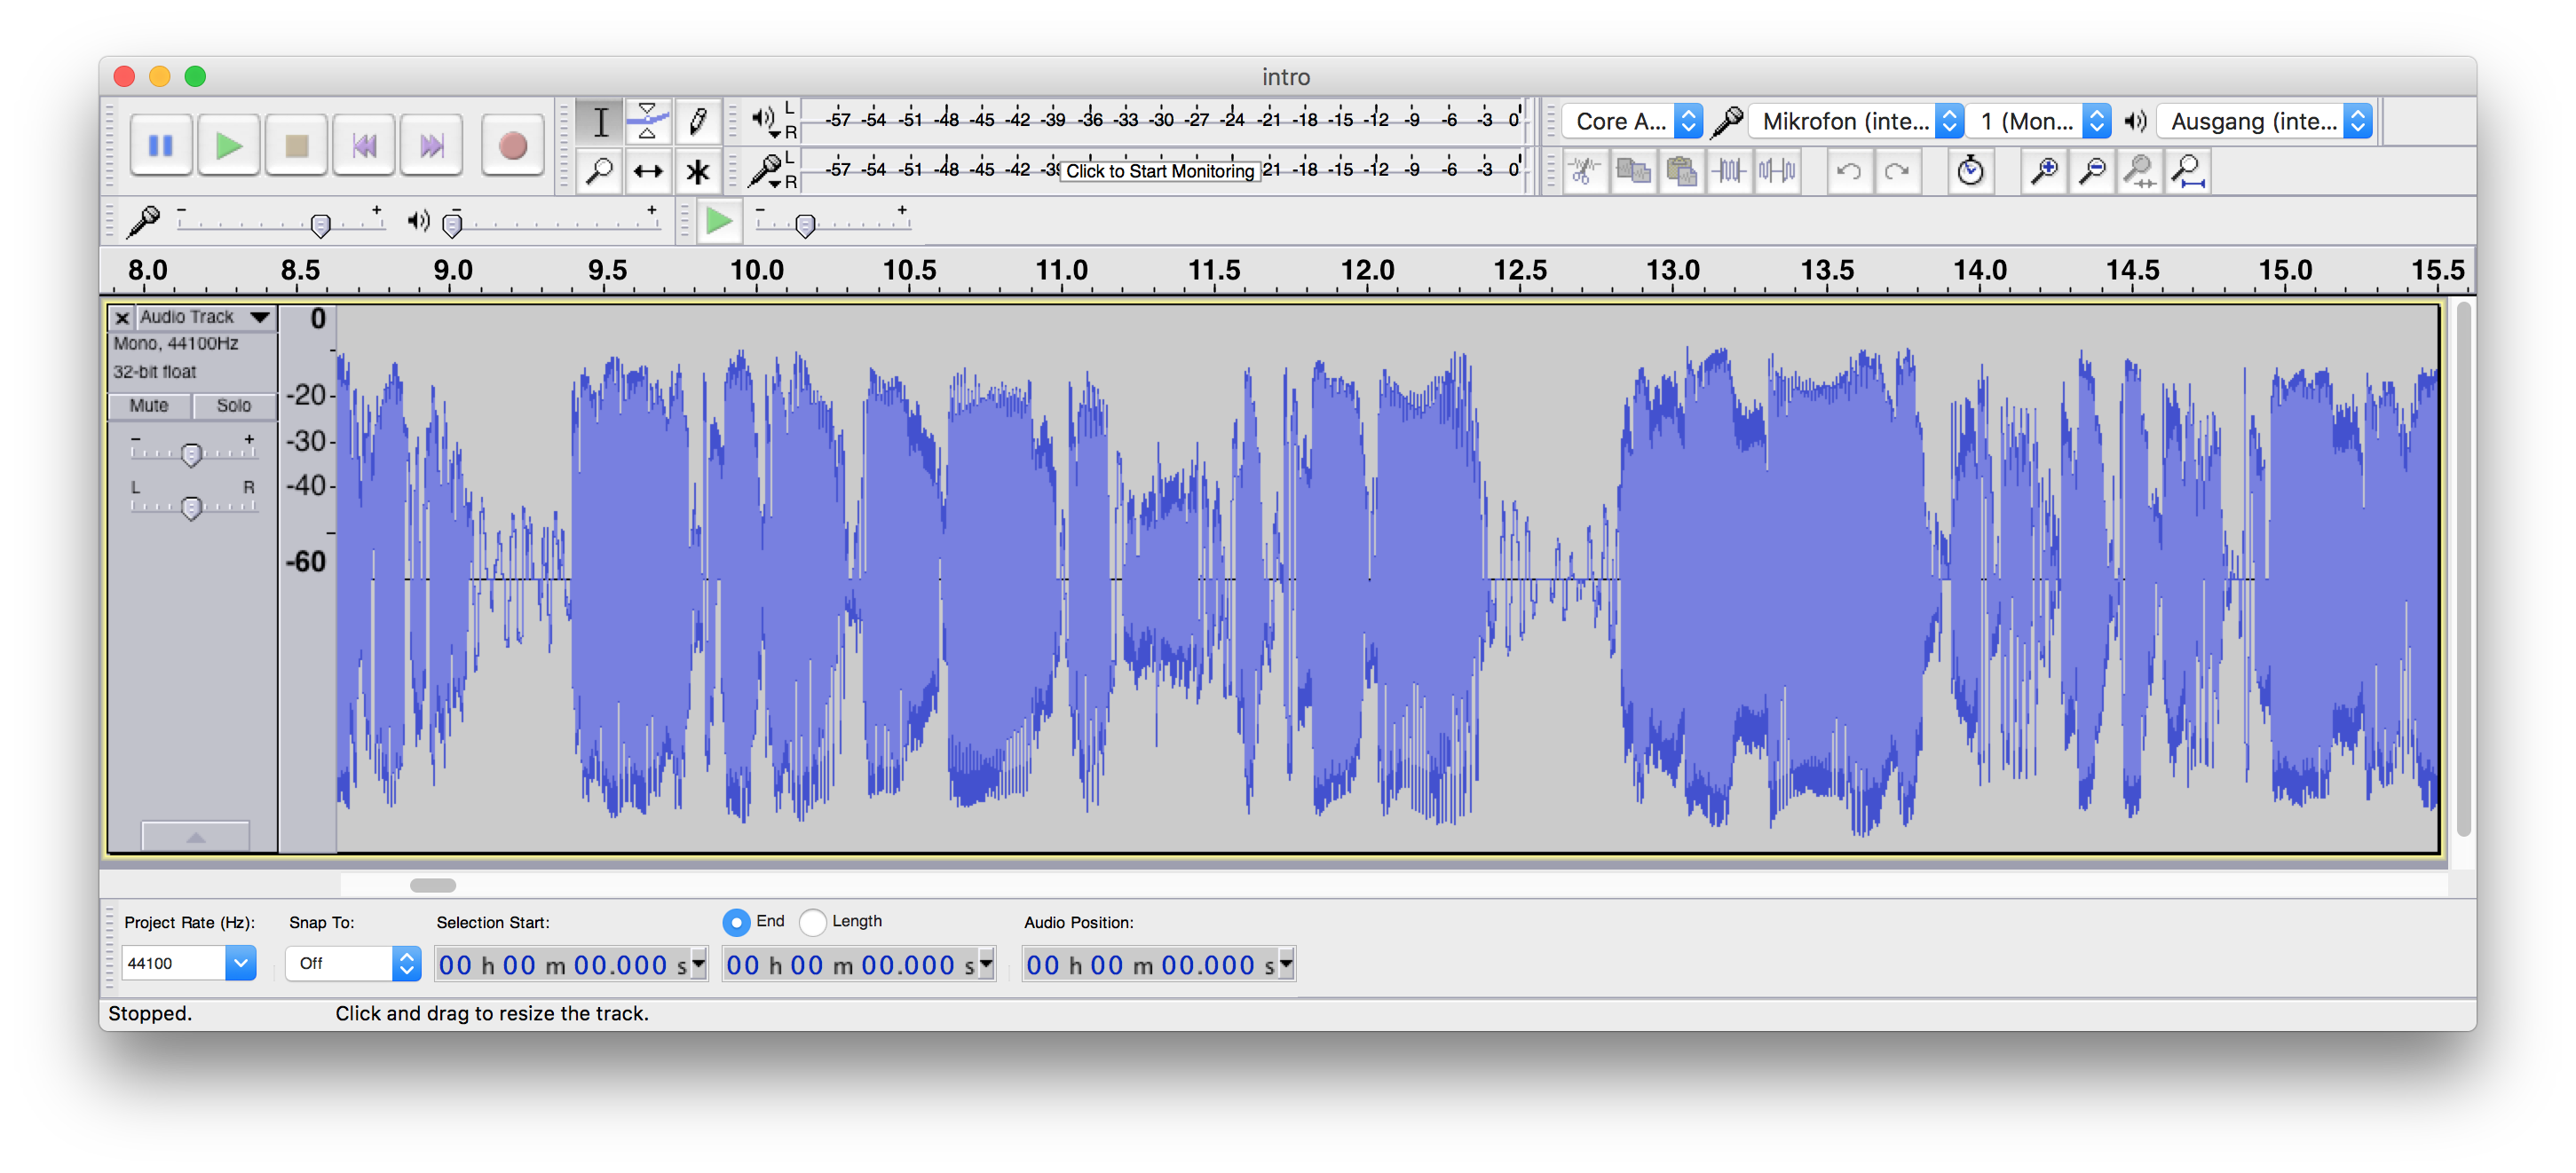
With the video done, I then open up Audacity and record the audio narration for the live demo.
This is, often, the easiest component of the process.
I always leave this until after the live demo video’s been created, as that way I can change the narration if I have to, because of some quirk in my local setup or other unexpected change.
Similar to recording the slide deck, I raise my desk, turn on my mic, put on my headphones and record the audio with loads of passion and energy.
When it’s done, I then go back through the recording and edit out any flubs, multiple takes, lengthy silences, and other things that detract from high quality audio.
I don’t know what other audio editors (or digital audio workstations), such as Adobe Audition, are like to use.
To be honest, I’ve never tried them.
So far, Audacity does all that I need, with capacity and features to spare!
I think it will be a while before I have to move on.
I don’t use that much functionality, I think.
I just edit recordings and use a macro which I’ll cover a bit later.
It’s a nice bonus that Audacity’s both open source and free!
Sure, it’s not the prettiest application around, but it’s a workhorse.
It’s yet to let me down in any way.
8. Compile the Video in Screenflow
Up until now, all of the work that has gone in to creating the course is reasonably straightforward.
Sure, it takes time and effort to plan, write, record audio, live demos, and slide decks, but editing or fixing mistakes is relatively straight-forward.
Merging recorded audio with live demo recordings, and combining all of the respective artifacts in to one, coherent, interesting-to-watch video is another matter entirely.
Of all the parts of the process, this is the one where I’ve found a significant proportion of my course creation time goes.
Here’s what it looks like.
- Create a new Screenflow document
- Import the Slide Deck Video File
- Combine the Live Demo Video and Audio
- Add Extra Content to Fill in Dead Patches or Add Greater Context and Meaning
- Add Text Overlays, Lower-thirds, Animations, and Callouts
Create a New Screenflow Document
I create a new Screenflow document and import the slide deck video, live demo video, audio files, and any other media assets.
I’ve tried out a number of different video editors over the years, including OpenShot, Kdenlive, Camtasia, and DaVinci Resolve.
Of all of these, the one that I’ve found the simplest and most efficient to work with is Screenflow.
It doesn’t have the most features.
I think that would have to go to DaVinci Resolve.
But from an editing perspective, for creating the type of content that I’m creating, its interface makes recording, editing, and exporting virtually painless.
Actually, I think that it goes a bit deeper than that.
I’m not a professional videographer or documentary maker.
I don’t have the mindset nor knowledge that those types of professionals would have.
To me, the approach that Screenflow presents in their UI/UX is one that is targeted to the way I work and the kind of content that I’m creating (for now).
Given that, after a little bit of experimentation, the software fits like a proverbial glove and lets me create content as quick as I’m able.
In the future, as I learn more, I suspect that I might end up migrating to Camtasia, or, more likely, DaVinci Resolve, as I learn more, become more proficient, and my workflow expands sufficiently.
It’s an added bonus that DaVinci Resolve is available on Linux, which is where I’m moving, progressively.
Import the Slide Deck Video File
I then import the slide deck into the Screenflow document’s timeline.
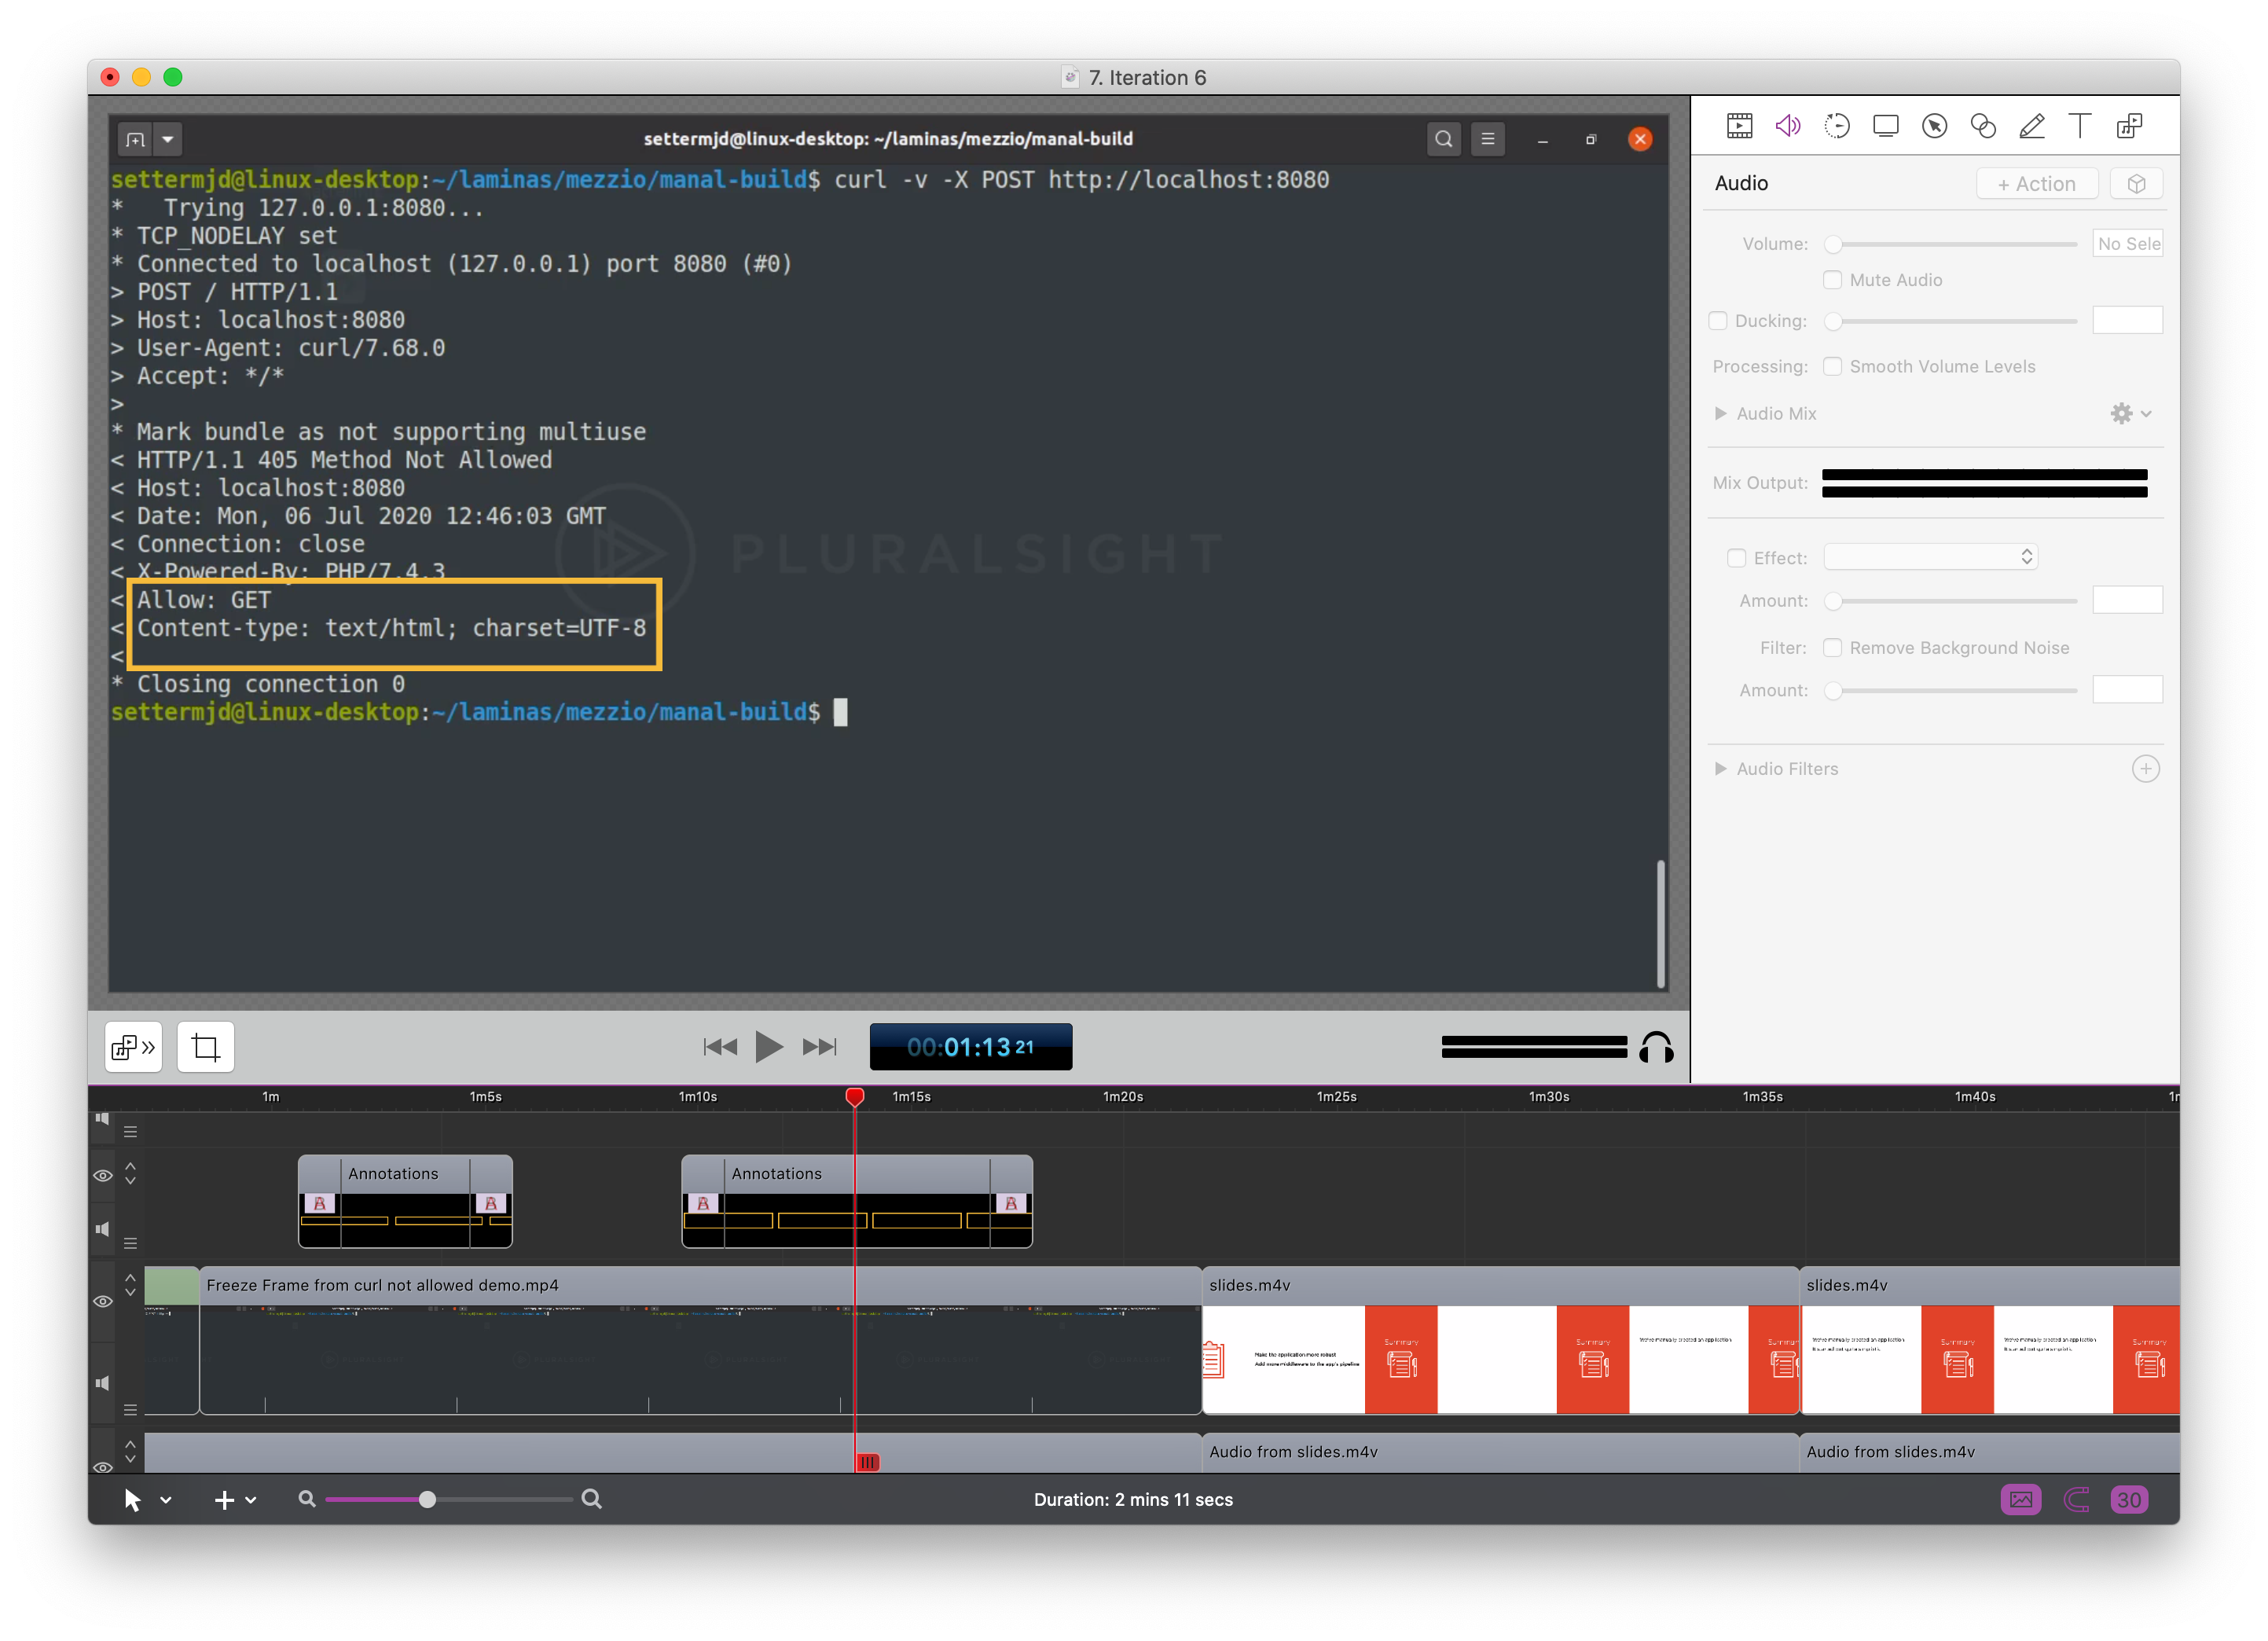
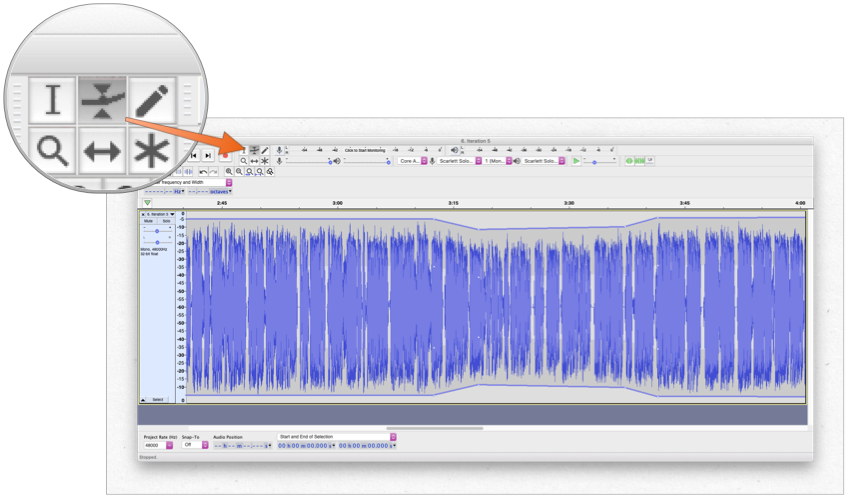
For the slide deck, I first detach the video and audio, open the Audio panel(1), and under “Audio Mix"(2), convert the audio from single channel, or mono, to stereo(3).

I need to do this as Keynote records in stereo, but the Focusrite Scarlett Solo mixer that I use records one channel.
The result is that the slide deck’s recorded audio only ever comes out of the left channel, at first.
After that, I then work through the slide deck and edit out any long silences and mistakes, so that what is left is the best quality recording.
After the audio’s changed to stereo (makes editing it a lot easier too) and the mistakes are removed, I then split up the slide deck recording in to the various parts, before moving the introduction to the start.
Combine the Live Demo Video and Audio
Depending on how the video is composed, I progressively add the live demo video and audio to the document’s timeline, and start merging audio and video.
This is where my time truly disappears.
The reason is that it can be a tricky process of combining them.
How should the audio and video be synced?
Should I neatly align a live code demo perfectly with the audio?
If the narration is shorter than the matching demo, should I speed up the demo, and by how much?
Sure, you don’t want to have someone pass out from boredom watching you type at your normal pace.
But on the other hand, you don’t want them to try and be the Flash, so that they can keep up with a demo which has been so sped up that it’s beyond the ability of the human eye to comprehend.
So it can be a challenging time trying to figure out if you need to add a transition between two points in a demo, cut out some of the demo, add more audio, cut some of the demo, etc, so that the two fit professionally together.
I am getting better at judging how to do this well, and at both planning out a video better, and writing better scripts, so that this time is minimised.
But, it’s still a work in progress, something which I suspect, will just take time, practice, review, and further discussions in the Pluralsight Slack channel.
Add Extra Content to Fill in Dead Patches or Add Greater Context and Meaning
Sometimes, after I’m done putting a video document together in Screenflow — okay, a lot of the time — there are moderately long sections of the video where nothing’s changing on the screen, and it’s just me talking.
For a stretch of 10 - 15 seconds, I don’t feel there’s any harm in having no changes in the video.
Actually, if there is too much going on, I believe that you can negatively impact information absorption, as the user likely becomes distracted by too much change occurring.
Conversely, if the time between something changing on screen takes too long, then I run the risk of the user tuning out.
So, I try to keep the momentum of the video going, by adding in a visual of some kind, one which will keep the pace going in the video.
These can be slides to draw attention to the key points of what I’m saying, an animation, or a supplementary recording, such as browsing a website which relates to what I’m talking about.
Add Text Overlays, Lower-thirds, Animations, and Callouts
Now that the video document’s been put together, it’s time to do some further post-production.
This is where I add those elements that round out the video and help the user get the most meaning out of them.
For example, I might add text overlays, such as URLs or names, or terms, to support what is being said.
I add lower-thirds to introduce each sub-section of the video.
These help maintain momentum, break up the video in to smaller chunks to help with comprehension, and help the user follow what’s going on more effectively.
I might add a callout or zoom in on a section of video, if doing so makes it easier to focus the user’s attention, or makes it easier to understand that section of content.
At this stage in the process, I’m usually feeling pretty good, as the significant majority of the work for creating this video’s complete.
I’m just, if you will, putting icing on the proverbial cake.
What’s more, it’s a lot of fun to add these items, judiciously, as I find they can make a good presentation so much more compelling.
Plus, it’s fun to play around with these things, too.
9. Do Audio Post-production
At this point, the video’s just about complete.
However, while I do love the sound which my MXL 990 mic and mixer produce, it still lacks a certain pizzazz.
What’s more, as the audio is composed of so many different audio files, invariably, the audio levels and recording style won’t be completely consistent.
I might have recorded one part in the morning, when I was ready to go, and extremely enthusiastic; so the audio levels will be notably higher, and you’ll hear me sound much more engaged.
Whereas I may have recorded another section of audio toward the end of the day; so I won’t have the physical energy or enthusiasm that I had at the start of the day, combined with not using quite the same mic technique or recording position as well.
So, I use Audacity to polish it.
To do that, I export the audio component of the video to an AIFF file, as it’s a lossless codec, and import it into Audacity.
When imported, I’ll then do a light amount of manual sound leveling using Audacity’s envelope tool, before applying my standard editing macros to it.
You can read more about them in my guide to making your voice sound sexy with Audacity.
But, in short, I apply:
- A Noise Gate
- Graphic equalisation
- Normalisation; and
- Compression
Before I learned about Audacity’s custom macro functionality, I used to apply all of these steps manually.
These days, I have a custom macro setup.
All I need to do is to click Tools -> Apply Macro -> Basic Audio Editing, which is what I called the macro.
With the effects applied and the audio quality increased, I then have a brief listen to check if the audio’s now a little too loud or a little too quiet.
If it’s too loud, I then reduce the gain.
Conversely, if it’s too quiet, I increase the gain a bit.
After that, I export the revised audio to WAV, again, so that no quality is lost, and drag it into Screenflow, and silence the original audio track.
The video is now, ready to export and upload.
10. Export to Pluralsight’s video and audio requirements
Pluralsight has a clear set of audio and video requirements that your videos have to comply with.
Similar to Audacity, I have a preset in Screenflow setup for that, which saves a stack of time and potential human error.
I then export the video with that preset, and then walk away and take a break while the video exports.
While my Macbook Pro isn’t that old, I learned the hard way that the 13” have long had somewhat less than stellar hardware, especially compared to the 15" models.
But, you can turn a loss in to a win, and give yourself the time to have a much earned break while the video exports.
11. Upload the video to Pluralsight
With the video exported, I then upload it to my course’s content.
There are a few other things that need to be done, but for the most part, that’s it.
After that, I repeat this process for each video in the module, and then for all of the remaining modules.
And That’s How I Create Online Courses for Pluralsight
Yes, it’s a long and involved process, but it takes less time than you might imagine.
Well, after creating several courses, and refining it along the way, along with building muscle-memory, it’s gotten better over time.
I’d love to be able to say that it’s less involved than this.
Unfortunately, for me, at this stage, it’s not.
Some things just take a decent investment of time and effort to create.
That said, others in the Pluralsight Slack forum have suggested outsourcing some of the work, but I’m not up for that at this stage.
There’s still too much to learn first.
That’s my process for creating online courses, with an emphasis on Pluralsight.
If you’re a course creator, I’d love to know what process you follow, and how you think I can do better.
If you’re considering creating a course, I’d love your feedback too.
Perhaps I could help you with your first course.


Join the discussion
comments powered by Disqus