There are static site generators, such as Hugo, Sculpin, and Jekyll, general-purpose CMS', such as Drupal, Wordpress, and learning management systems, such as Moodle. That said, these are general purpose tools, designed with other purposes in mind.
However, when it comes to platforms that have been specifically designed around the needs of technical writers and technical documentation, there are only two possible choices; these are Antora and Sphinx-Doc (Sphinx).
Sphinx is the older, veteran platform, and Antora is the up and coming competitor. Of the two though, speaking from personal experience, Antora is the better choice.
What is Antora?
Antora is self-described as:
The multi-repository documentation site generator for tech writers who love writing in AsciiDoc.
While relatively new (currently at release 2.3.3), it's already a very competent tool; one I expect makes developers' lives much more comfortable than competing platforms. This is because Antora is:
- Based around the AsciiDoc format, a format far more akin to Markdown. Its syntax is readable, concise, comprehensive, extensible, and, above all, easy to learn.
- Powered by Asciidoctor, which is a fast text processor and dateing toolchain for converting AsciiDoc content to HTML5, DocBook, PDF, and other formats
- Available on all major operating systems (Linux, macOS, and Windows)
- Provides a logical and structured way of organizing technical documentation.
- Enforces a clear and consistent separation of text content and supporting assets (such as images, videos, and code).
- Uses a small set of tools, ones that are commonly available in developer toolsets, such as Node and Git.
- Provides very flexible project navigation.
- Natively links to different documentation versions within the UI
- Developed by people who live and breathe documentation
- Backed by an active community
- Plus so much more!
What Does Antora Generated Documentation Look Like?
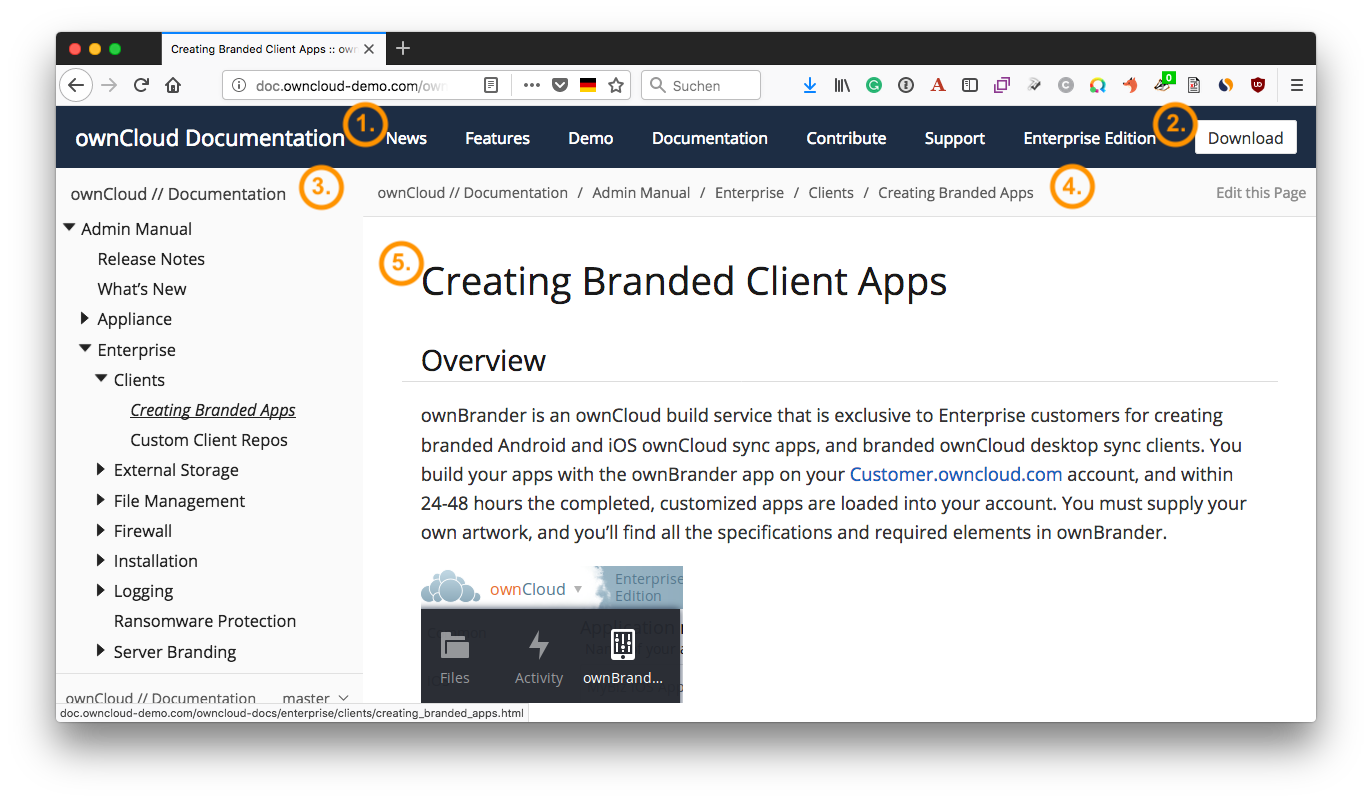
In the screenshot above, you can see an example of what Antora documentation looks like (using a slightly modified default theme). You can see that:
- The standard main navigation is at the top(1).
- The secondary navigation is down the left-hand side(2).
- There is breadcrumb navigation above the main content(3).
- The main content is in a large pane on the right(4).
While not revolutionary, the layout uses well-recognized and understood navigation conventions. However, it has a rich navigational feature. Notice the link right at the bottom(5). If you click it, it opens up a sub-navigation menu.
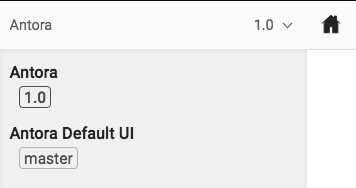
This is an excellent, time-saving feature that allows for direct navigation between different documentation versions (git branches). In the current documentation, an extra page exists to link to the various versions of the documentation, such as for version 8.2, 9.x, and 10.x..
However, by taking advantage of this feature in Antora, that's not necessary, thanks to this innovative feature. I expect that it makes users lives so much easier, as they'll be able to navigate quickly to the version of the documentation that matches their ownCloud installation.
What is AsciiDoc?
Use AsciiDoc for document markup. Really. It’s actually readable by humans, easier to parse and way more flexible than XML. - Linus Torvalds.
To quote the AsciiDoc Syntax Quick Reference Guide (which you should bookmark!):
AsciiDoc is a lightweight markup language for authoring notes, articles, documentation, books, web pages, slide decks and man pages in plain text. This guide is a quick reference for the common AsciiDoc document and text formatting markup.
If you look through the guide, you'll see that it's a file format which is quite similar in appearance to Markdown, supporting paragraphs, formatted text, headers, sections, section titles, lists, links, images, code, and tables.
However, that's where the similarities end. AsciiDoc, being specifically designed for technical documentation, supports an extensive range of additional functionality, including:
- Admonitions
- Attributes and Substitutions
- Bibliographies
- Complex tables (which support line highlighting, code blocks, headers, and CSV and DSV source data)
- Footnotes
- Include files
- List continuation
- Complex list content
- Native tables of content
- Text Replacement
- UI Macros
What's more, the format is consistent and predictable, as it has a definitive standard. This is in stark contrast to Markdown, which has a series of (often competing) standards, such as GitHub Flavoured Markdown, and Daring Fireball.
AsciiDoc is a robust, text-based file format, which you can use to create even the most sophisticated technical documentation, able to be exported to a range of modern file formats. Have a look through the quick reference guide, and the rest of the official AsciiDoc documentation to learn more.
# Hello, AsciiDoc!
Doc Writer <doc@example.com>

An introduction to http://asciidoc.org[AsciiDoc].

## First Section

-   item 1
-   item 2
DocBook is nice, but (like XML) it is not meant for editing nor for merging changes (by humans). Using AsciiDoc (which translates to DocBook perfectly) is a much easier way of developing. - Dag Wieers.
How Do You Write & Edit AsciiDoc Files?
To write AsciiDoc, you only need three things; these are:
- A text editor with AsciiDoc syntax support available.
- An AsciiDoc previewer.
- The AsciiDoc documentation
Let's step through each one.
A Text Editor With AsciiDoc Syntax Support Available
Just like writing in any other format or computer language, you're going to need a text editor or an IDE. And as you're a developer, you'll already have one, and it likely supports AsciiDoc already. If not there should be a plugin available for it. Here are some of the text editors and IDEs that we recommend.
VIM
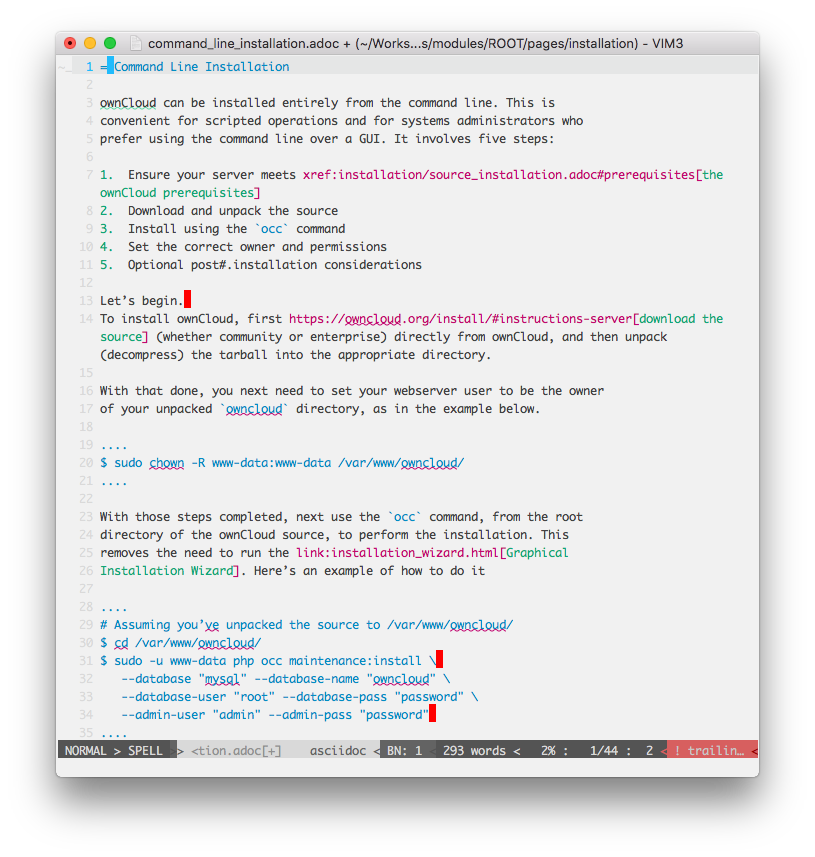
If you're using VIM (or VI), there are two plugins that you can make use of; these are dahu/vim-asciidoc, and matcatc/vim-asciidoc-folding. vim-asciidoc provides enhanced editing support for Asciidoc files. vim-asciidoc-folding allows vim to enable folding asciidoc files.
Alternatively, if you want both of these, plus some extra setup ready to go, you can use the Vim for Technical Writers repository.
The repository has a .vimrc file that installs both plugins, enabling them only when editing Asciidoc files.
SublimeText
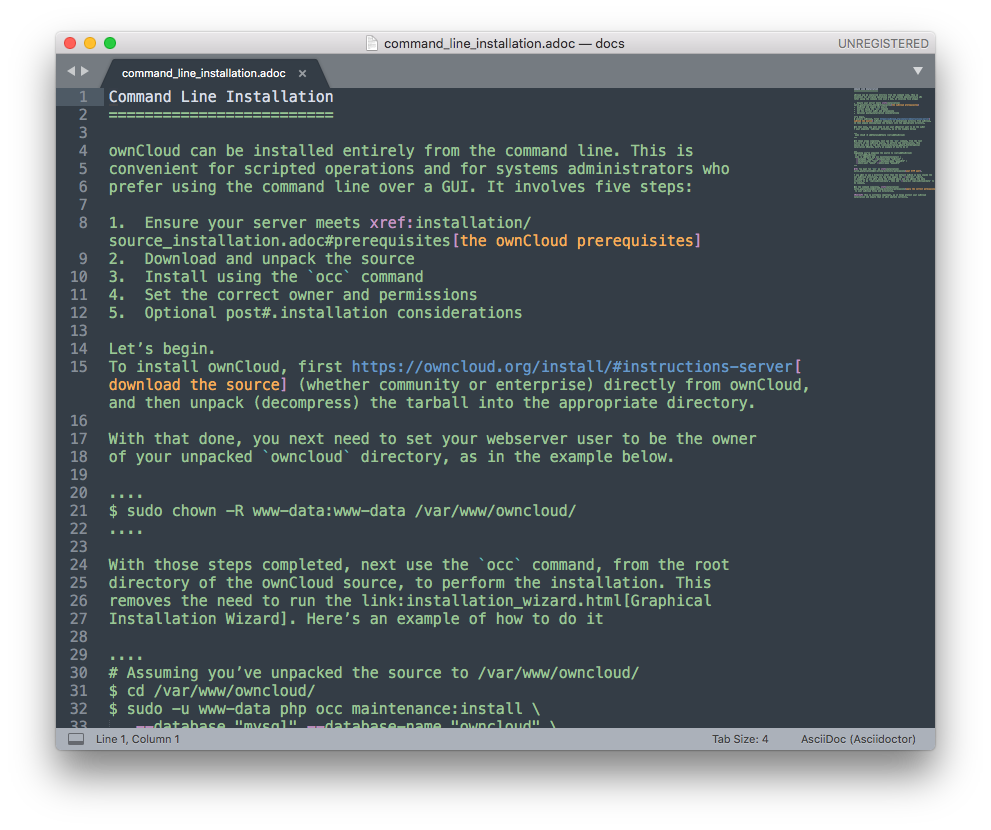
SublimeText doesn't come with native support for AsciiDoc, but you can install the AsciiDoc package which provides it. Once you do that, you'll have a range of AsciiDoc editing functionality available, including:
- Snippets
- Syntax Highlighting
- Keymaps
- Attribute completion
- Display document and section titles in the local symbol list
Atom
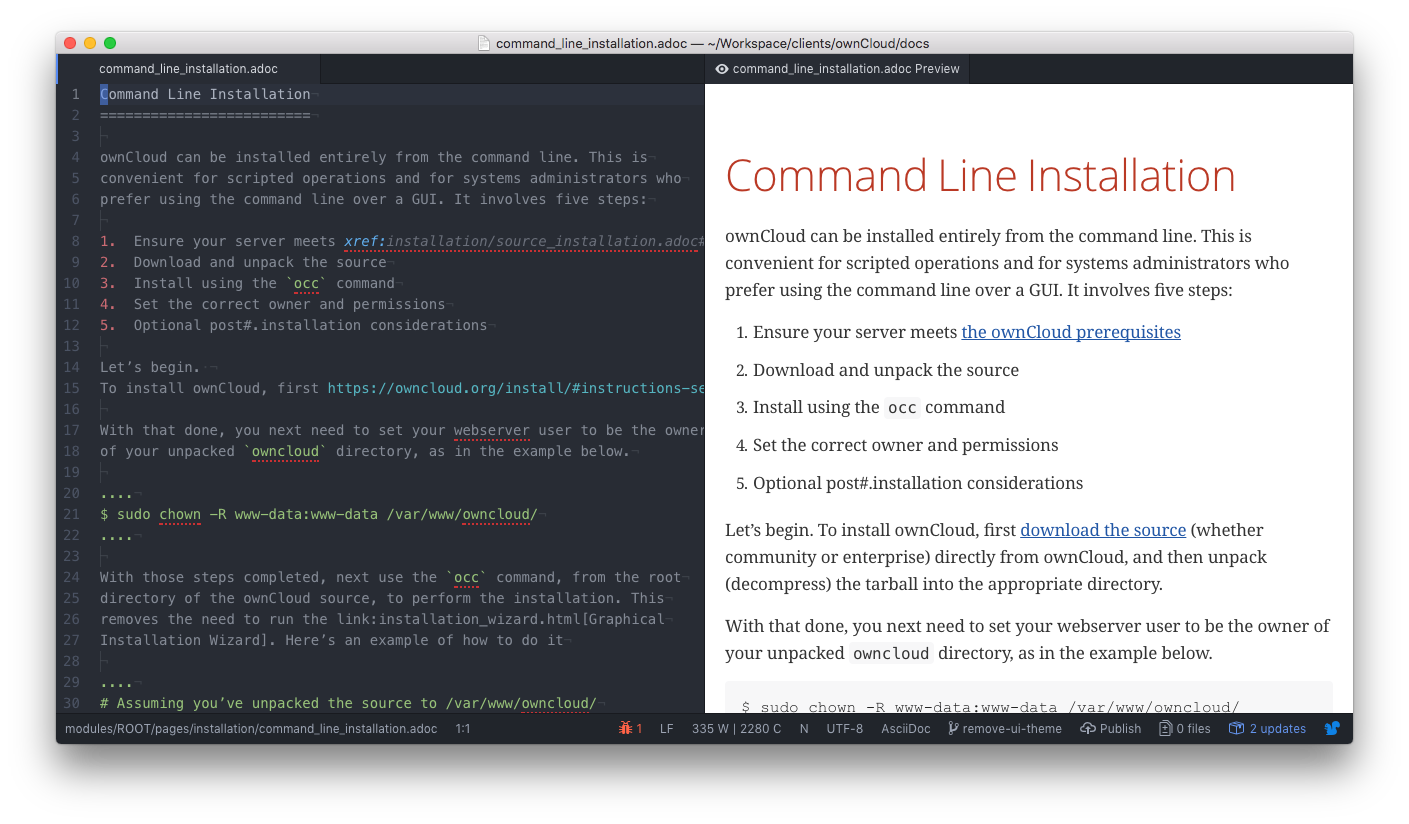
In recent months, Atom's been gaining significant traction. Written primarily by the team at GitHub and supported by a massive community around the world, and packed with a wide range of features out of the box, it's easy to see why.
If it's your text editor of choice, install the asciidoc-assistant package. This package is a meta-package that takes care of installing a range of plugins, which to give you full AsciiDoc support.
These are:
- language-asciidoc This package adds syntax highlighting and snippets to AsciiDoc files.
- asciidoc-image-helper This package facilitates insertion of images in an AsciiDoc document.
- asciidoc-preview This package allows Atom to show the rendered HTML of the AsciiDoc content in the current editor.
- autocomplete-asciidoc This package provides AsciiDoc language auto-completions in Atom.
Visual Studio Code
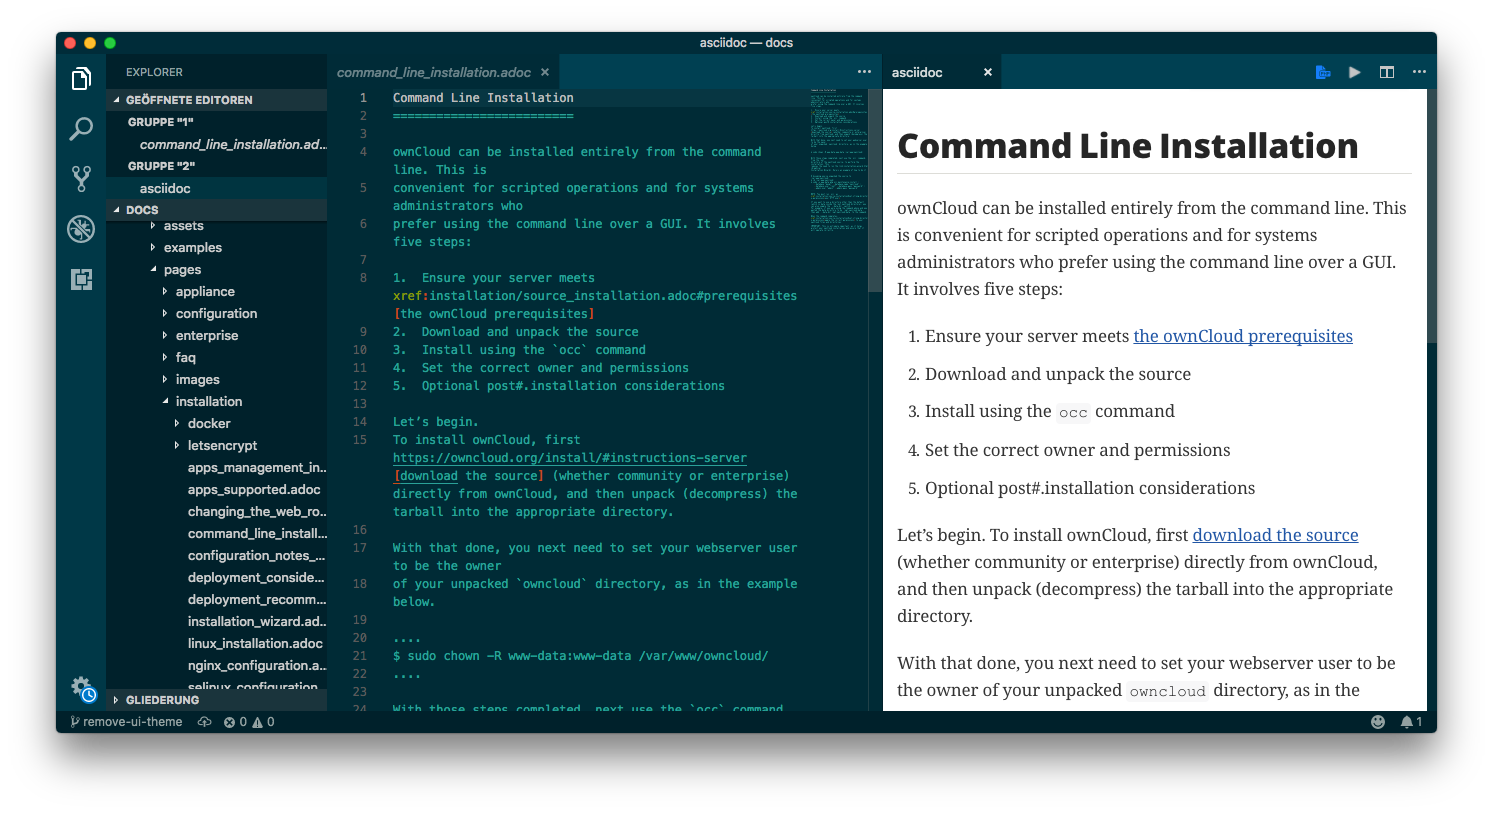
If you're on the Microsoft Windows platform or love the Visual Studio environment — and in particular the new VS Code editor/IDE — then you'll be happy to know that it supports AsciiDoc as well. If you install the AsciiDoc plugin, then you'll get some basic functionality, including:
- Live preview.
- Syntax highlighting.
- Open Preview to the Side.
- View Symbols and Go to Symbol actions.
IntelliJ IDEA
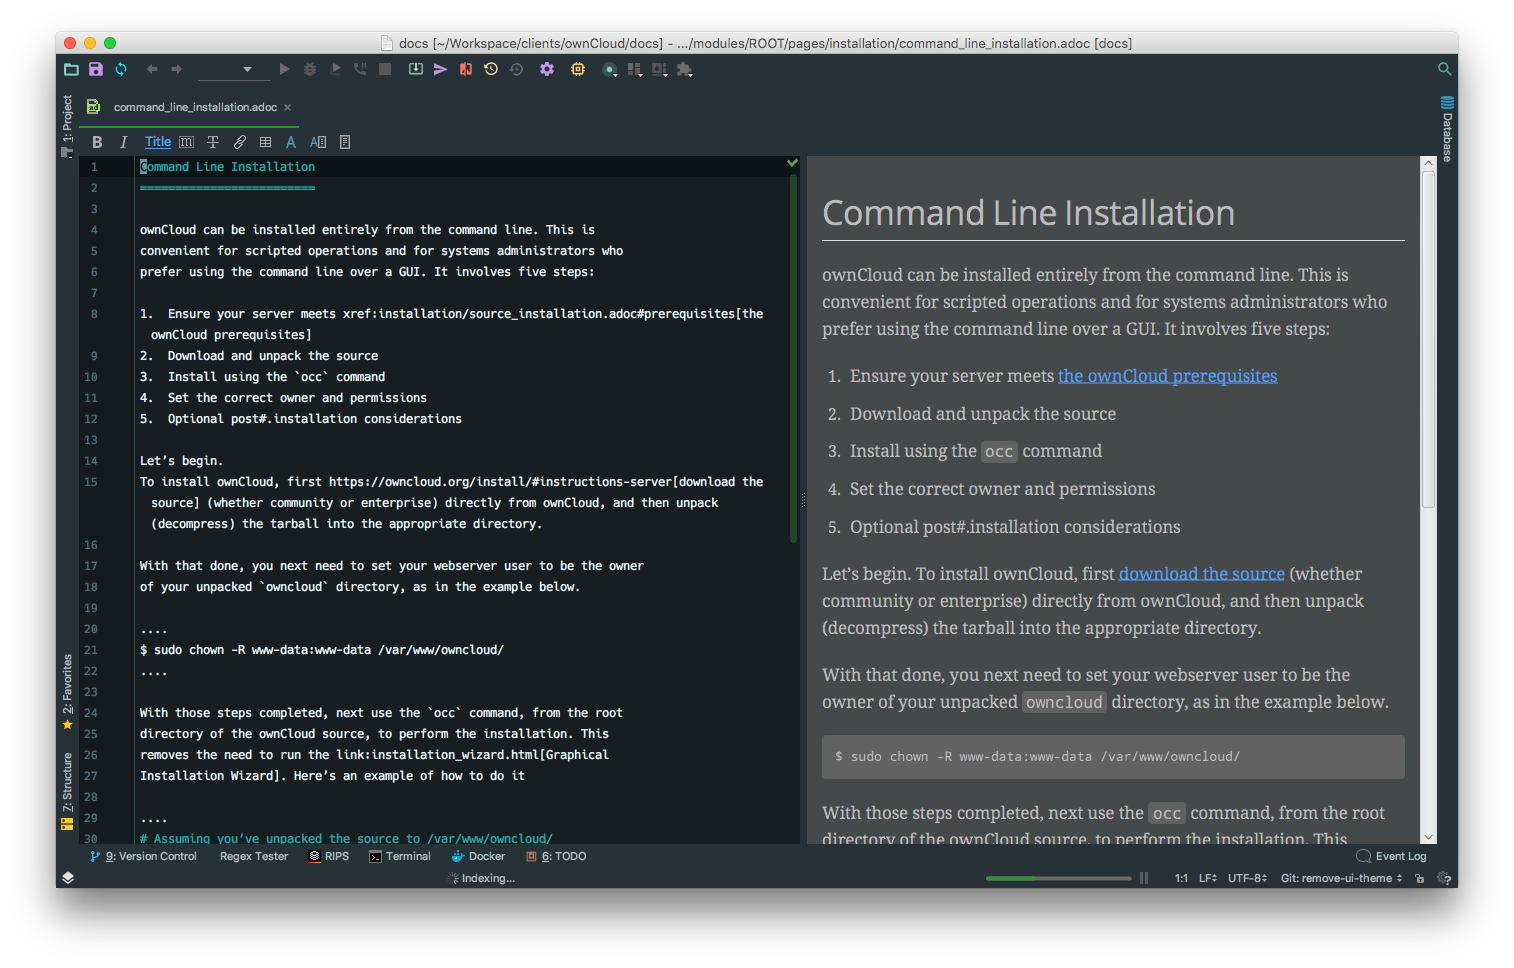
If you're a fan of IDEs over text editors, in particular, the JetBrains IntelliJ platform, then make sure you install the AsciiDoc plugin, available, from the JetBrains repository.
It provides a minimal set of functionality when editing AsciiDoc files, which includes:
- Live Preview (show editor and preview, the editor only, and preview only).
- Basic formatting toolbar (bold, italics, mono-spaced).
- Code folding.
- Syntax highlighting.
- Convert non-AsciiDoc files to AsciiDoc.
Another Text Editor or IDE
If you're not already using one of these text editors of IDEs, don't feel the need to change to them, just because they're what we recommend. It's possible that your existing text editor or IDE already has an AsciiDoc plugin. And it makes far more sense to continue using what you already know, instead of learning an entirely new tool.
An AsciiDoc Previewer
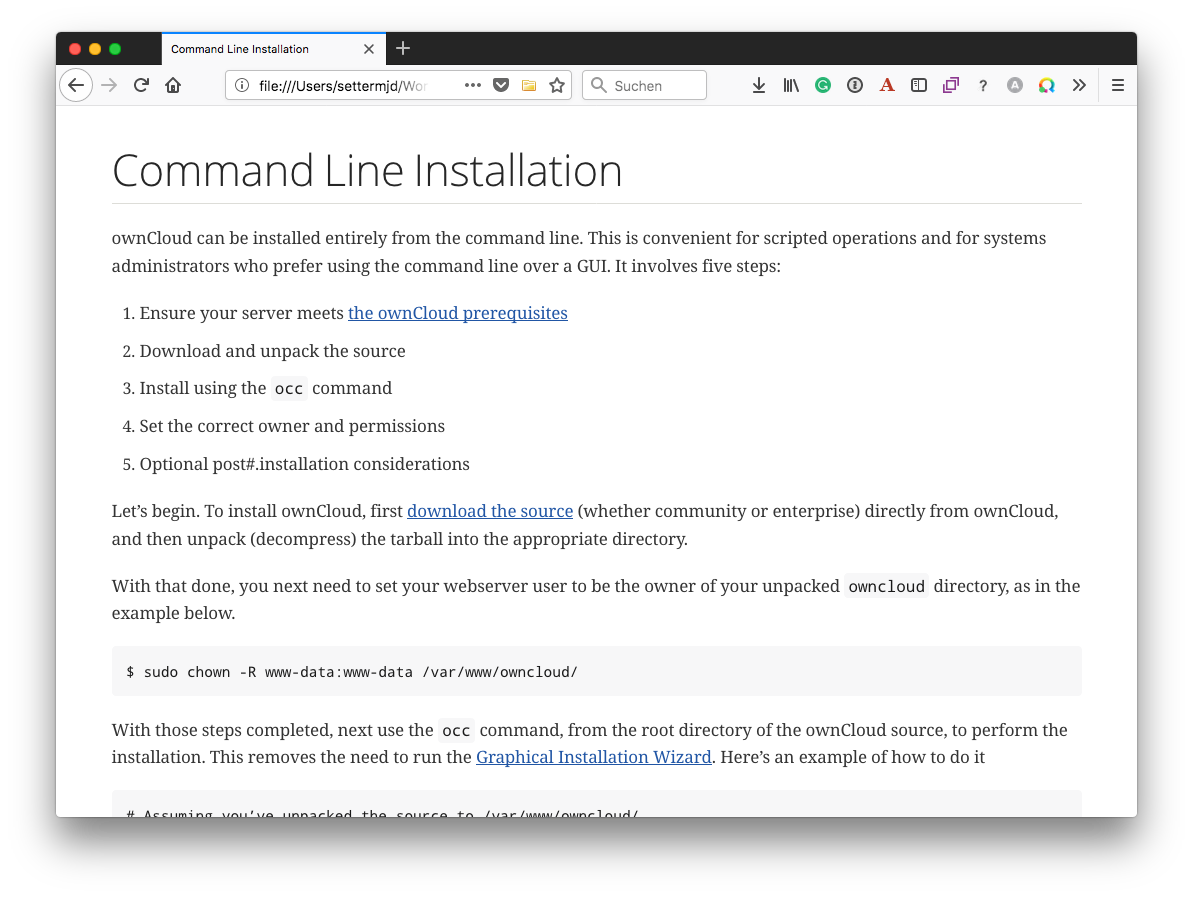
Once your text editor or IDE is ready to work with AsciiDoc then, assuming it doesn't already support previewing AsciiDoc, you'll need a way to preview the changes you're making to ensure that they render as you expect.
For that, assuming that you're using one of Google Chrome, Mozilla Firefox, or Opera, you need to install the AsciiDoc Live Preview plugin. When installed, enable the AsciiDoc Live Preview plugin, and you will see AsciiDoc files rendered as HTML in the browser.
The AsciiDoc Documentation
As with anything of a technical nature, you need documentation, because there's going to come a time that you will need to refer to it. So too with AsciiDoc. Here are a set of links to documentation that you can bookmark and use on a regular basis:
- The AsciiDoc Syntax Quick Reference Guide
- Powerman's AsciiDoc Cheatsheet
- The AsciiDoc Markup Syntax Summary
How Do You Install Antora?
Installing Antora on your local development (virtual) machine doesn't take too much time, based on whether you install the tools directly, or use the official Antora Docker container.
Please note: if you want to make text changes, then installing the AsciiDoc Live Preview Plugin, whether as a Browser plugin or as part of your text editor or IDE, may be sufficient for your needs.
Use The Docker Container
If you're looking for the most straightforward path to making Antora available, so that you can build the documentation and preview the documentation locally then, assuming that you have Docker already installed, run the following two commands.
# Install the Antora Docker container in your local Docker registry.
docker pull antora/antora

# Install NPM's serve command, which is an easy way of serving static content.
yarn global add serve
After the commands finishes executing, you're ready to build the documentation. You can find out more about Serve in the official NPM documentation.
Install The Antora Tools Locally
To install all the Antora tools on your local machine will take a little bit of time and effort. Before you get started, make sure that your development machine is one of the supported hardware platforms.
After that, install the system requirements for your platform, whether that's Linux, macOS, or Microsoft Windows. These include the base build tools, Node 8, and NVM. With that done, you're now ready to install Antora's two command-line tools; these are the Antora CLI and the default Antora site generator.
To install the Antora CLI, run the command: npm i -g @antora/cli.
You can then test that it's installed by running the command: antora -v.
To install the default Antora site generator, run the command: npm i -g @antora/site-generator-default.
This command installs it globally.
If you want to install it locally, remove the -g switch.
With the dependencies and Antora tools installed, you're ready to build the documentation locally.
How Do You Build the Docs?
Let's assume you've made a change to some aspect of documentation, whether large or small, and you want to rebuild the docs and preview the changes. There are two ways to doing so, depending on how you installed Antora.
Using the Docker Container
From the command line, in the root of the docs directory, run the command:
docker run -v $PWD:/antora:Z \
    --rm -t antora/antora \
    antora-playbook.yml
This command starts up the Antora Docker container, removes the existing documentation, and then runs Antora's generate command, and regenerates the documentation. If all goes well, you will not see any console output.
Running Antora From The Command-Line
From the command line, in the root of the docs directory, run the command:
antora antora-playbook.yml
If all goes well, you will not see any console output.
Viewing Build Errors
If an aspect of your change contains invalid AsciiDoc, then you'll see output similar to the example below.
asciidoctor: ERROR: index.adoc: line 25: only book doctypes can contain level 0 sections
There, you can see:
- That an error was found
- The file it was found in
- The line of that file where it is located
How Do You View Generated Documentation?
Assuming that there are no errors, the next thing to do is to run the NPM Serve tool so that you can view your changes, before committing and pushing the changes to the remote docs repository. We suggest using it, as it's trivial to install and start. You could also use PHP's built-in web server as well. By using either of these, you don't have to install and configure a complete web server, such as Apache or NGINX.
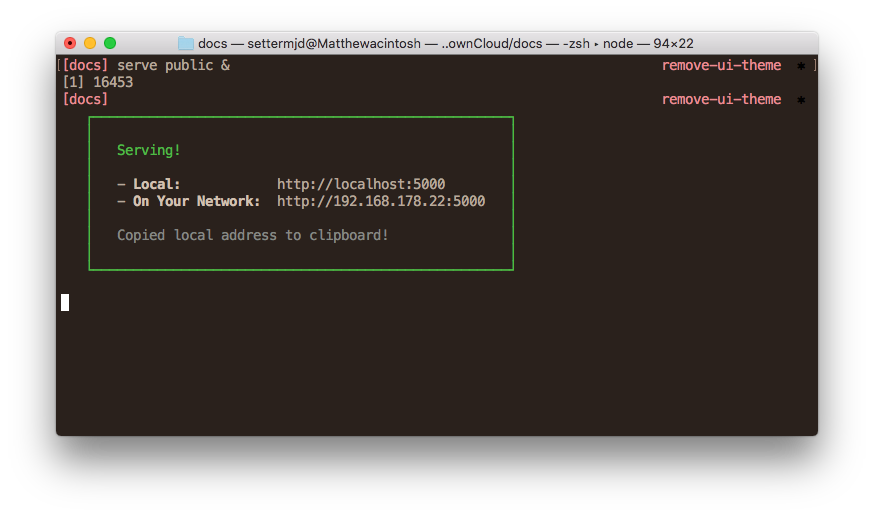
To start Serve, run the following command:
serve public &
This starts Serve and set it running in the background, using the public directory, (re)generated by antora antora-playbook.yml, as the document root, listening on http://localhost:5000.
The URL is automatically copied to the clipboard.
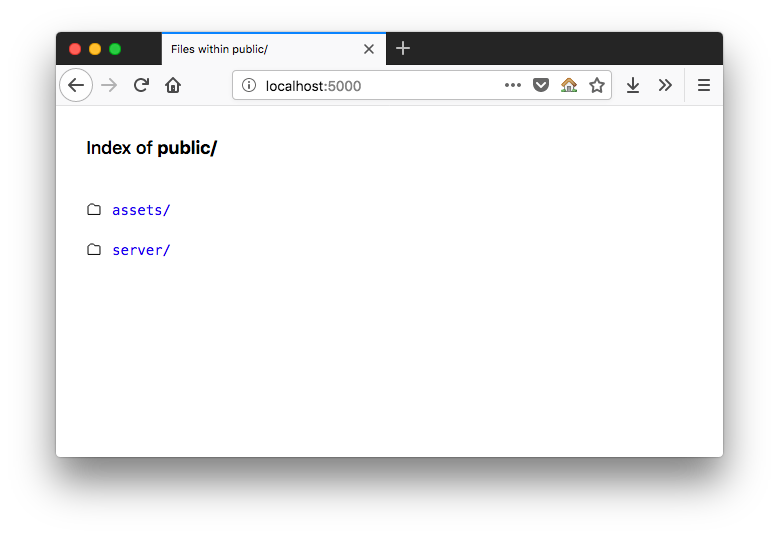
Open the URL in your browser of choice, and you'll see two links, as below.
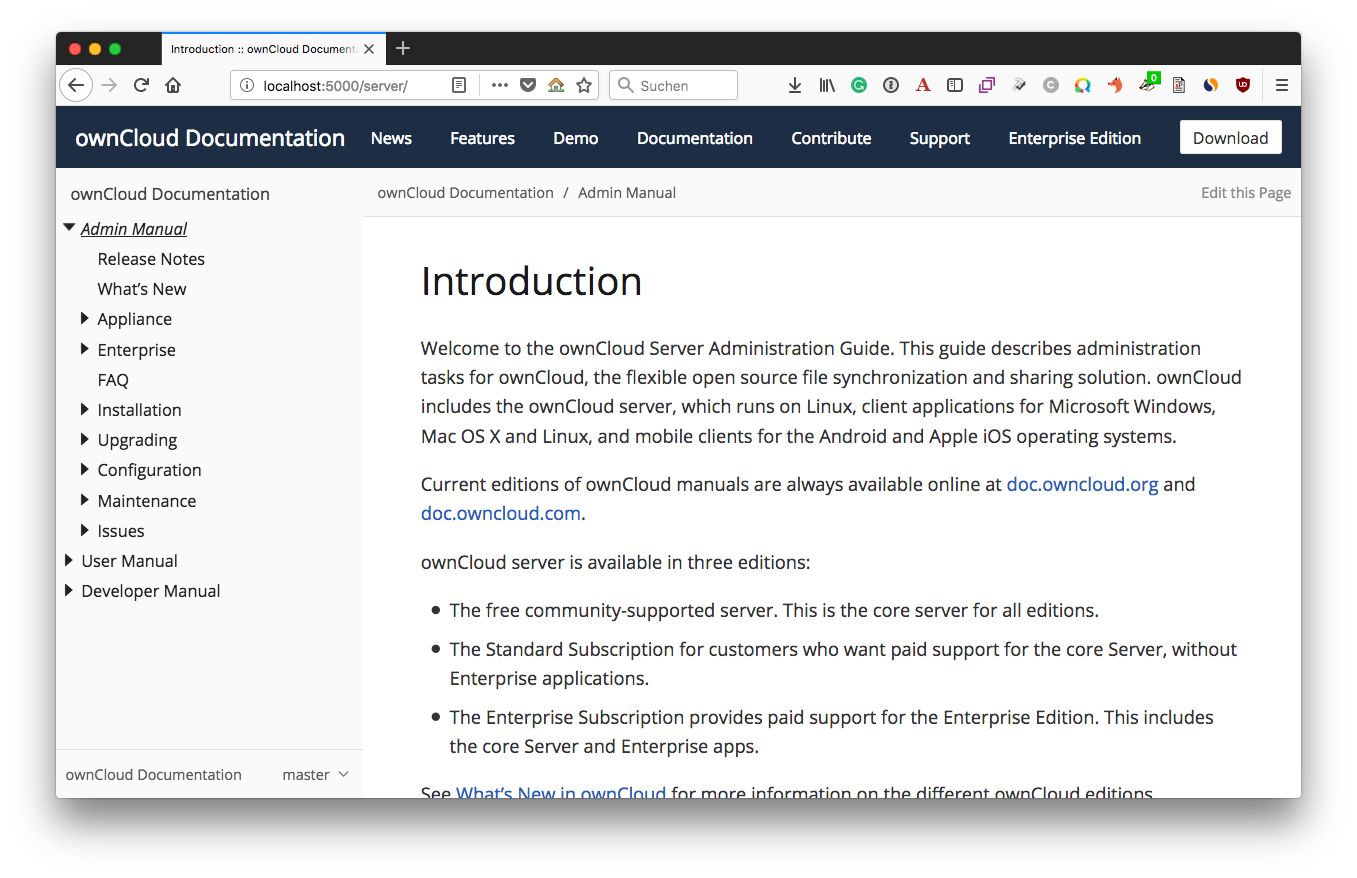
Click "server/", and you'll see the local copy of the documentation.
If you're happy with your changes, as with any other change, create a set of meaningful commits and push them to the remote repository.
If you're not satisfied with the changes, however, continue to make further updates, as necessary, and run antora antora-playbook.yml afterward.
Your changes will be reflected in the local version of the site that Serve is rendering.
We hope that you can see that contributing to the documentation using Antora is a pretty straight-forward process, and not that demanding.
In Conclusion
If you need to create and maintain technical documentation, Antora, while still young, is the solution with the lowest barrier to entry, the most straightforward file structure, and the most flexible and well-designed underlying file format.
Yes, you could use alternatives, such as static site generators, general-purpose CMS', and knowledge management systems. However, these are general purpose tools, designed with other purposes in mind.
In my opinion, there are only two platforms that have been specifically designed around the needs of technical writers and technical documentation. And of those two Antora is the best.
What’s your opinion? Do you love a different platform?
 Are you tired of hearing how "simple" it is to deploy apps with Docker Compose, because your experience is more one of frustration? Have you read countless blog posts and forum threads that promised to teach you how to deploy apps with Docker Compose, only for one or more essential steps to be missing, outdated, or broken?