 Are you tired of hearing how "simple" it is to deploy apps with Docker Compose, because your experience is more one of frustration? Have you read countless blog posts and forum threads that promised to teach you how to deploy apps with Docker Compose, only for one or more essential steps to be missing, outdated, or broken?
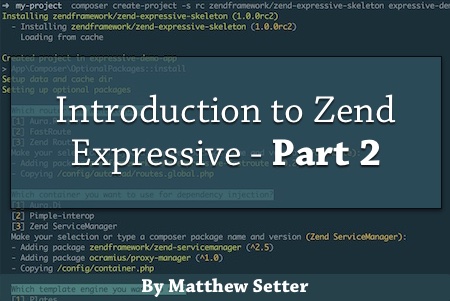
In part one of this series we had an introduction to what Zend Expressive is, looking at:
- How it’s composed
- The core package choices
- The directory structure
We finished up by seeing how to create a basic application using it, based on the Zend Expressive skeleton project.
Here in part two of the series, I’m going to take you through how to add both Zend\Db and Zend\Cache support, so that you can start to build a more meaningful application.
Adding Cache Support
Let’s start off by adding cache support to the application. Specifically, we’re going to make use of Zend\Cache\Service\StorageCacheAbstractServiceFactory to do most of the legwork for us. If you’re not familiar with it I discussed it in a previous post. Definitely check that one out if you’re not sure with how it works.
But to quickly recap the post, it sets up support for two caches, which use the keys Cache\Transient and Cache\Persistent. Cache\Transient is intended to connect to a faster, yet potentially volatile, remote or local caching server. Cache\Persistent is intended to be used for a slower, yet less volatile, cache, such as the local filesystem.
Using this abstract factory to setup our caching configuration provides both speed and reliability. We’re going to use Redis as the transient cache and a local directory on the file system for the persistent one.
If you’d like to get a quick start with Redis, check out this excellent intro post, by Karl Seguin.
Setting it up only requires the addition of a new configuration file. So under config/autoload, add a new file called cache.global.php. In there, add the following configuration:
$caches = ['caches' => []];

$caches['caches']['Cache\Persistence'] = [
    'adapter' => 'filesystem',
    'ttl' => 86400,
    'options' => [
        'cache_dir' => __DIR__ . '/../../data/cache/'
    ]
];

if (extension_loaded('redis')) {
    $caches['caches']['Cache\Transient'] = [
        'adapter' => 'redis',
        'ttl' => 60,
        'plugins' => [
            'exception_handler' => [
                'throw_exceptions' => true,
            ],
        ],
        'options' => [
            'server' => [
                'host' => '127.0.0.1',
                'port' => '6379',
            ],
        ]
    ];
}

return $caches;
What this does is add a new key in to the global configuration called caches, which we’ll access later. It’s expecting to be able to connect to a Redis server running on 127.0.0.1, on the standard port of 6379, and to store cache files in /data/cache, which is available by default with the Zend Expressive skeleton project setup.
Please note that I’ve wrapped the configuration in an if/else block checking that the Redis extension is loaded, before returning the configuration to use it. I did this as Redis isn’t a standard extension.
Now we need to add the ServiceManager, or dependency, configuration. To do that, open up config/autoload/dependencies.global.php and add in the following to the dependencies element of the returned array:
'abstract_factories' => [
    Zend\Cache\Service\StorageCacheAbstractServiceFactory::class
]
Adding Database Support
With that done, we’re ready to move on to configuring database support. It really doesn’t matter what database you use, so long as it’s supported by PDO and that you have the relevant PDO driver loaded in your PHP installation.
For this example, I’ve chosen to use PostgreSQL, as I’ve been spending time recently improving my knowledge of it. Feel free to change the configuration for your database of choice.
The first step, as with caching configuration, is to add a configuration file. So under config/autoload/ add a new file, called database.global.php. In there, add the following configuration:
return [
    'db' => [
        'driver'   => 'Pdo',
        'dsn'      => 'pgsql:host=localhost;port=5432;',
        'database' => 'your-database-name',
        'user'     => 'your-username',
        'password' => 'your-password'
    ],
];
This is a standard configuration you’d likely recognize from Zend Framework 2 projects. It uses the PDO PostgreSQL driver, connecting to a PostgreSQL database on localhost, listening on port 5432.
If you’d like to know more about the DSN settings for PostgreSQL, or any other database supported by PDO, check out the PHP manual.
Remember, you can split your configuration up over a global and local configuration. I’ve chosen to keep it all in the global configuration purely for the sakes of simplicity.
Now we need to configure the ServiceManager. Similar to configuring it for cache support, we need only add one addition to the factories element of the dependencies array returned from the configuration in config/autoload/dependencies.global.php.
So, open up the file, and add Zend\Db\Adapter\Adapter::class => Zend\Db\Adapter\AdapterServiceFactory::class to your existing configuration.
Afterward, your configuration should look, at least, like the following snippet.
$config = [
    'dependencies' => [
        'factories' => [
            Zend\Db\Adapter\Adapter::class => Zend\Db\Adapter\AdapterServiceFactory::class,
        ],
    ],
];
Retrieving the Cache and Database Objects
Let’s start off with the cache. To do so, in any class which has access to the container, such as /src/Action/HomePageFactory.php, you can access the two caches by their key name in the caches array. Specifically, here’s how:
// Transient (Redis) cache
$cache = $container->get('Cache\Transient');

// Persistent (Filesystem) cache
$cache = $container->get('Cache\Persisten);
To access the database, as you’d expect, is quite similar. This time, you’d retrieve the instantiated adapter using the following code:
$adapter = $container->get('Zend\Db\Adapter\Adapter');
Over to You
And that’s it for the series. I hope you got a lot out of it. Judging by the flurry of activity which followed the publishing of the first part, I think it’s definitely resonated. If you’re keen to see more, tweet me - @zfmastery.
Are you already using Zend-Expressive for your projects? What’s your experience with it? Share your thoughts in the comments and let’s have a hearty conversation about it.